Through my involvement in the local Tesla Owners Club, one topic that continues to come up is vehicle data logging. If you perform a quick google search you will see that there are many Tesla-compatible data logging tools out there with the most popular being Teslascope, TeslaFi, TezLab, and the Stats App just to name a few. This blog post will focus on Teslascope not only because it is one of the more popular Tesla data logging solutions out there (10,000+ daily active users), but because they are the leader when it comes to constant feature updates and involvement with the broader Tesla community.
This blog post is split up into the following sections:
- Why data logging?
- What is Teslascope?
- How do I setup Teslascope?
- Power User Functionality
- Closing Thoughts
Why data logging?
Upon accepting delivery of my first Tesla Model 3 Performance back in November of 2018 I quickly became fascinated with the many hardware & software systems that allowed the vehicle to function. I wanted to know everything about my car including how it would react to the various weather conditions that we are exposed to every year here in Minnesota. As a result, I drafted up a list of solution requirements (see below) and began my search for the best data logging tool:
- Charge session monitoring
- Drive session monitoring
- Battery Degradation monitoring
- Tracking of Software Updates
- True Sleep Support – This means that the solution would not prevent the car from performing normal functions such as sleeping when not in use. The solution should also appropriately recognize when the car is no longer asleep and quickly resume data logging services.
- Centralized / Hosted Architecture – I am personally not a fan of mobile device-based data logging solutions due to unreliable connectivity, frequent device reboots, etc.
- Security – This is extremely important since I am essentially trusting the solution with the keys to my vehicle. It is imperative that the solution is supported by comprehensive privacy & security policies. These policies should outline how sensitive user information (such as access & refresh tokens) is handled, how the solution conforms to industry-standard security best practices, and how regular security audits are performed ensuring the solution remains secure.
After a bit of research I initially chose TeslaFi as it seemed to meet all of the aforementioned requirements. I continued to leverage TeslaFi for my data logging needs for a few years until I discovered Teslascope in 2020. After watching Teslascope quickly outpace TeslaFi in terms of community involvement & feature updates, I decided to make the switch!
What exactly is Teslascope?
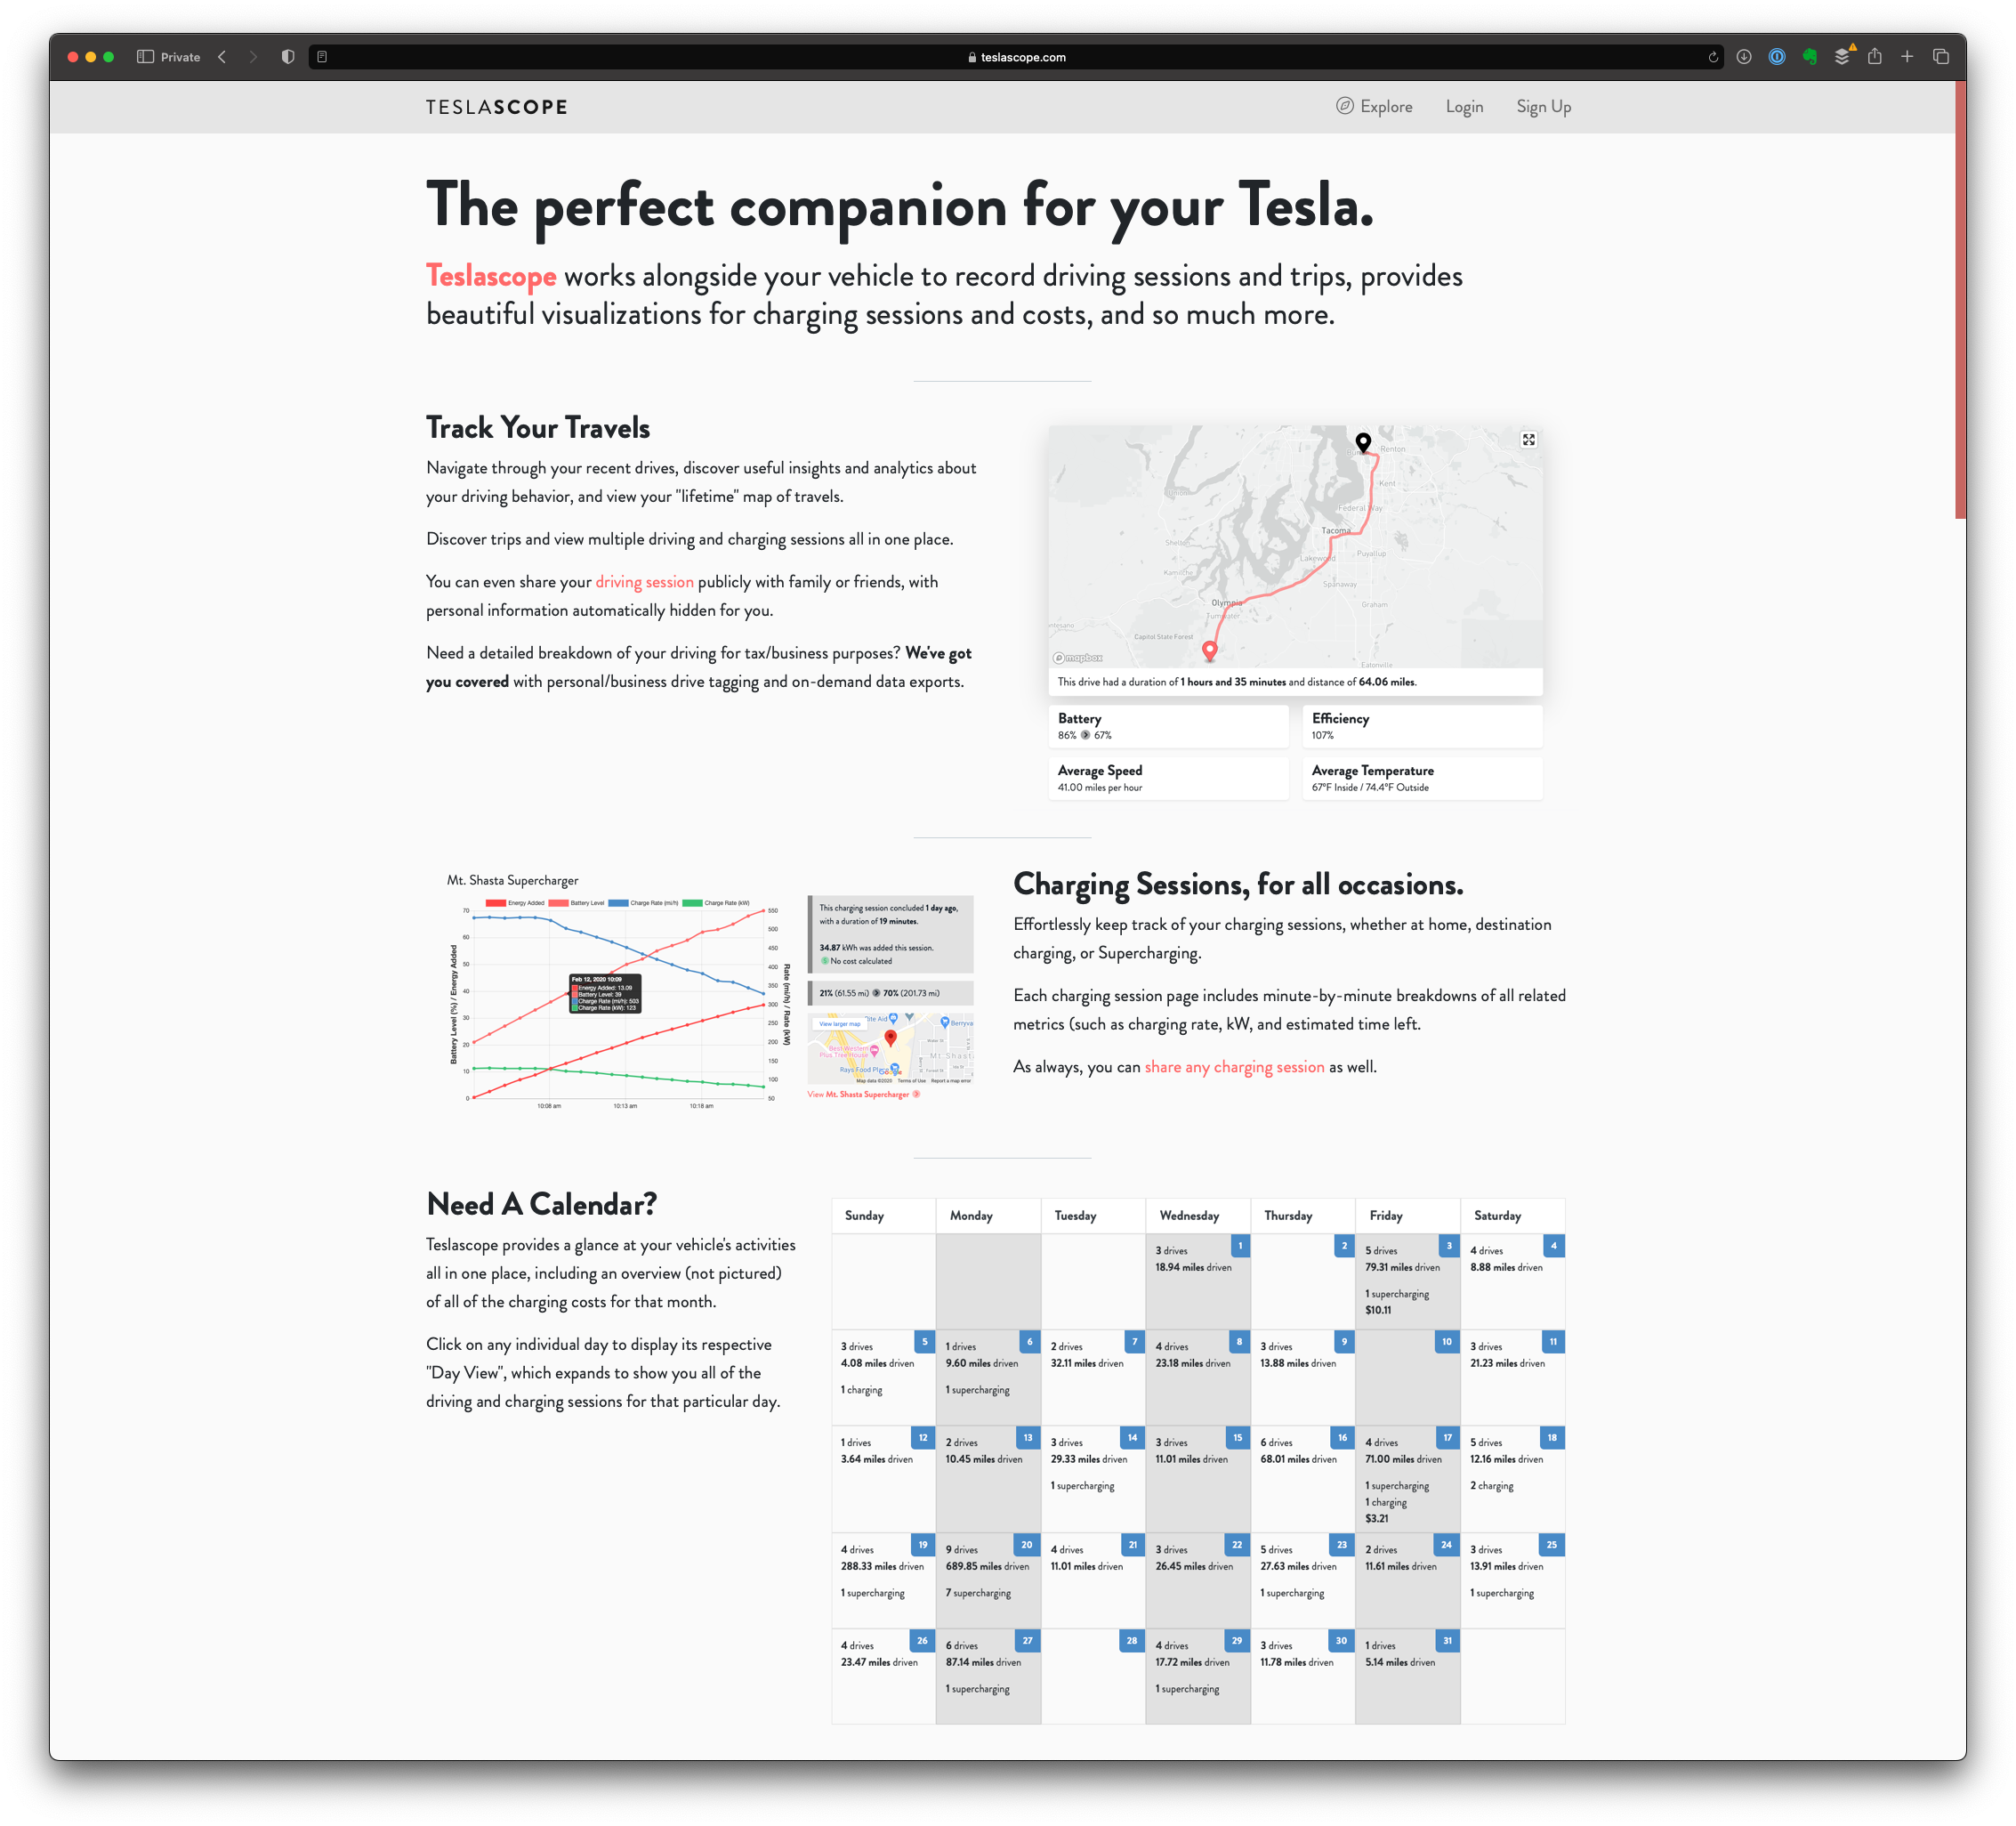
Teslascope is a hosted data logging service that allows Tesla owners to monitor every aspect of their vehicles. Teslascope offers a free tier that comes with many basic features as well as a premium tier that includes support for advanced features like comprehensive data import capabilities form platforms likes TeslaFi.com. According to Teslascope’s website, they currently offer the following functionality:
- Charge tracking – This includes data points such as charge time, charge cost, amps, volts, power, etc.
- Drive tracking – This includes data points such as starting address, ending address, overall vehicle efficiency in terms of watt hours per kilometer or mile (wh/km or wh/mi), inside & outside temperatures, wind speed, HVAC settings, etc.
- Locations – Teslascope offers the ability to tag commonly visited locations such as Home, Work, etc. This functionality allows you to do powerful things like calculate how much energy you consume when charging at home.
- Calendar View – As the name implies you can review all vehicle activity through a calendar view. This feature is helpful for reviewing charge stops on a road trip or if you want to see vehicle activity on a given calendar day.
- Temperature Efficiency – Teslascope allows you to measure vehicle efficiency across various temperature ranges allowing you to accurately plan road trips in even the most extreme conditions.
- Security – Teslascope does not store your Tesla.com credentials and instead ephemerally leverages access & refresh tokens to access your vehicle data. f you have any further questions or concerns regarding the security of Teslascope.com please refer to the following link:
- Vehicle Automation – Thanks to the Teslascope iOS shortcuts, you can easily execute & schedule vehicle commands such as turning on the HVAC, setting the charge limit, unlocking the doors, etc on a given schedule. This also allows you to easily execute Tesla vehicle commands using “Hey Siri” on any of your Apple devices.
- Data Importing - Integrated import functionality that allows you to import previous vehicle data from TeslaFi.com
- On-Demand Data Exporting - Expand upon basic drive and charging session summaries with fully detailed data exports in .CSV format.
- Software Updates – This feature allows you to track the latest Tesla software updates as they are rolled out to the fleet. With each detected update, you are able to see which release the owners are coming from, their vehicle model, configuration and country location.
- (Vehicle) Updates – Track when your vehicle receives each software update and see how long you remained on each specific version.
- Reminders + Maintenance – Allows you to log all maintenance activities and set service reminders based on Topic, Mileage, and any additional notes you’d like to add.
- Advanced Climate Controls - Set up specific times to begin cooling/heating your vehicle, control your seat heaters, and much more.
A free trial period of 14 days is offered however you can extend that to 30 days if you use a referral link when signing up. Once the trial period expires, your account will be downgraded to a Regular account unless you opt to pay the Premium membership fee which is $3 USD per month or $30 per year, depending on the selected term.

How do I setup Teslascope?
Follow the detailed steps below which will result in the setup & configuration of your Teslascope account.
Account Creation
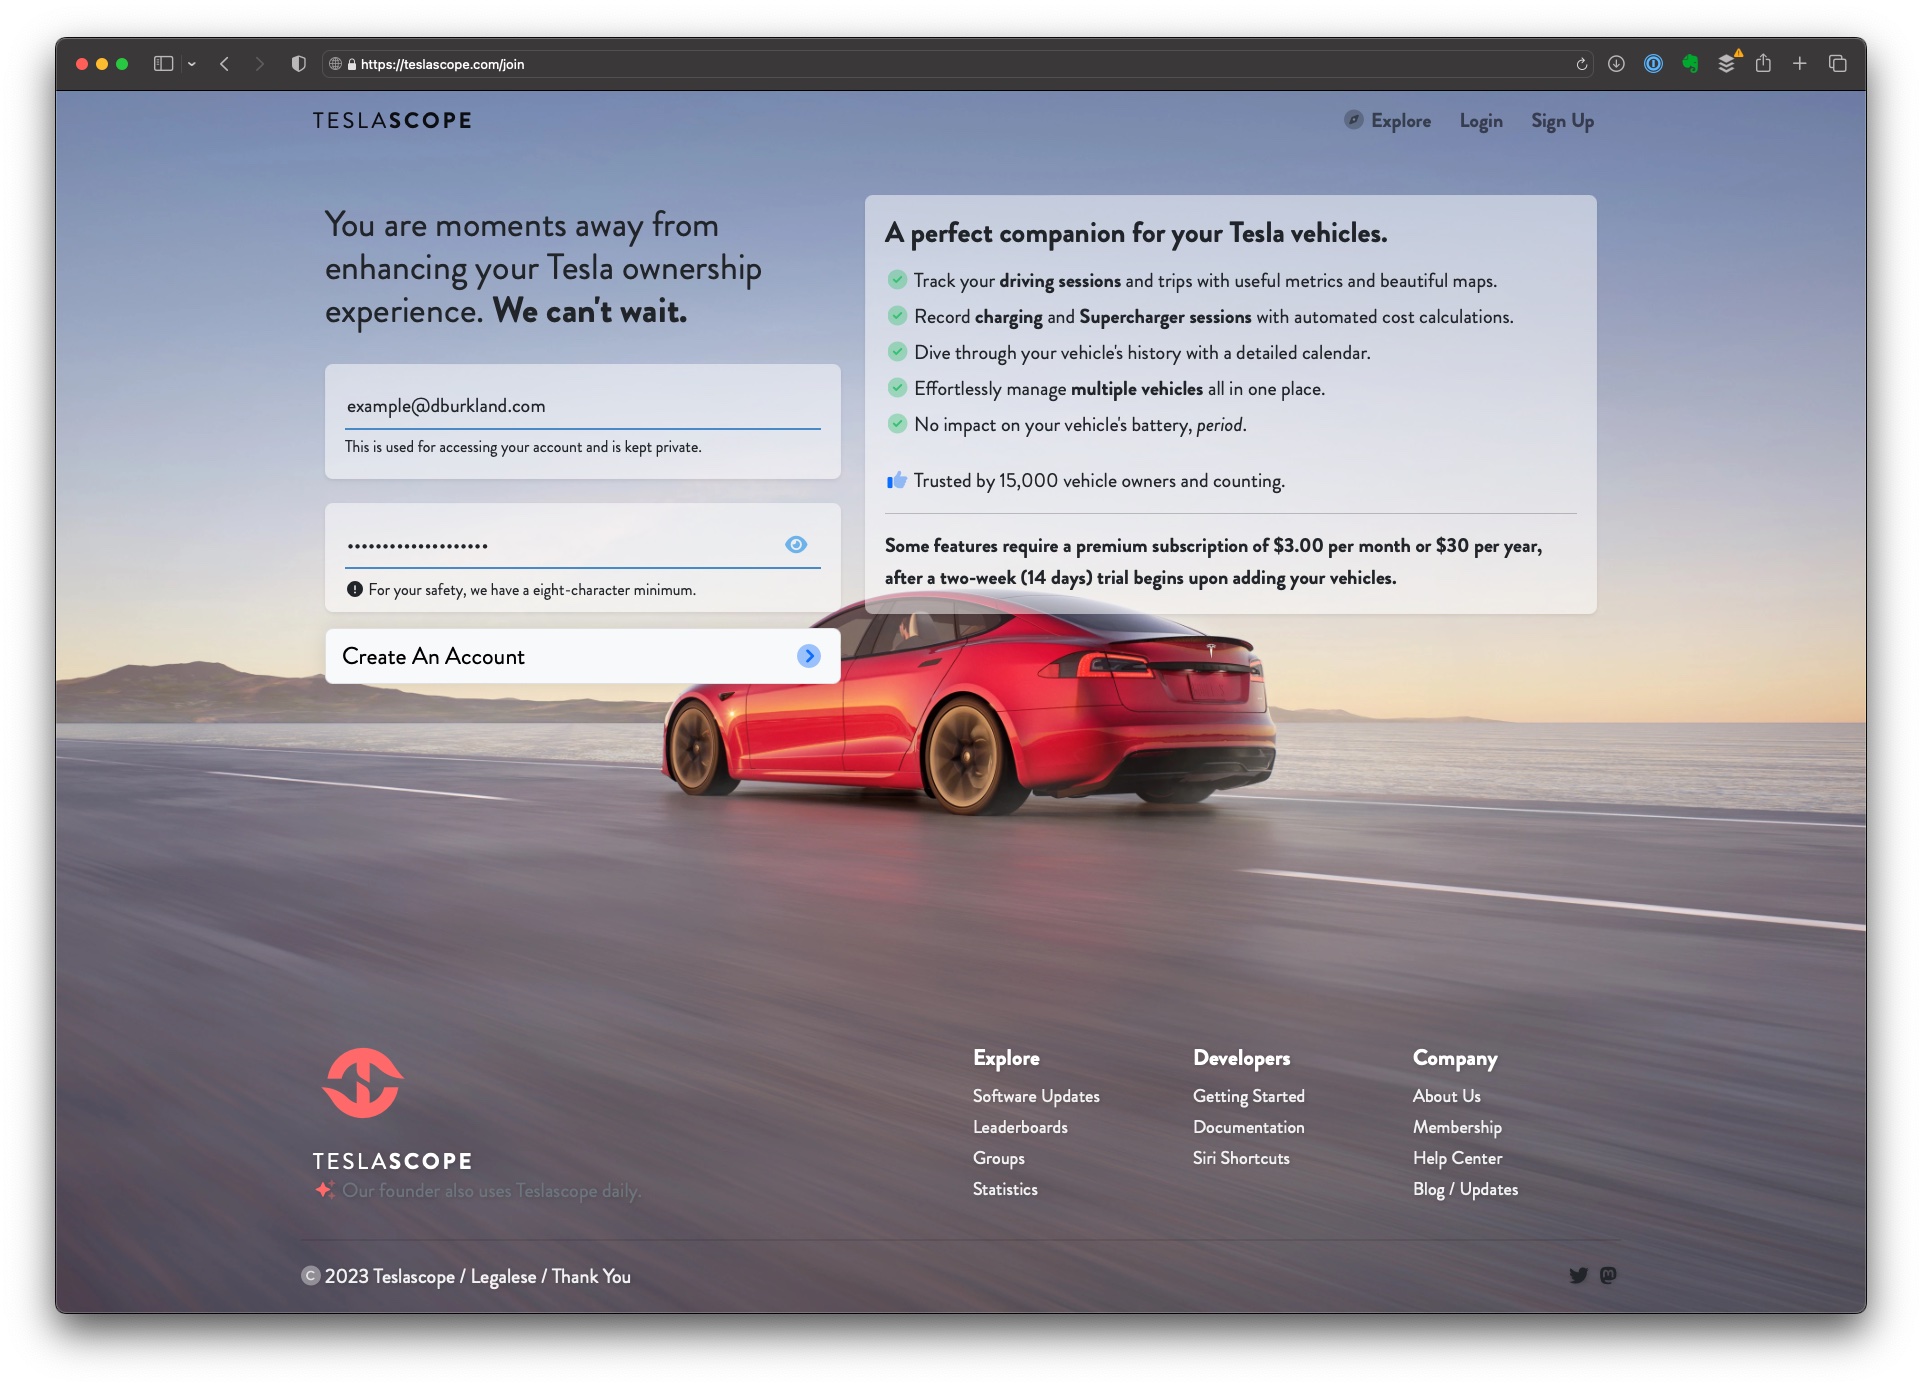
- Click on my Teslascope.com referral link which will allow you to try Teslascope Premium free for 30 days instead of the standard 14 day trial.
- Fill out the appropriate fields as seen in the following screenshot and click “Create An Account” to create your Teslascope account:
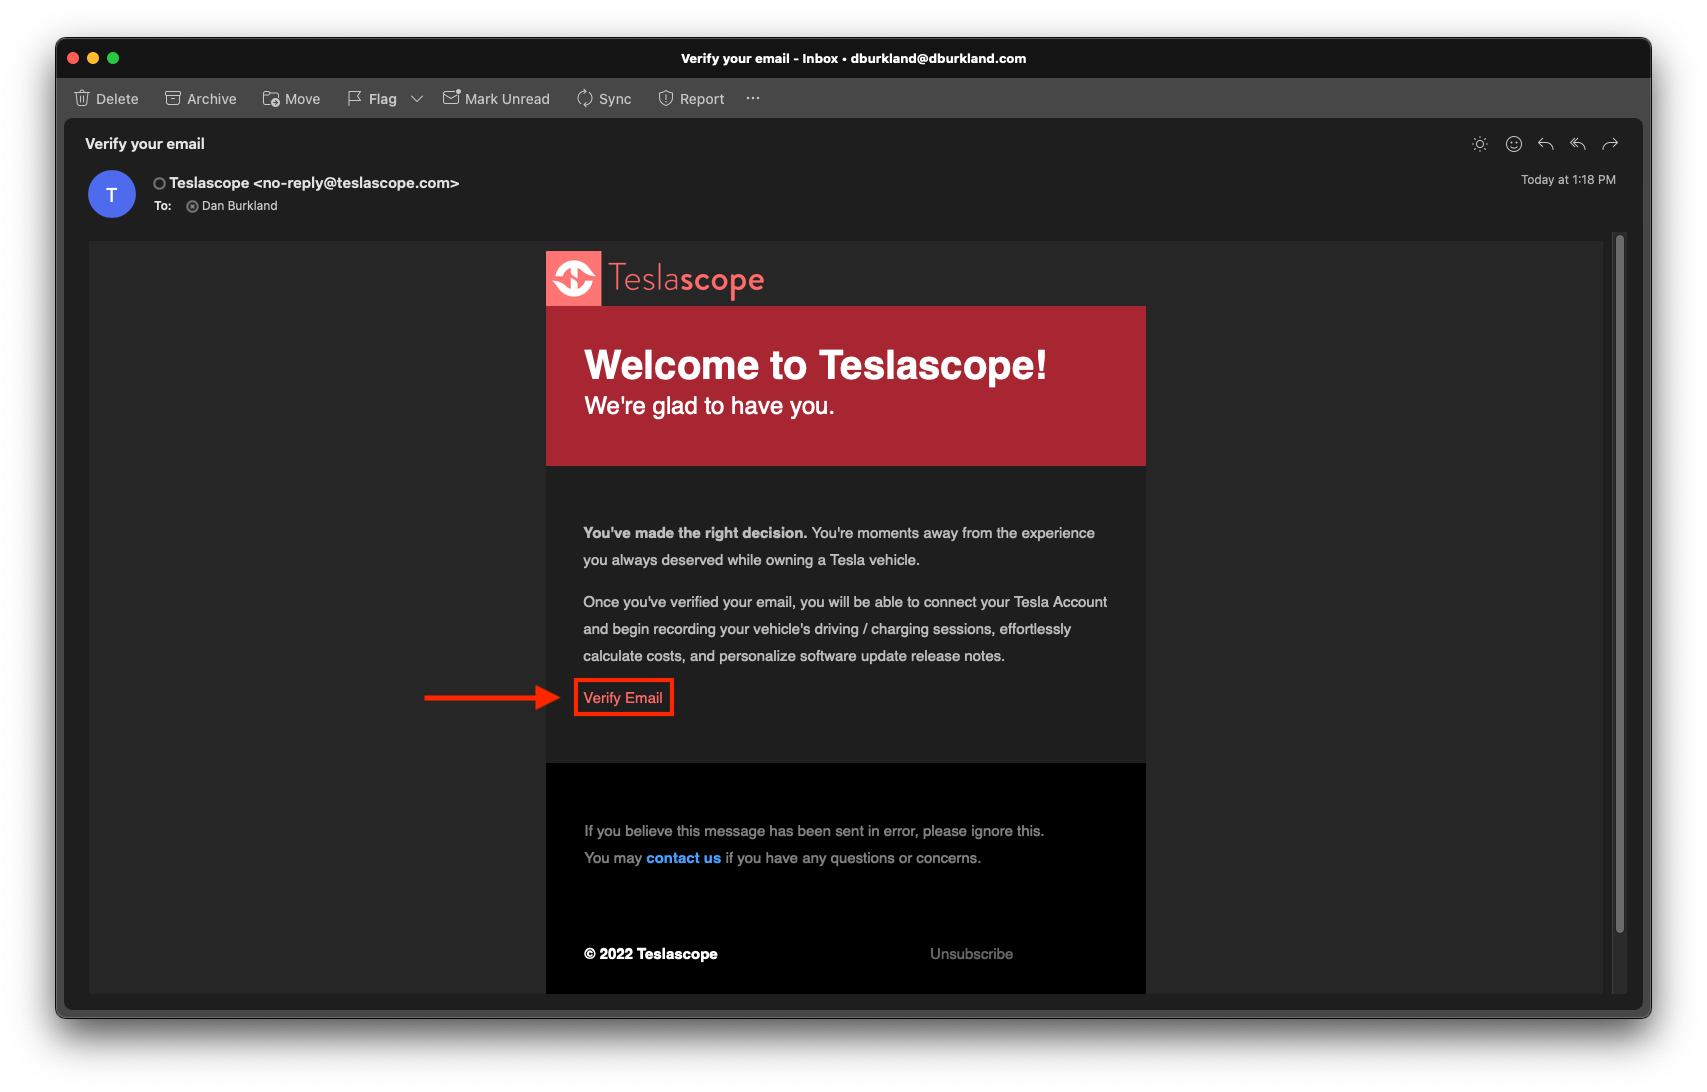
- To proceed, go to your email and look for an email from Teslascope.com with the subject “Verify your email”
- With the aforementioned email open, click the “Verify Email” link
Account Configuration
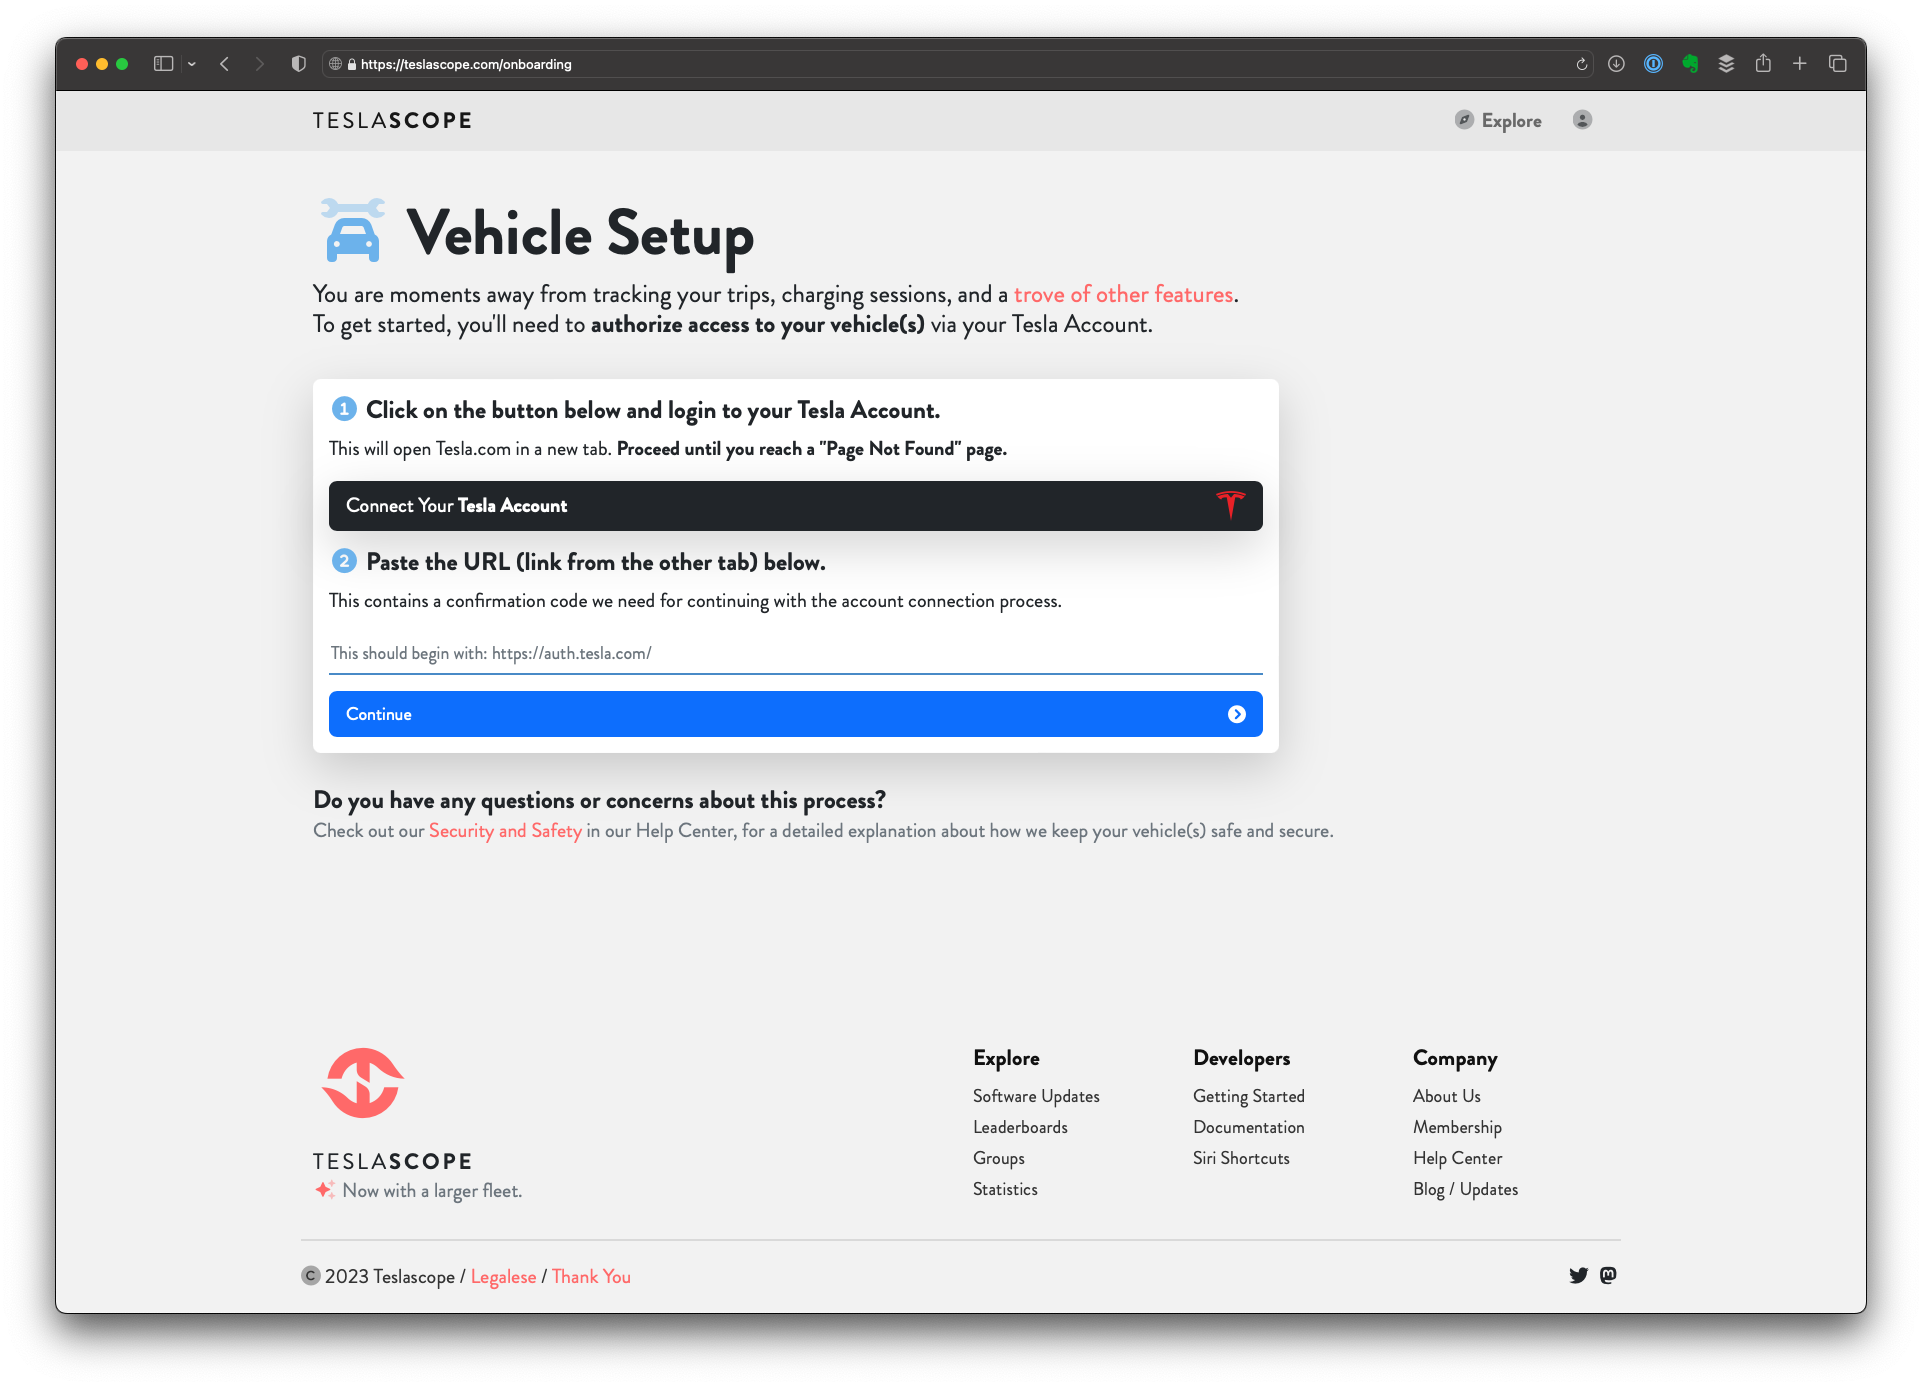
With your Teslascope account now created & verified, it is now time to connect it to your Tesla.com account
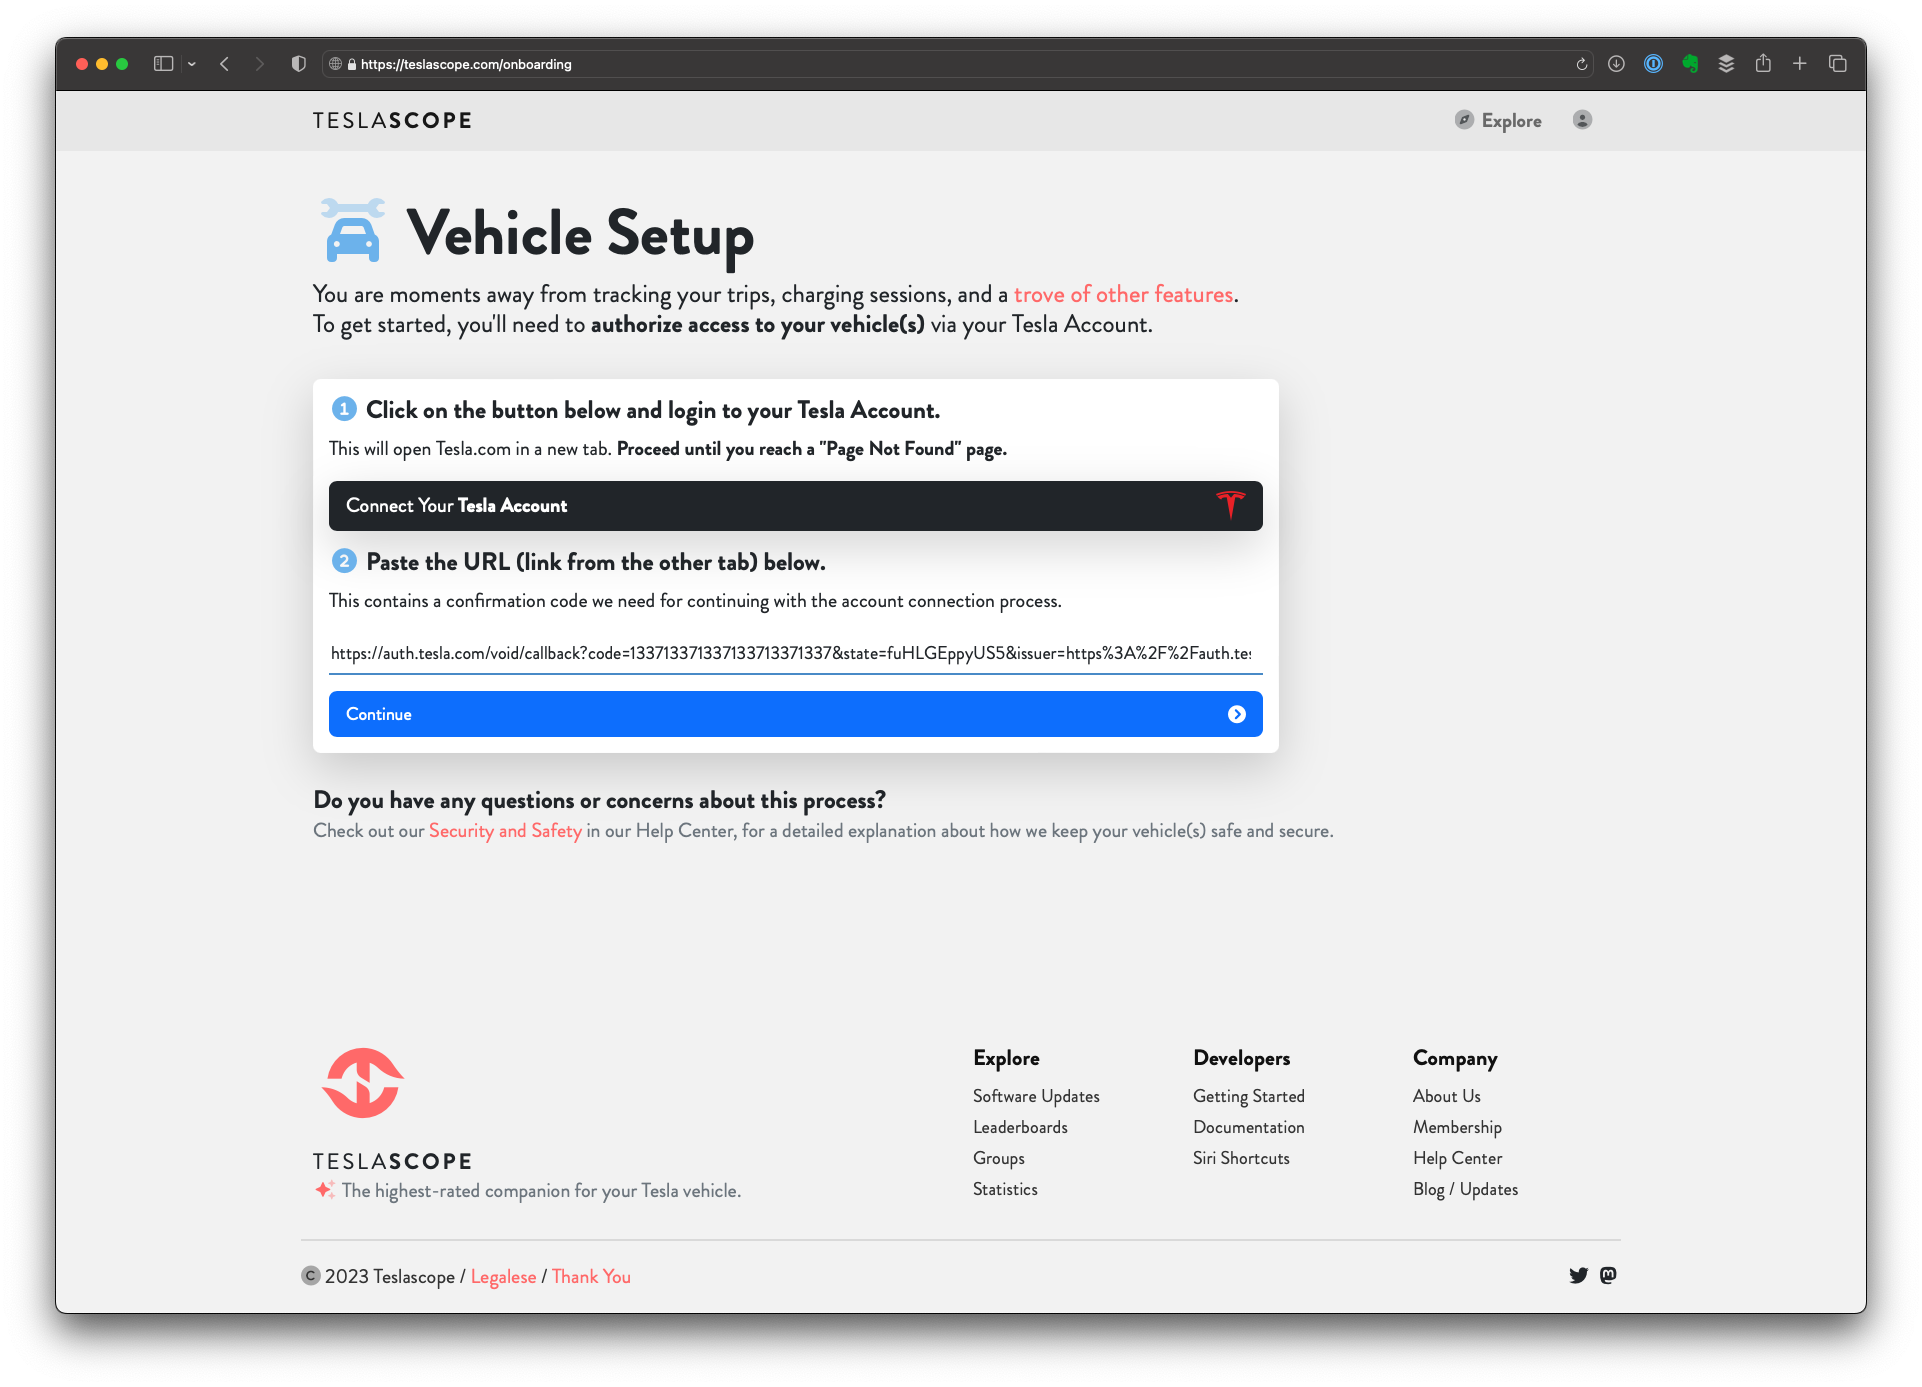
To do so, click the “Connect Your Tesla Account” button
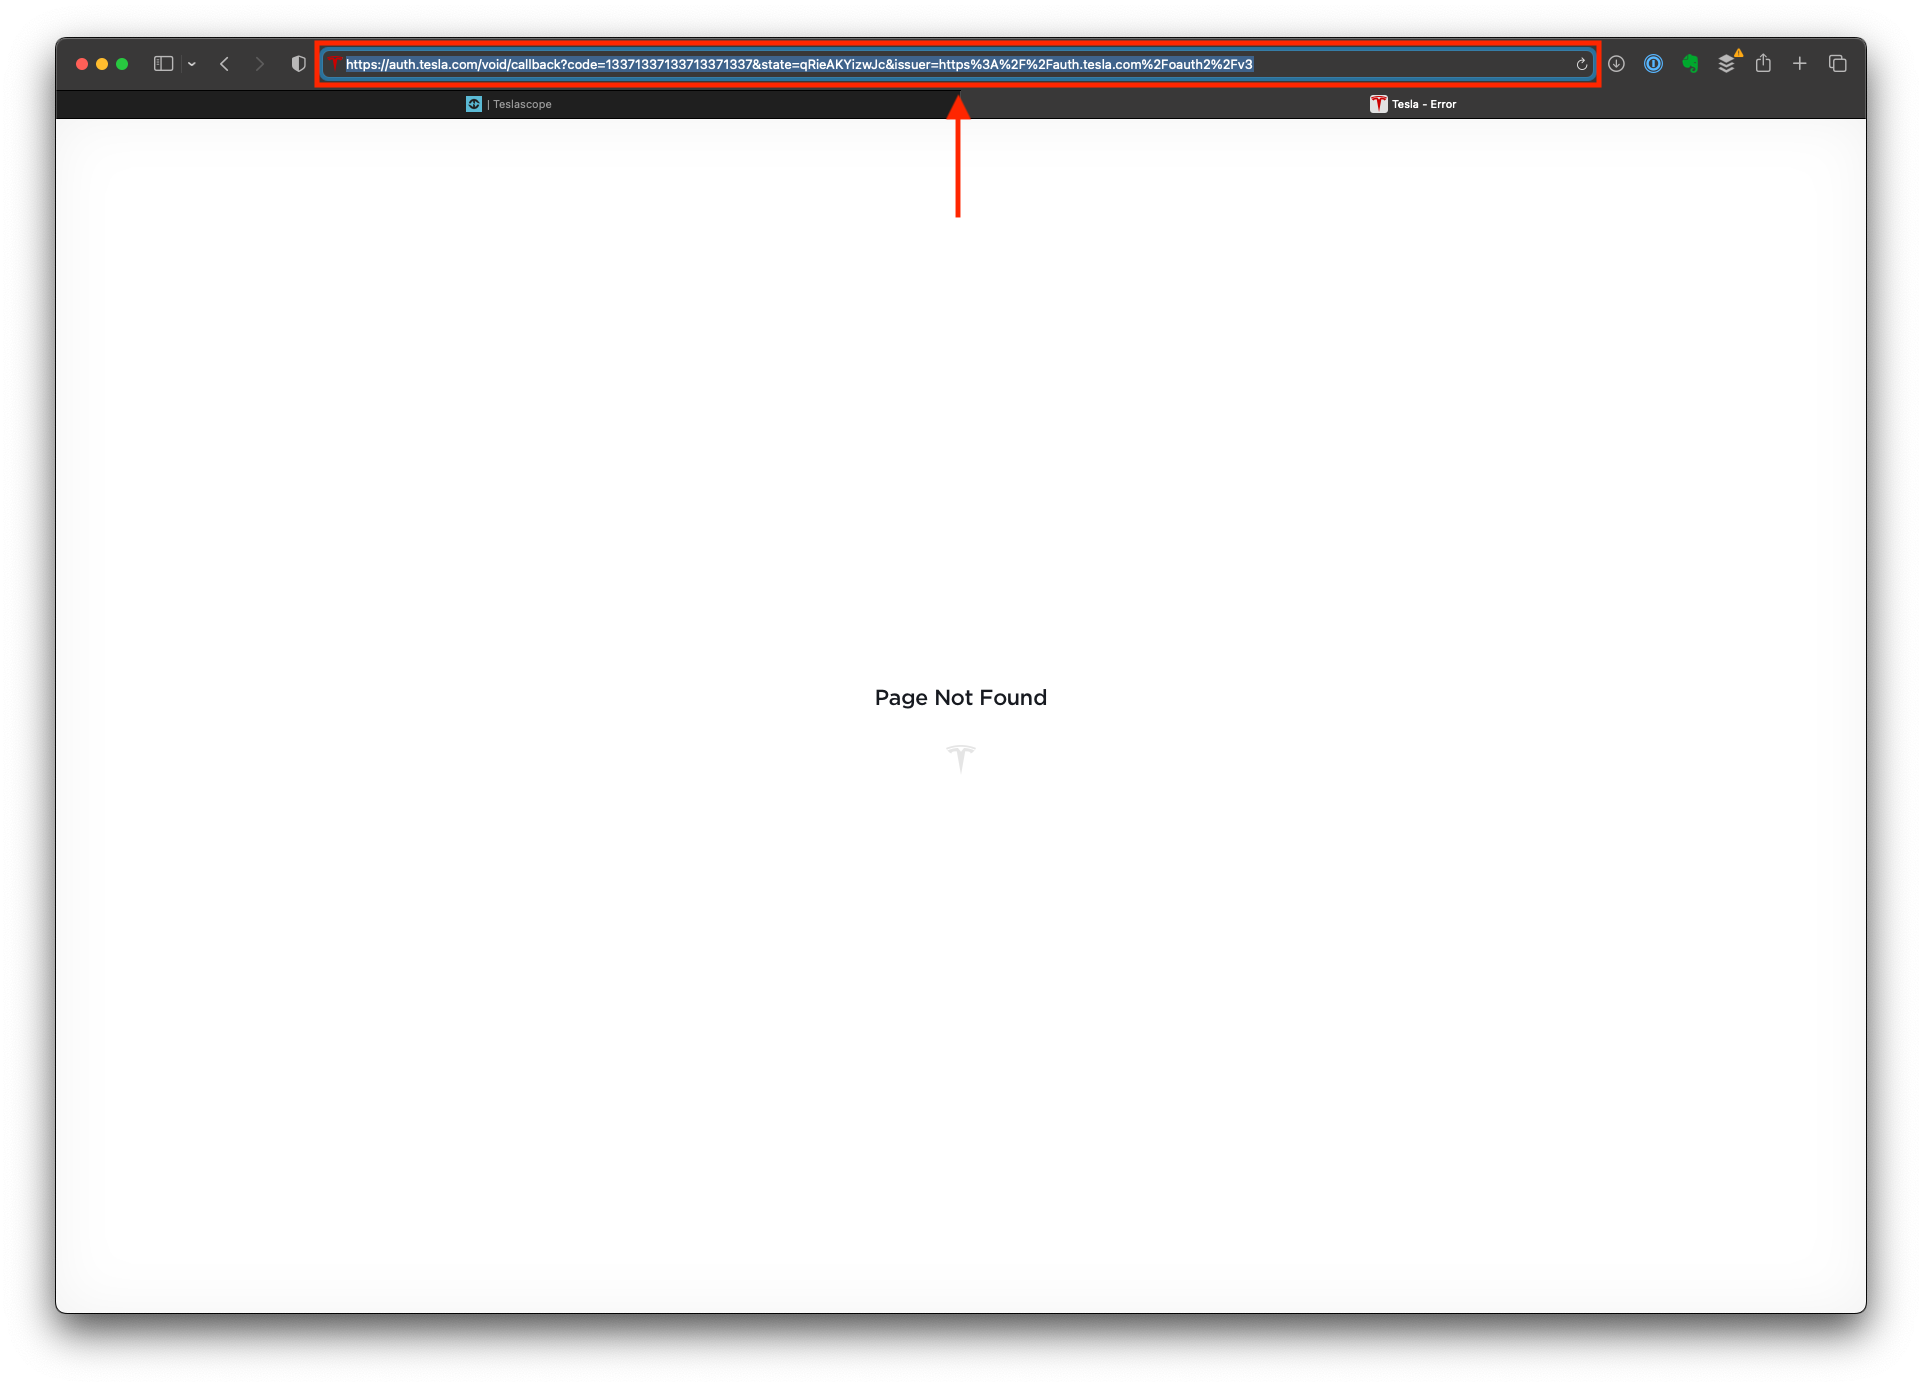
Enter your Tesla.com username & password credentials which eventually will bring you to a page that says “Page Not Found”
Right click the Address Bar in your web browser and select “Copy”
You may now close the Tesla.com browser tab and navigate back to the Teslascope browser tab
Underneath “Paste the URL”, right click & paste the address you copied from the previous step and click the “Continue” button.
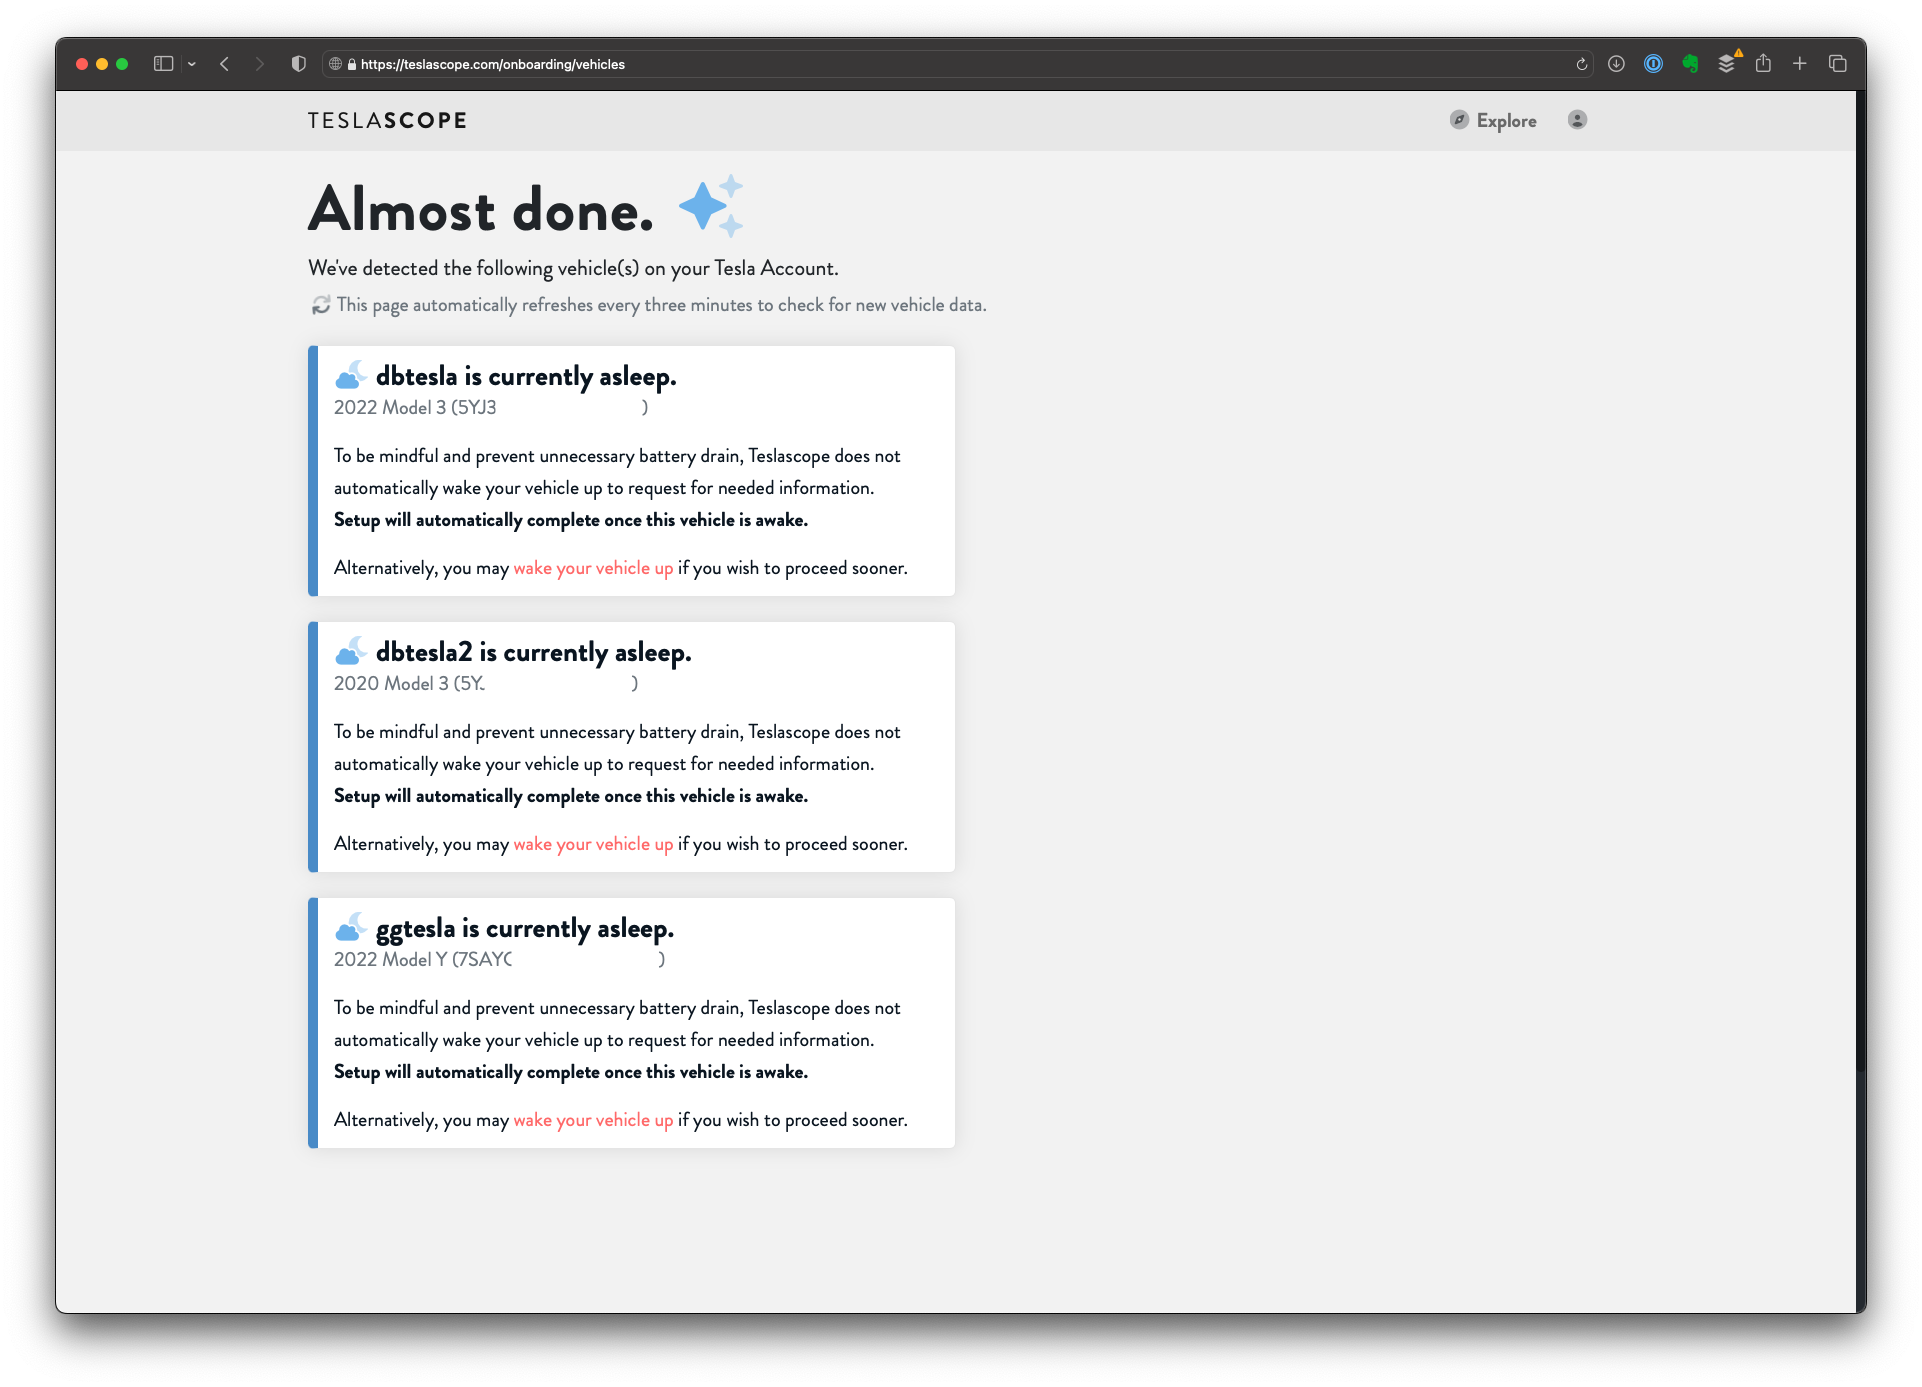
If you followed the previous steps correctly, you should now see a list of all vehicles that are associated with your Tesla.com
If your vehicle(s) is asleep, it is recommended to click the “wake your vehicle up” link under each vehicle to complete the pairing process between Tesla.com & Teslascope
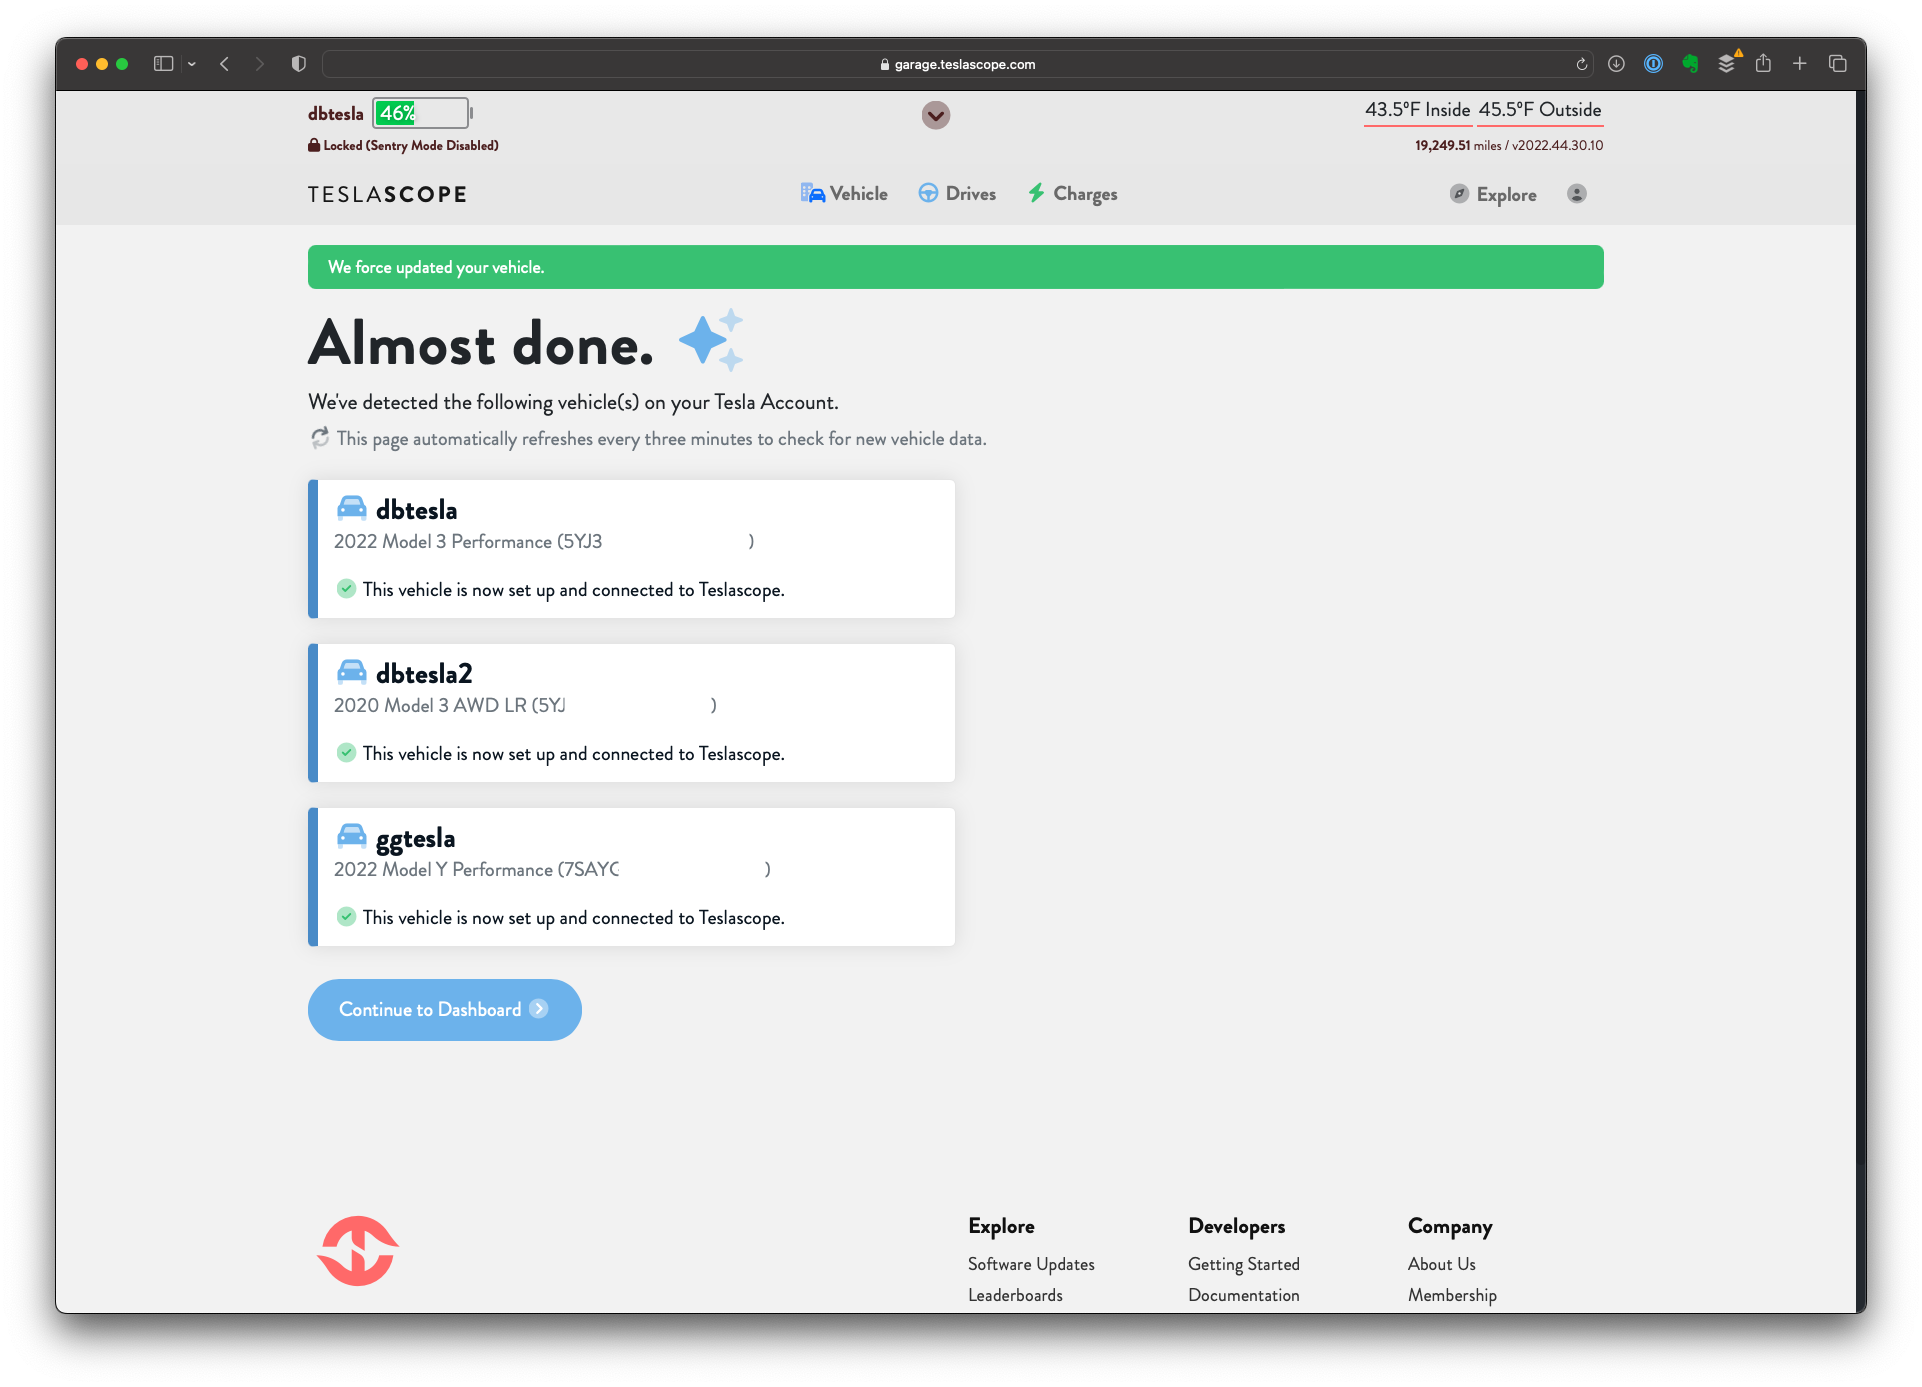
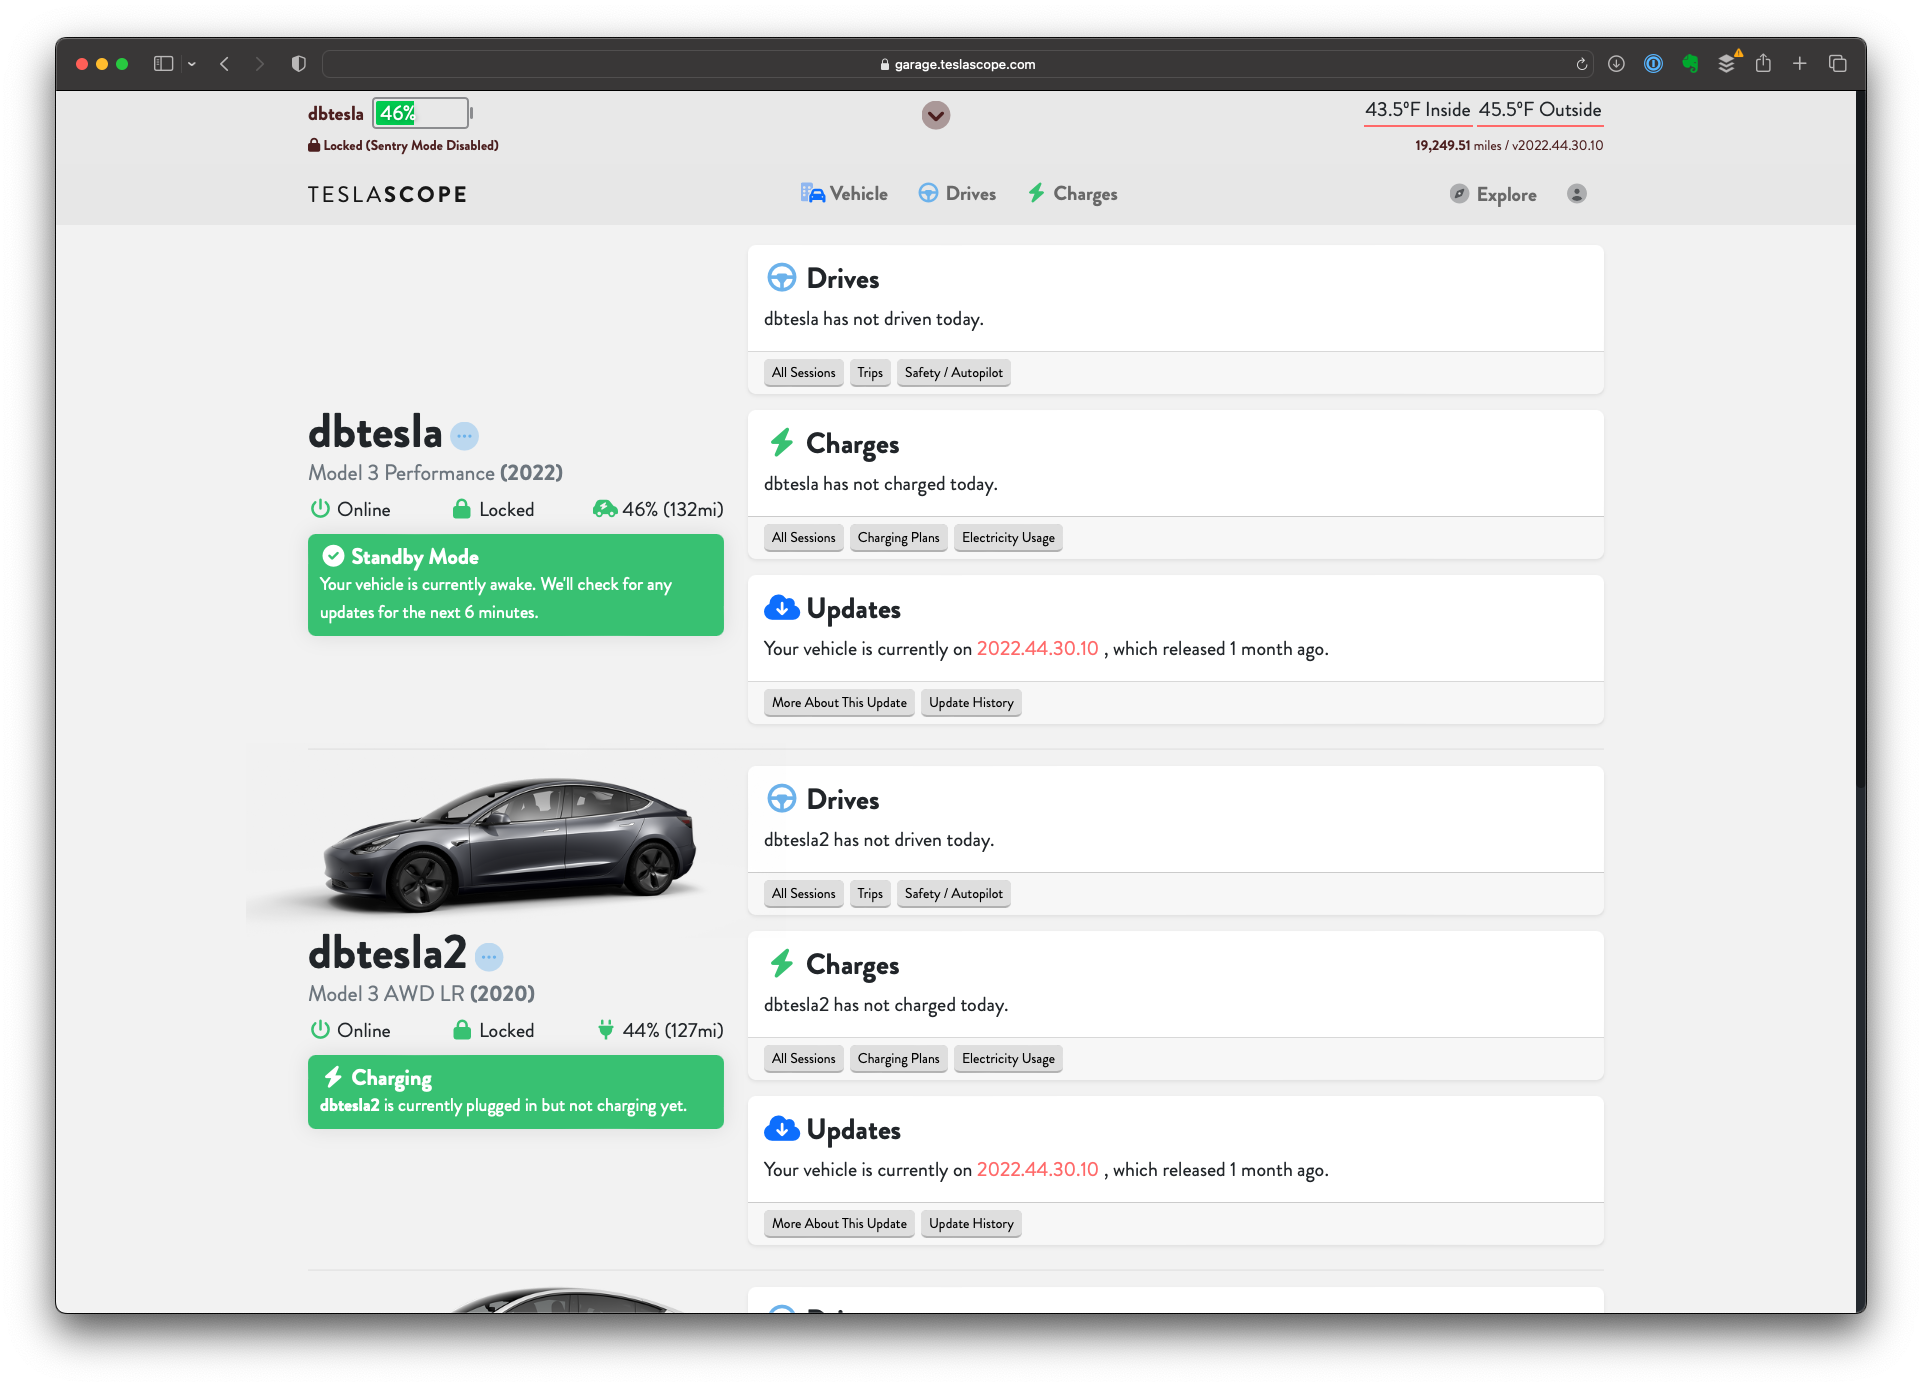
You will now be presented with the Dashboard that will look something like this:
Global Settings
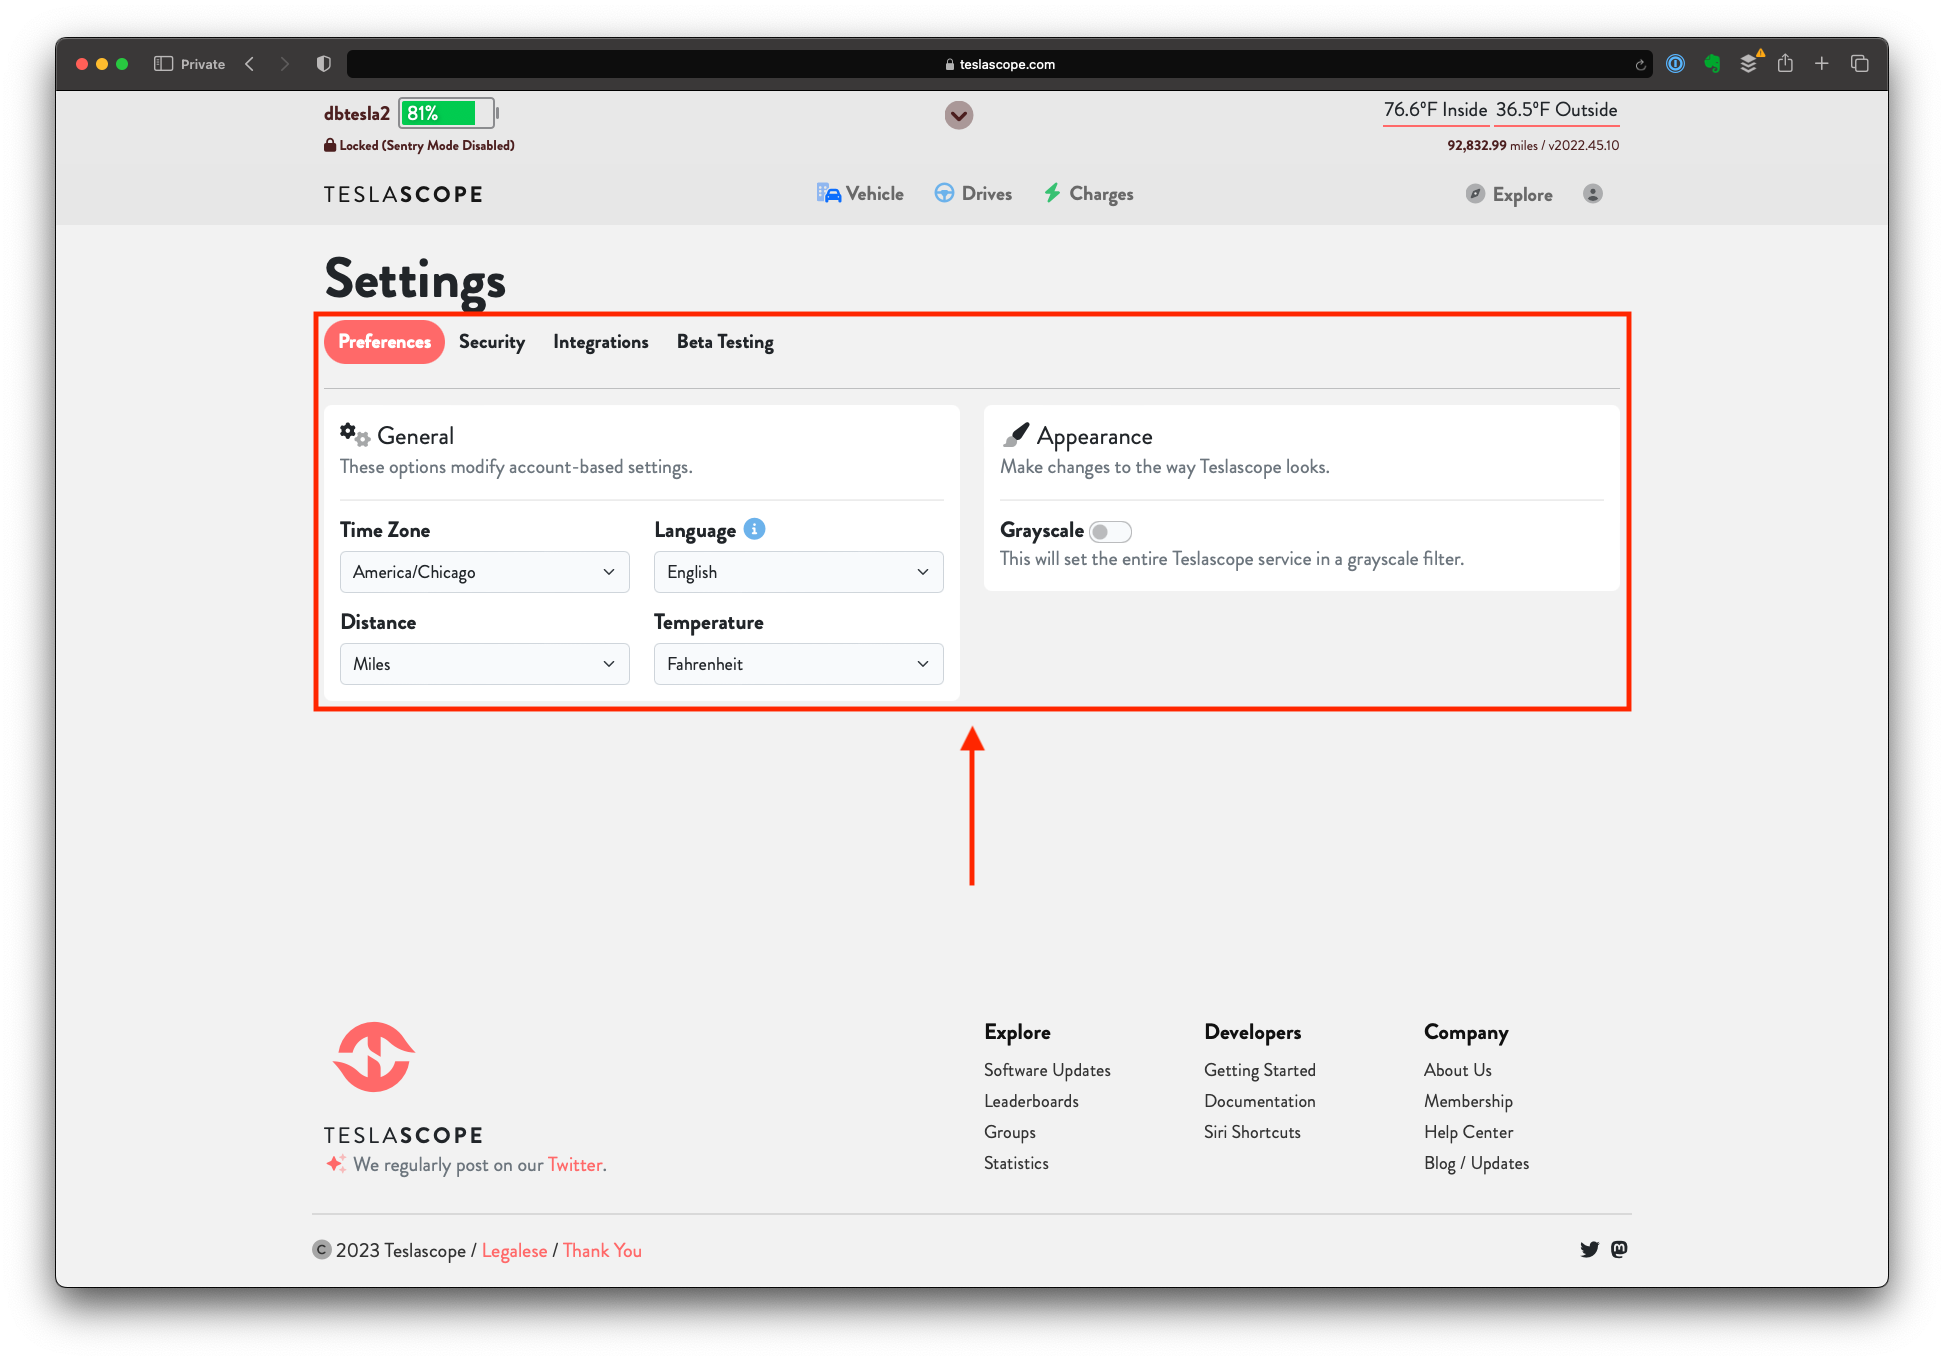
- Preferences
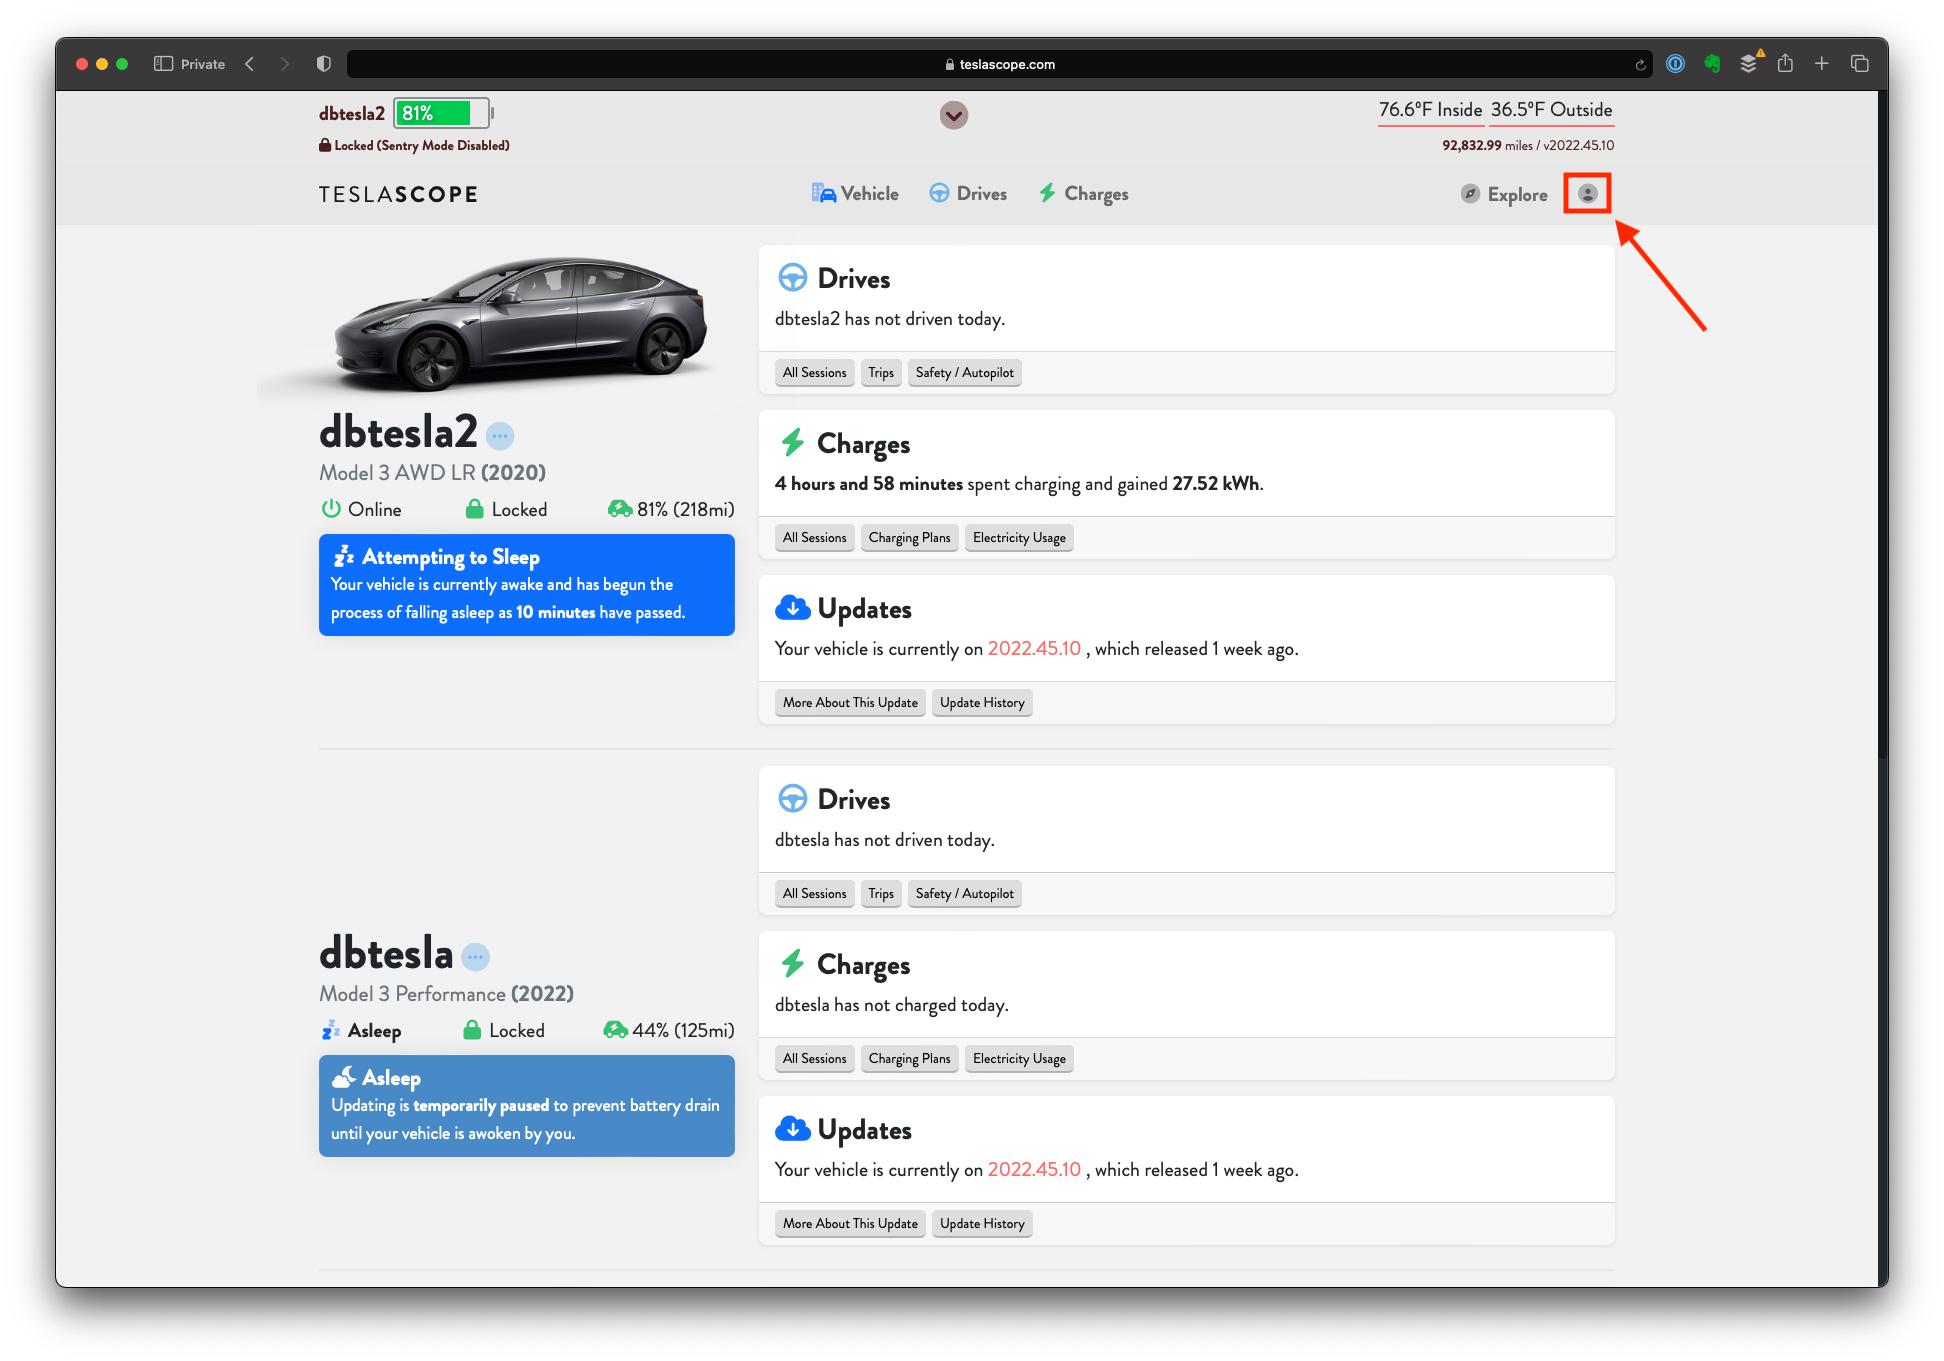
- To access the Teslascope account settings page, click on the user icon in the upper right corner next to “Explore” and click “Settings”
- Make sure the following settings are set to the correct values for your locale:
- To access the Teslascope account settings page, click on the user icon in the upper right corner next to “Explore” and click “Settings”
- Security
- Click the “Security” button next to “Preferences”
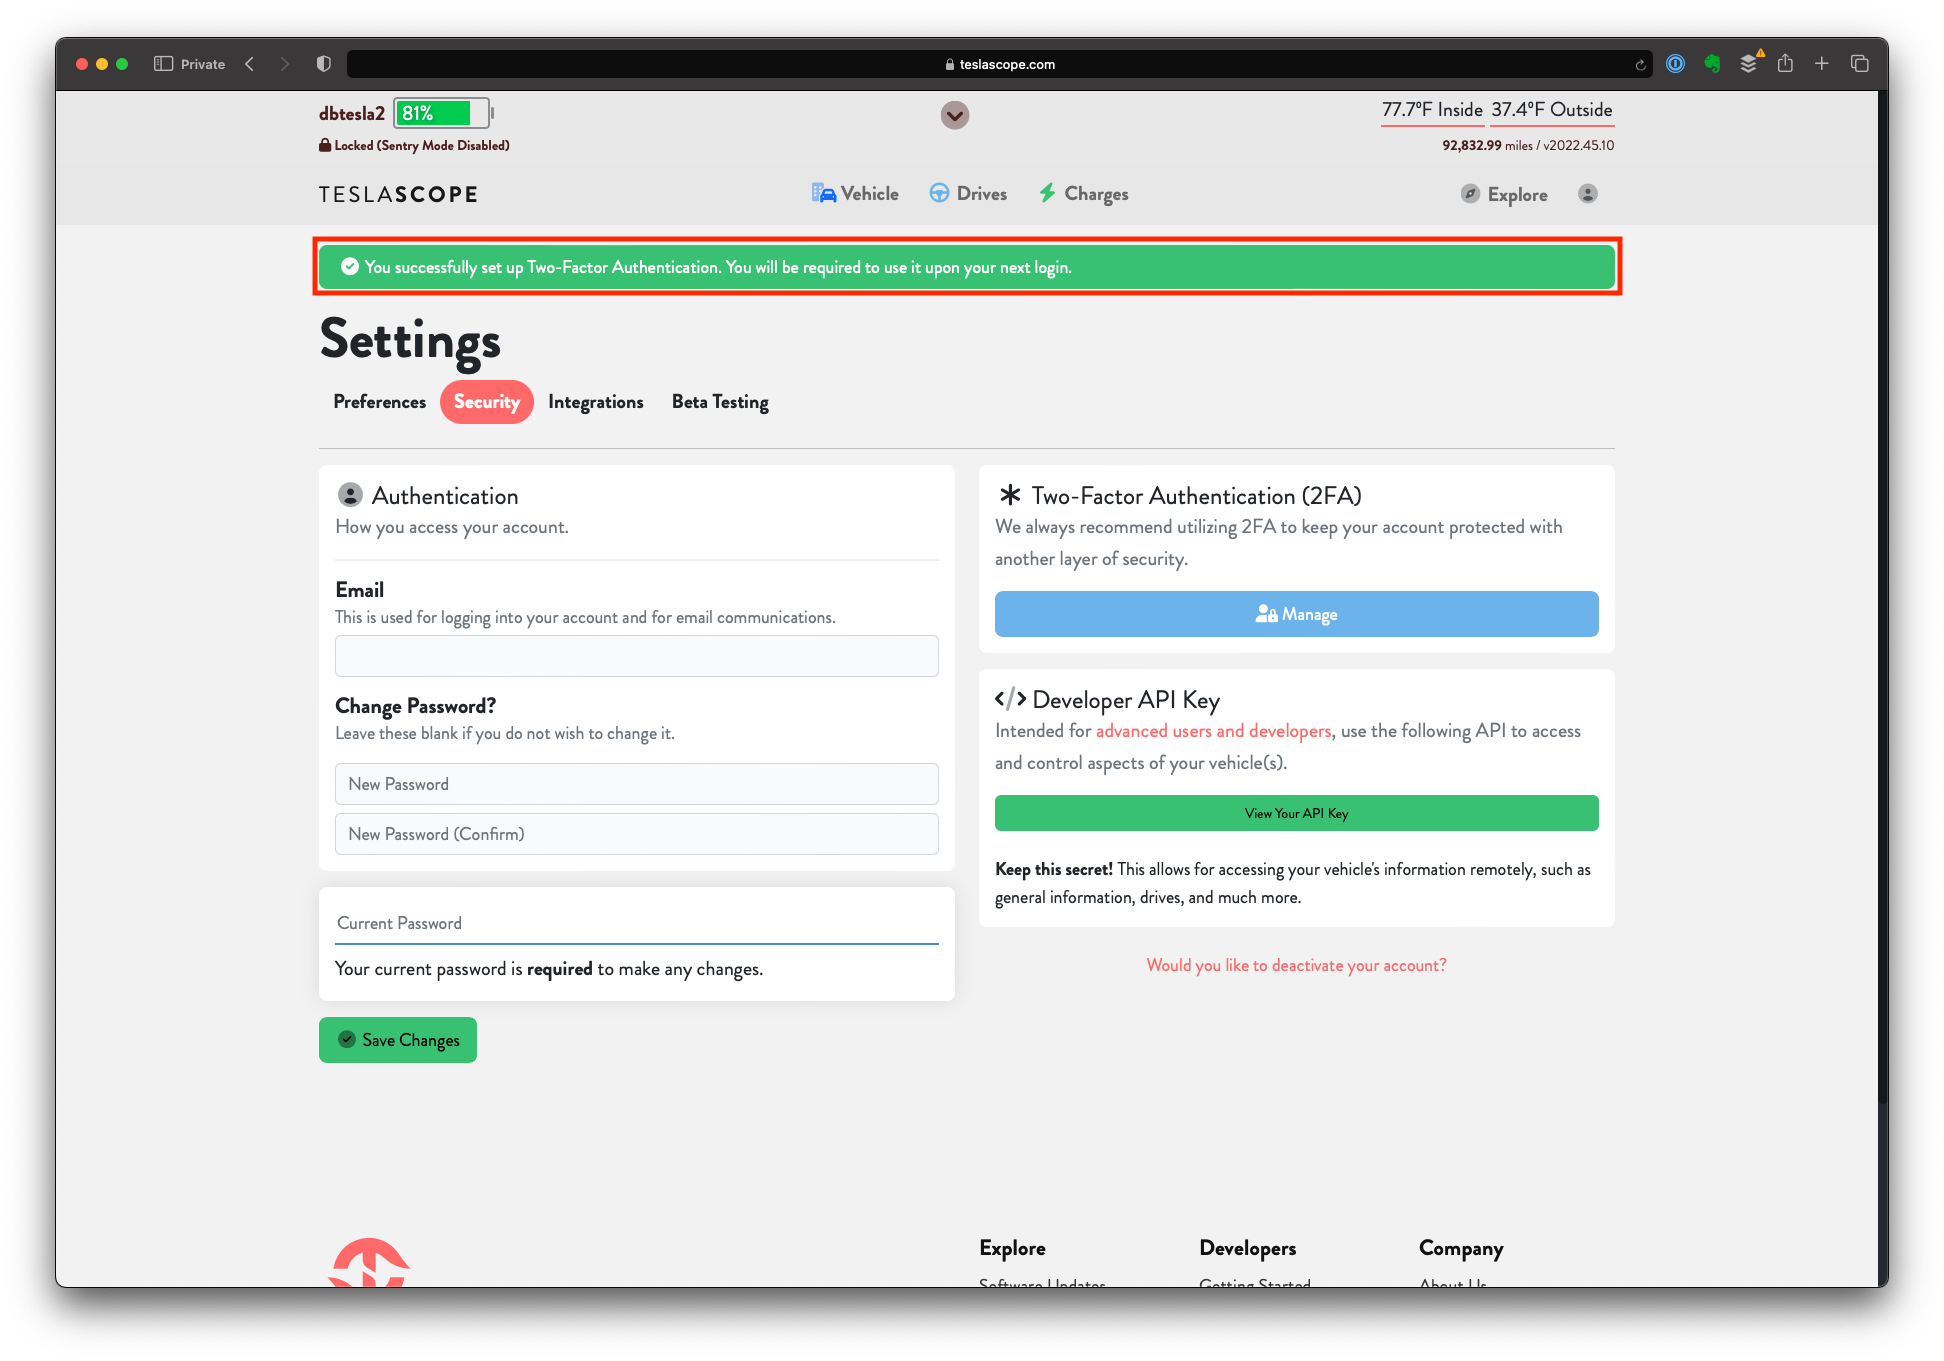
- Recommendation: I strongly recommend that you enable Two-Factor Authentication (2FA) to protect access to your Teslascope account.
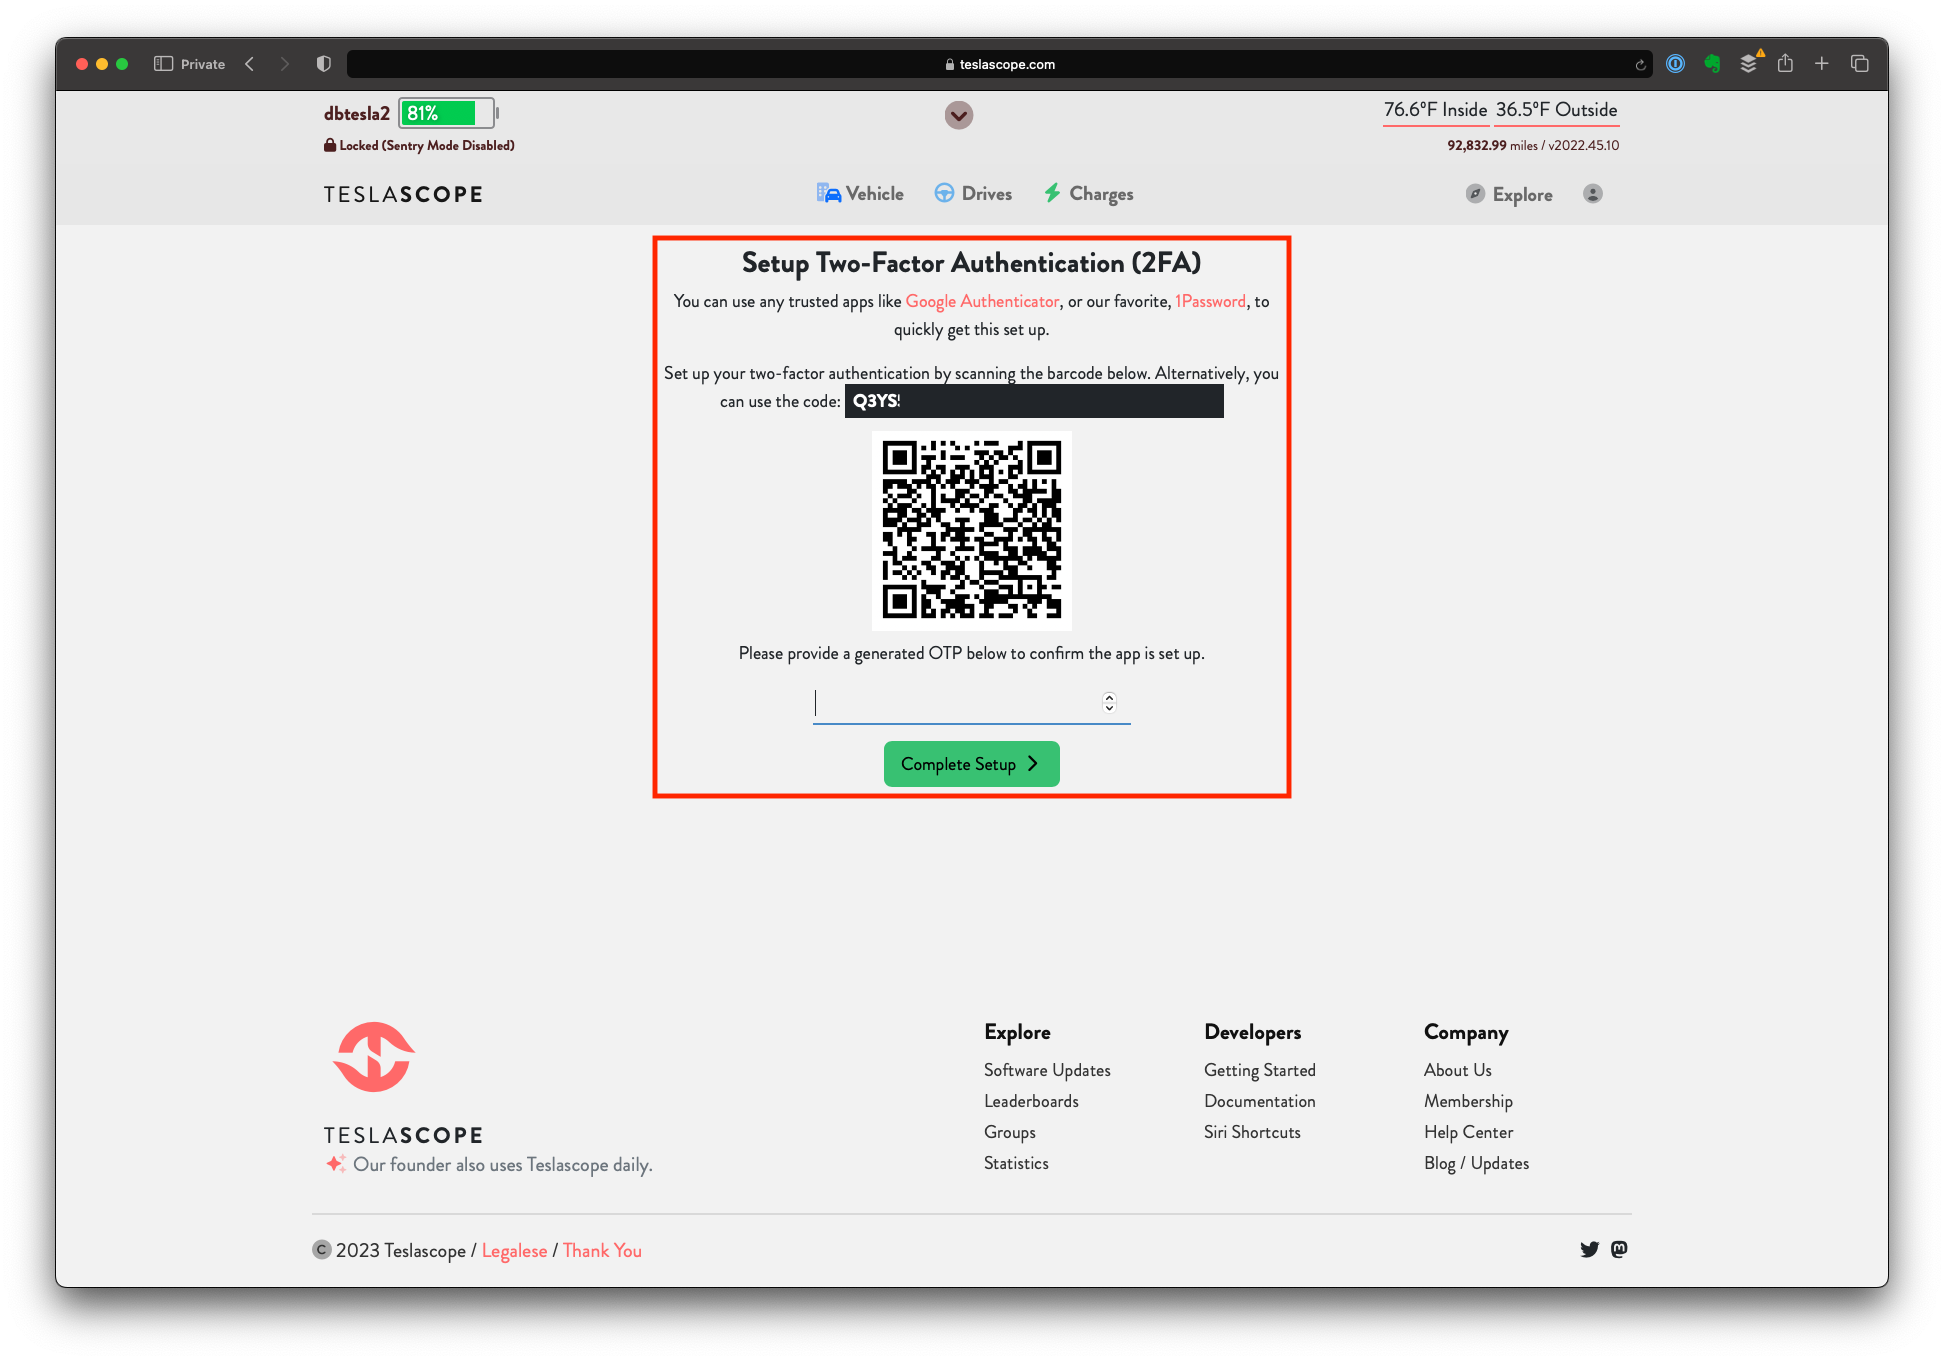
- To setup 2FA, click the “Setup” button underneath “Two-Factor Authentication (2FA)”
- Using your favorite authenticator app ( 1Password is what I recommend), capture the barcode or code to perform the initial 2FA setup
- You will be asked to login using your authenticator app so please do so now
- Once setup is complete you will see a confirmation message at the top confirming 2FA setup is complete
- Preferences
Vehicle Settings (Repeat These Steps For Each Vehicle You Own)
General
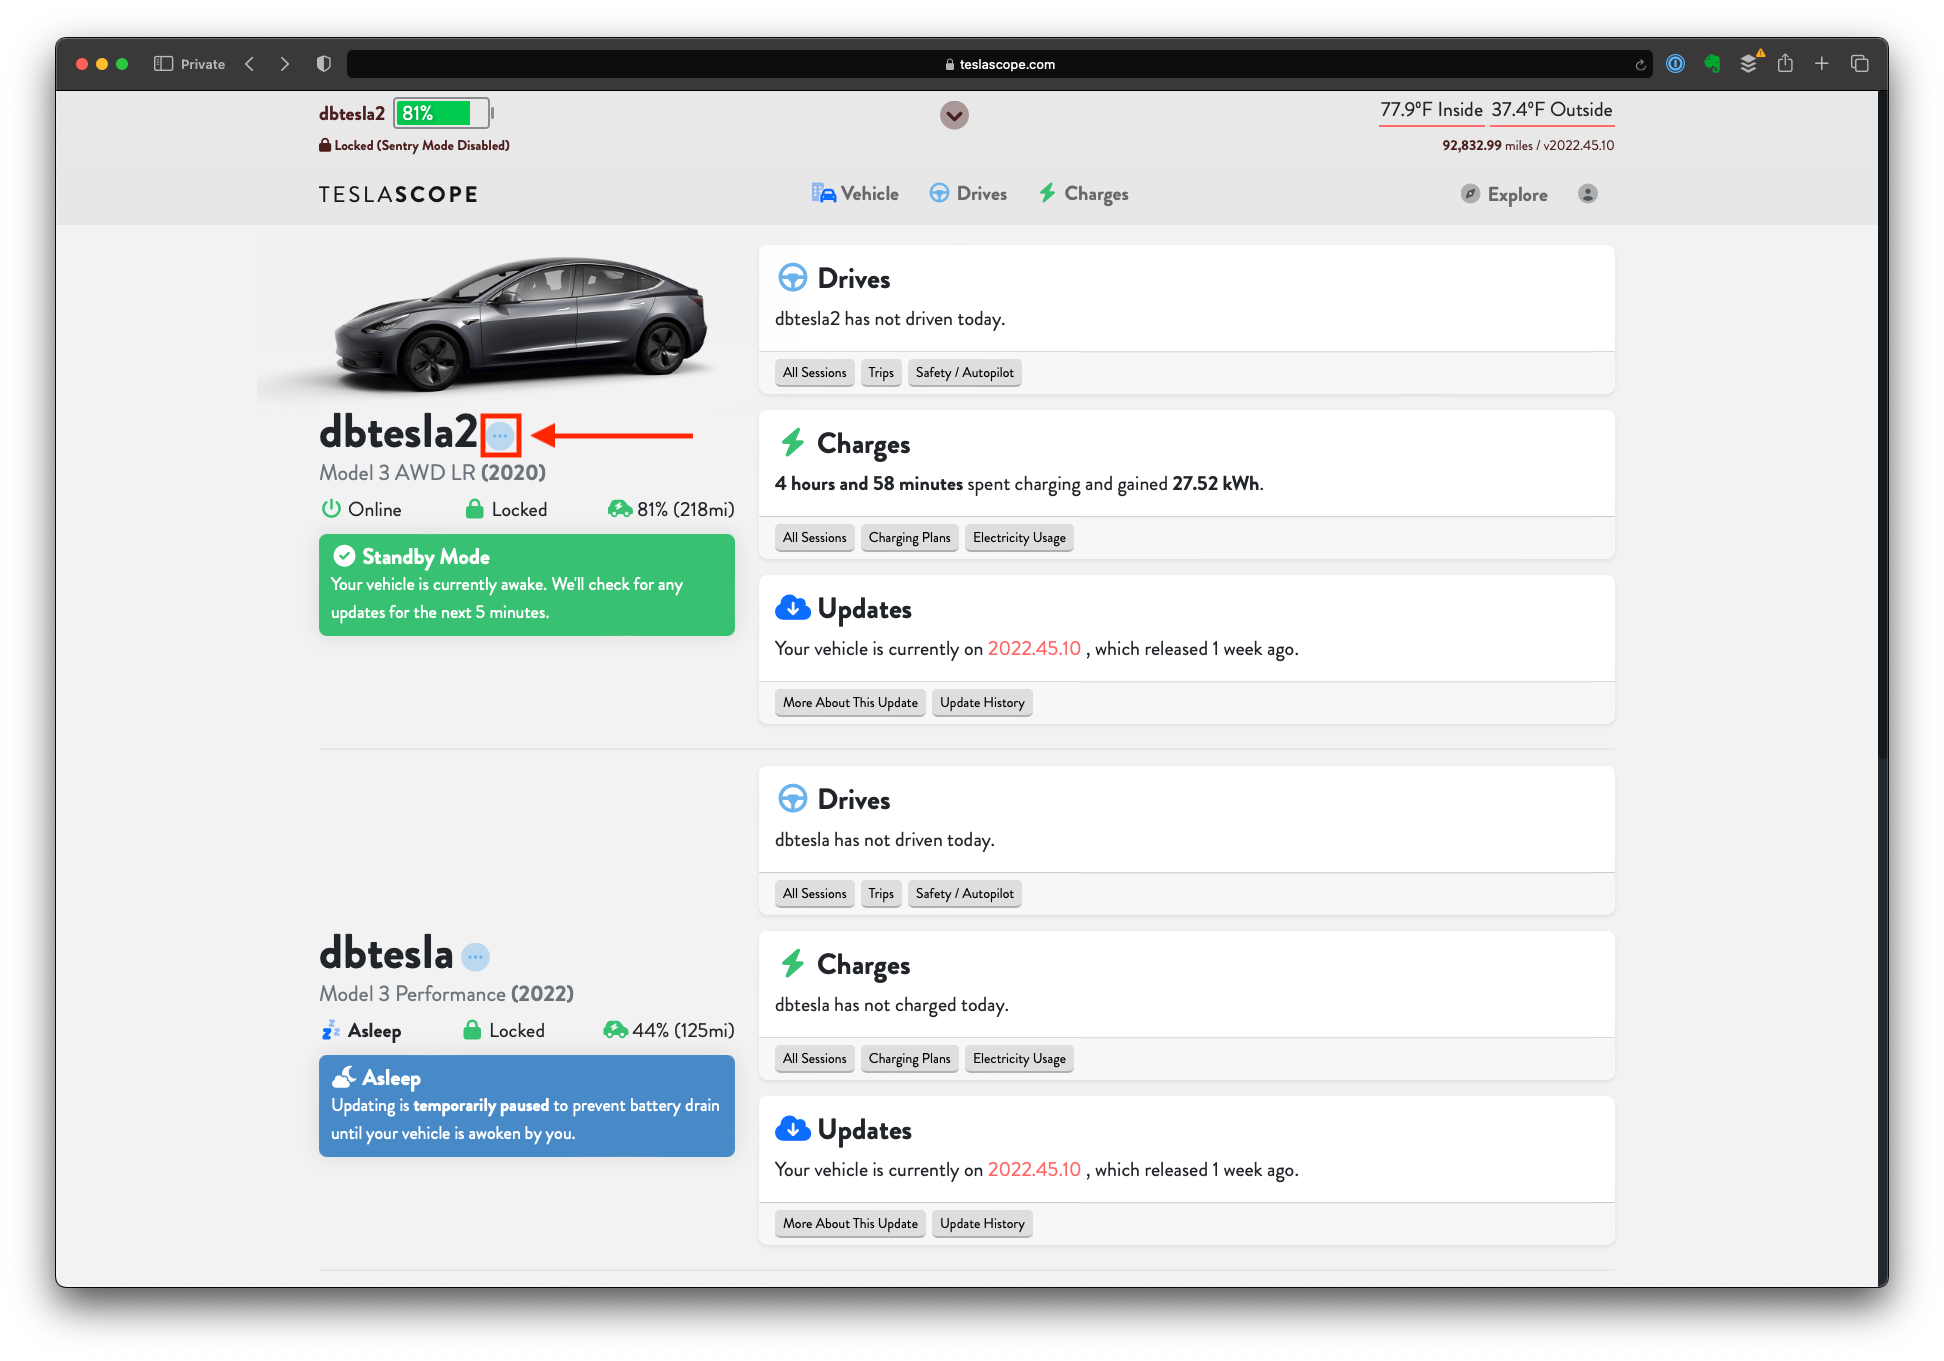
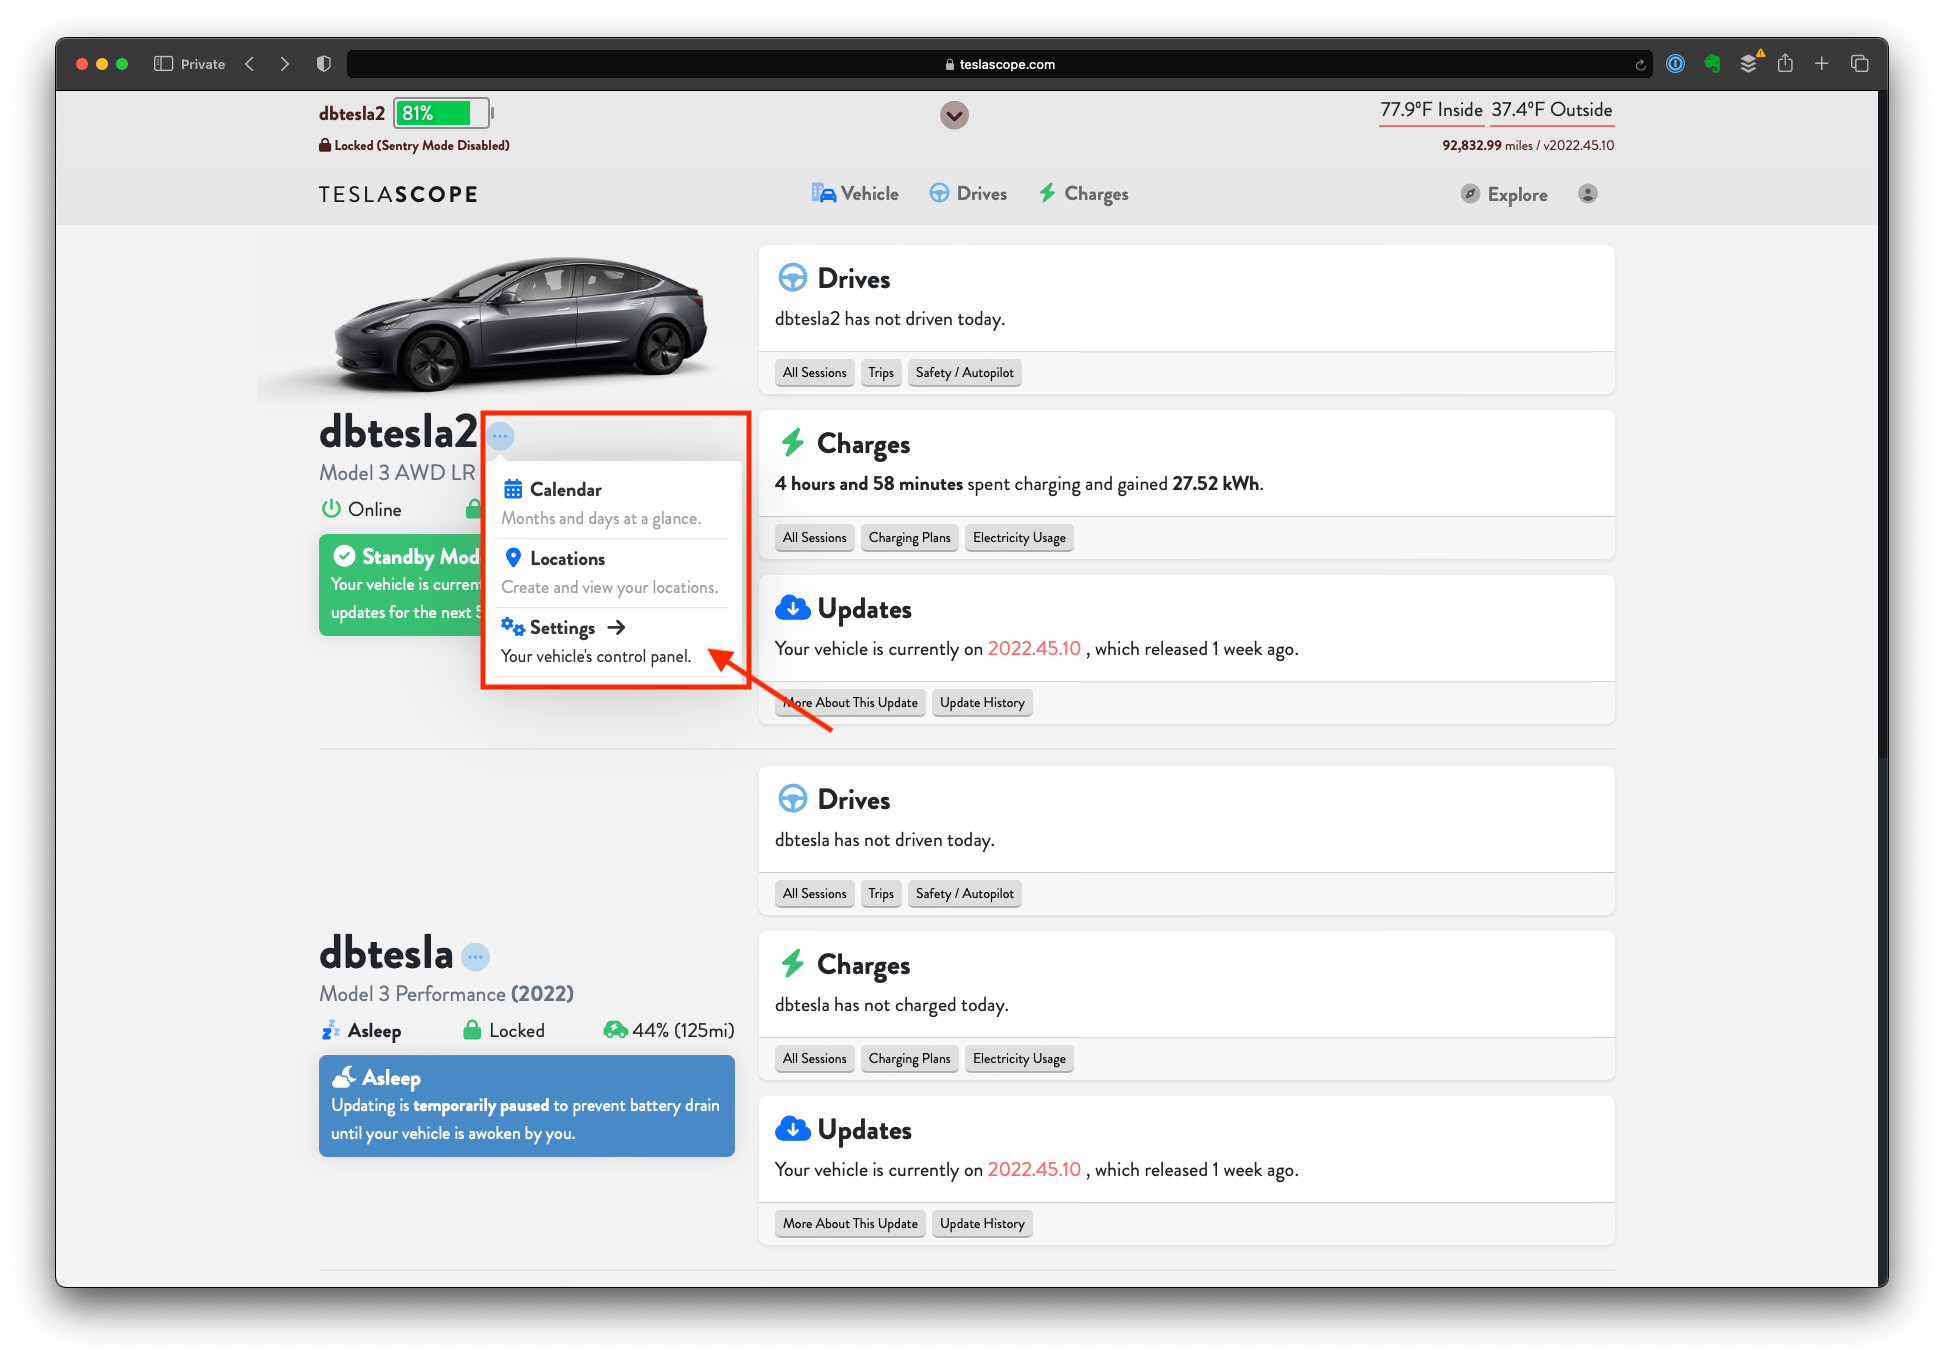
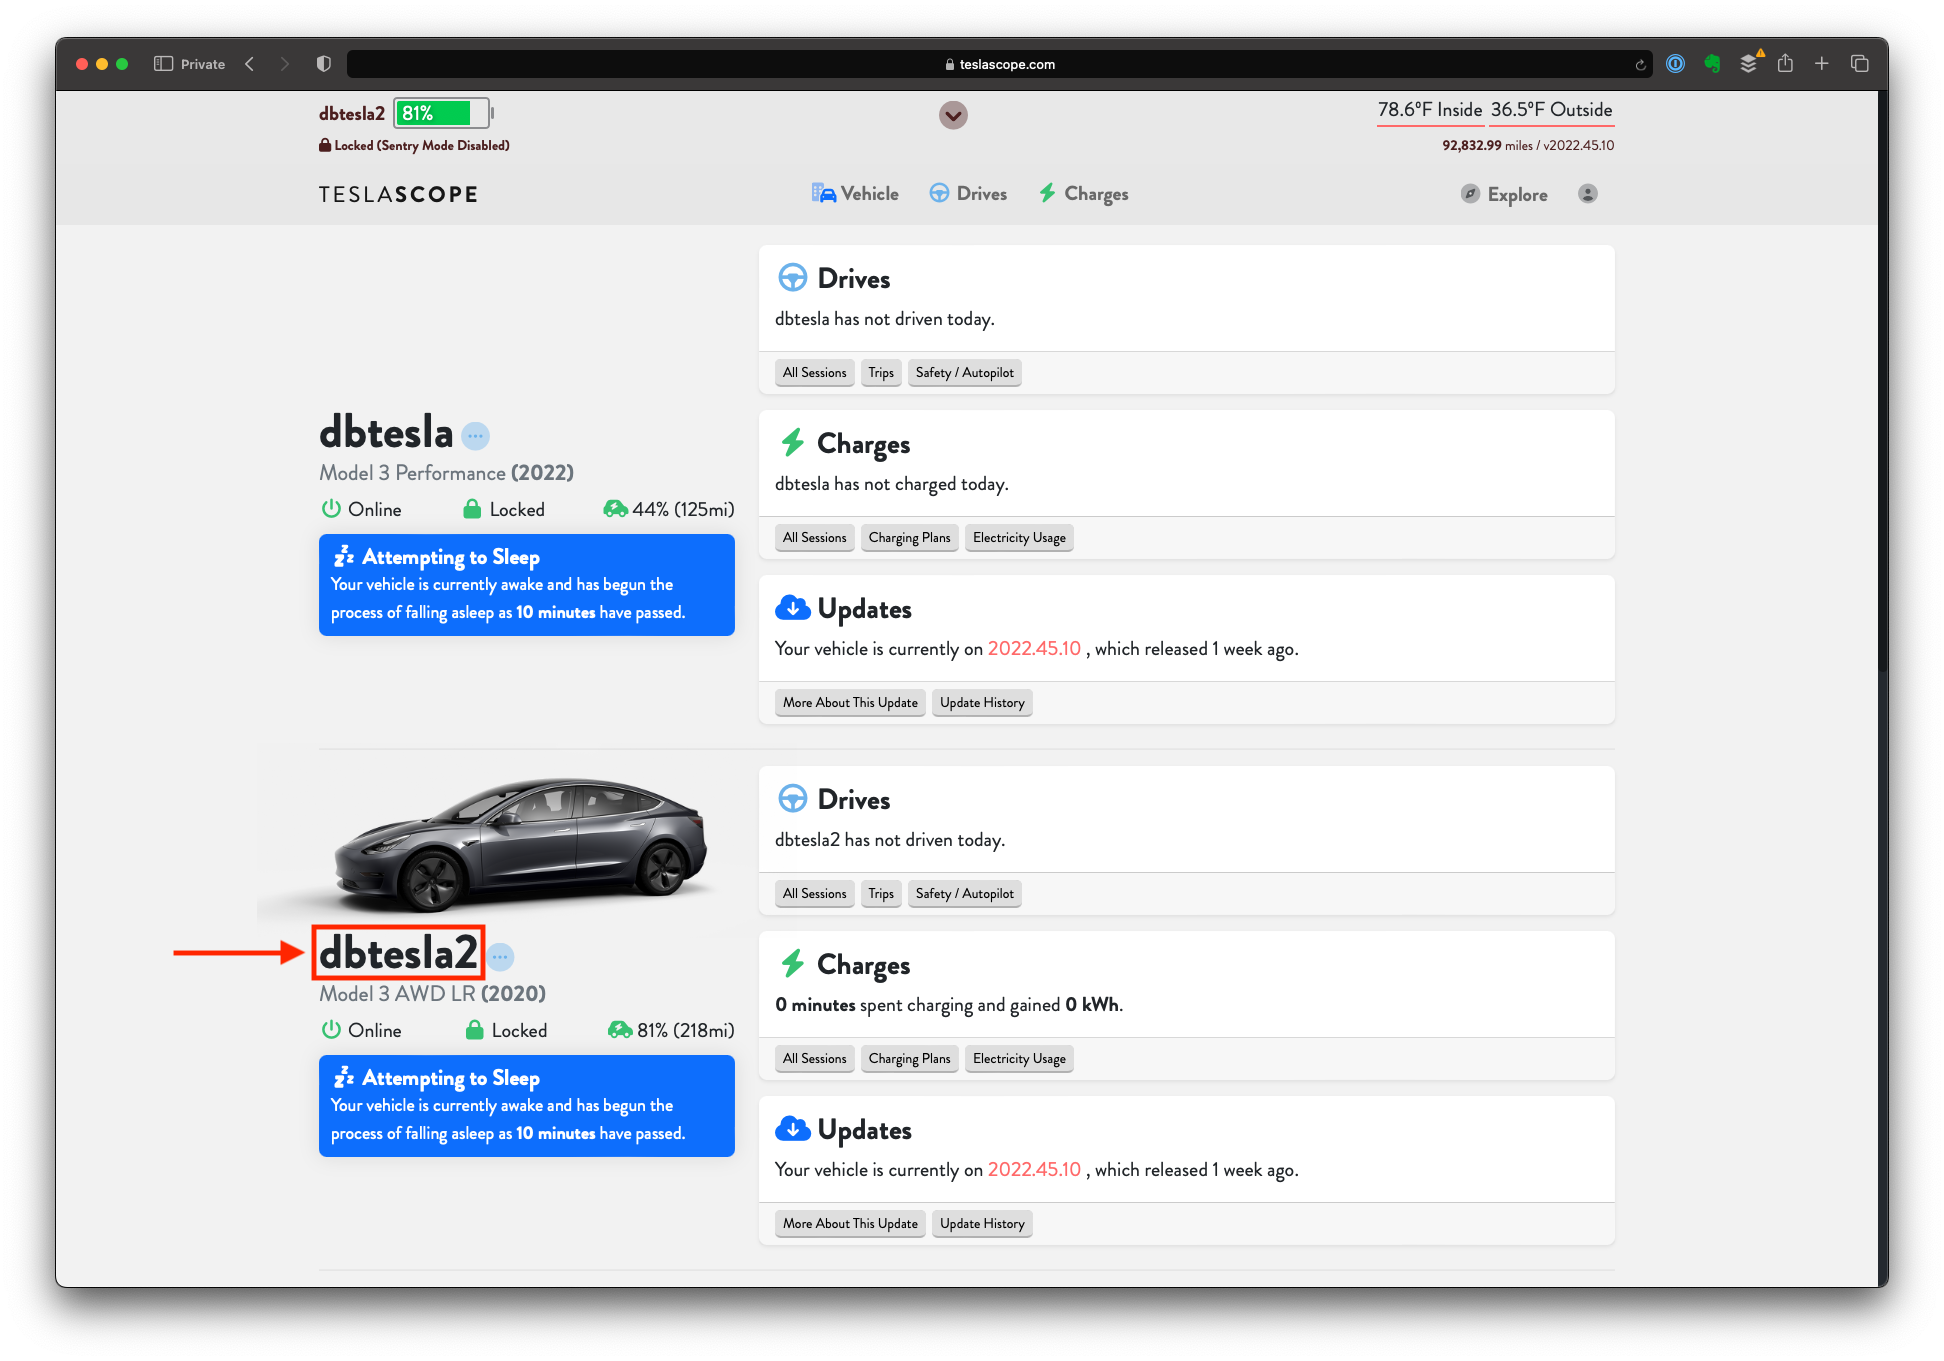
- Scroll down and click the light blue circle with 3 dots next to the vehicle’s name
- Scroll down and click the “Settings” button
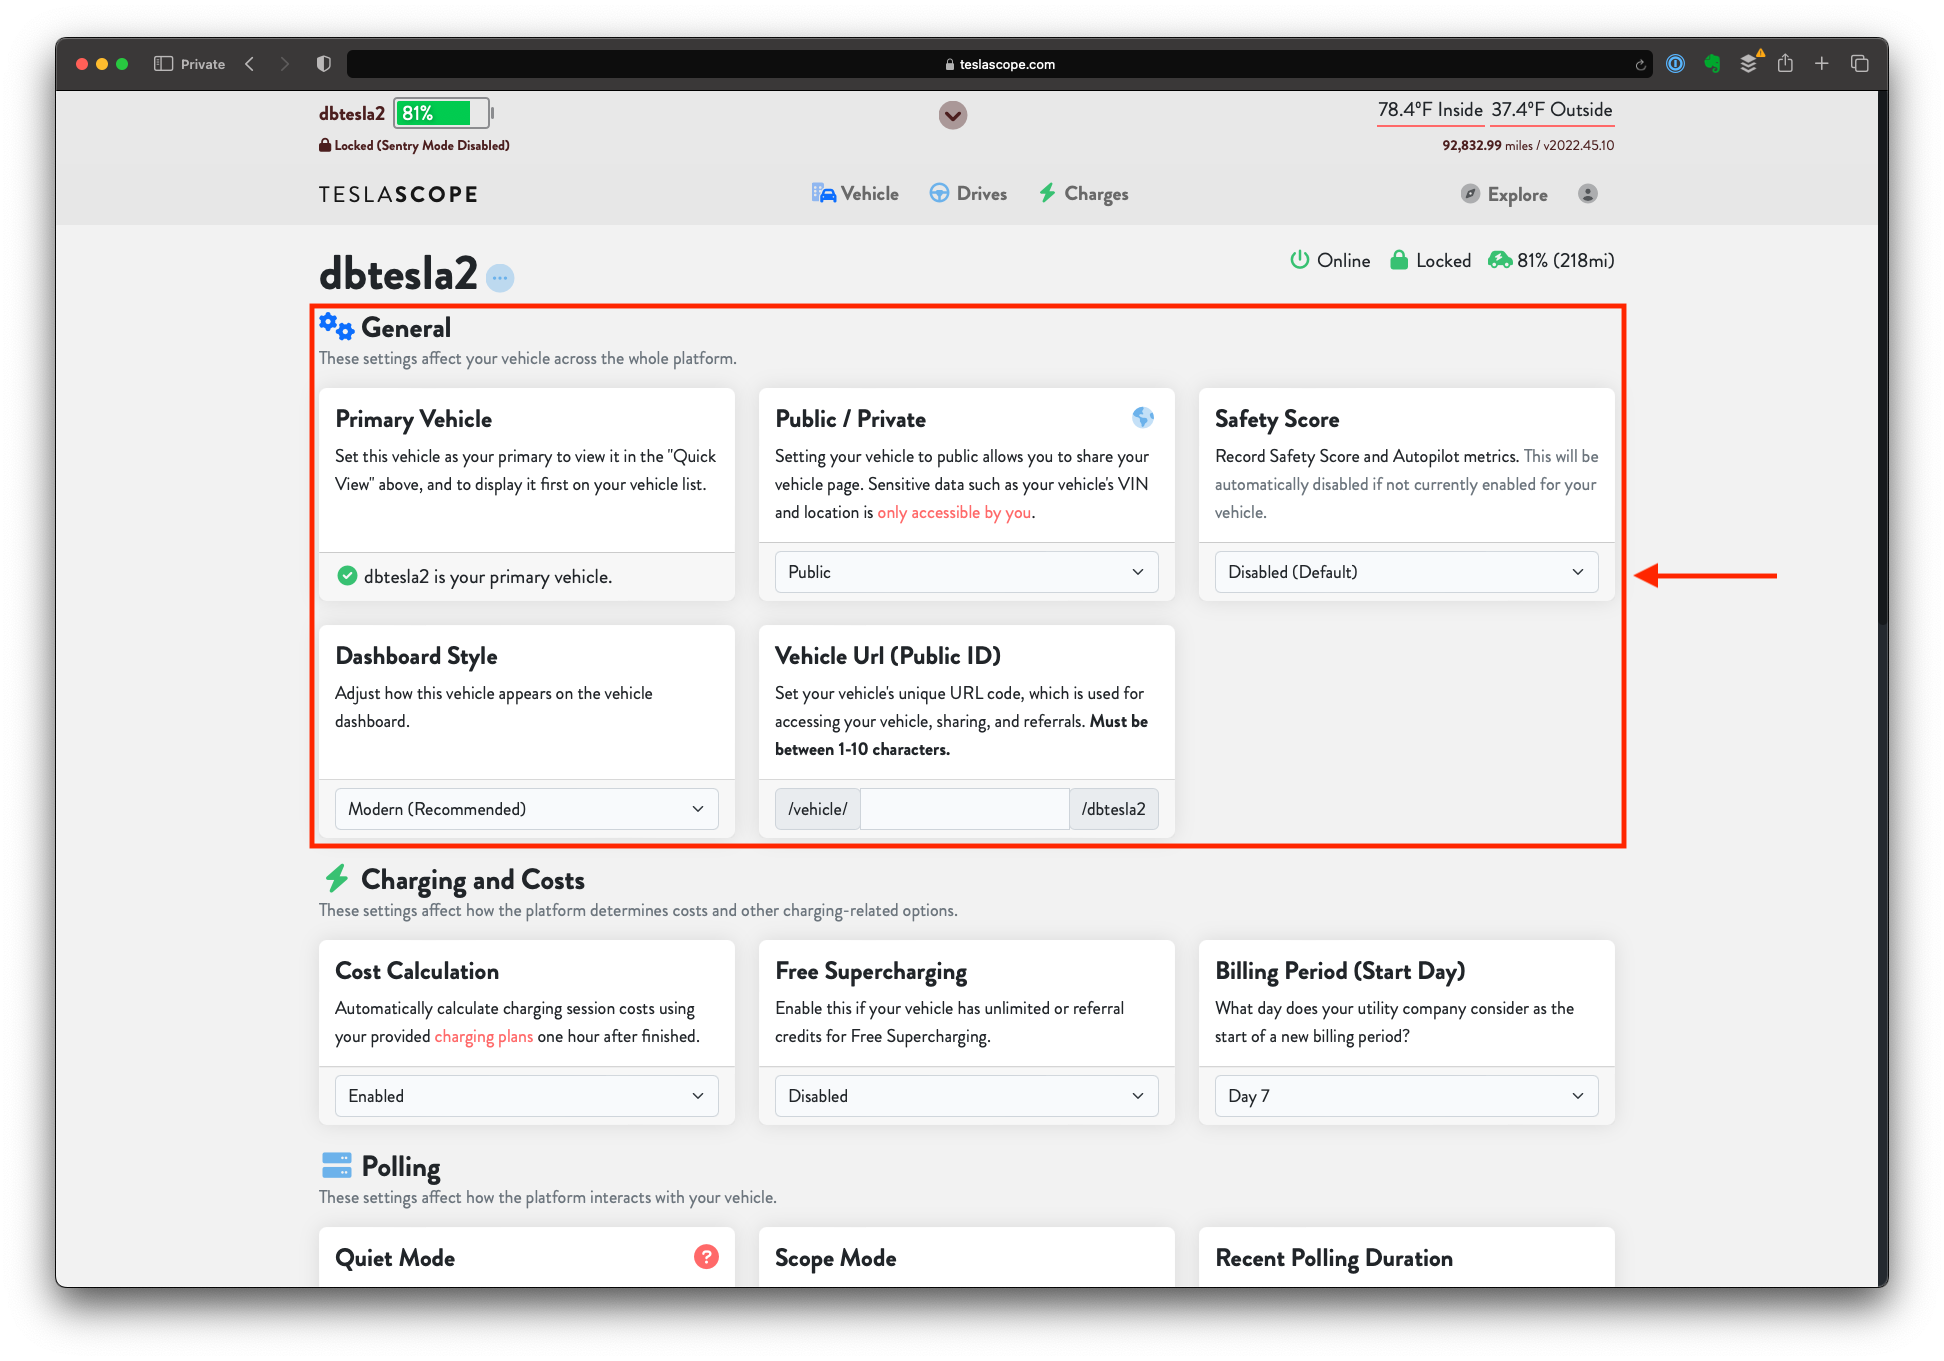
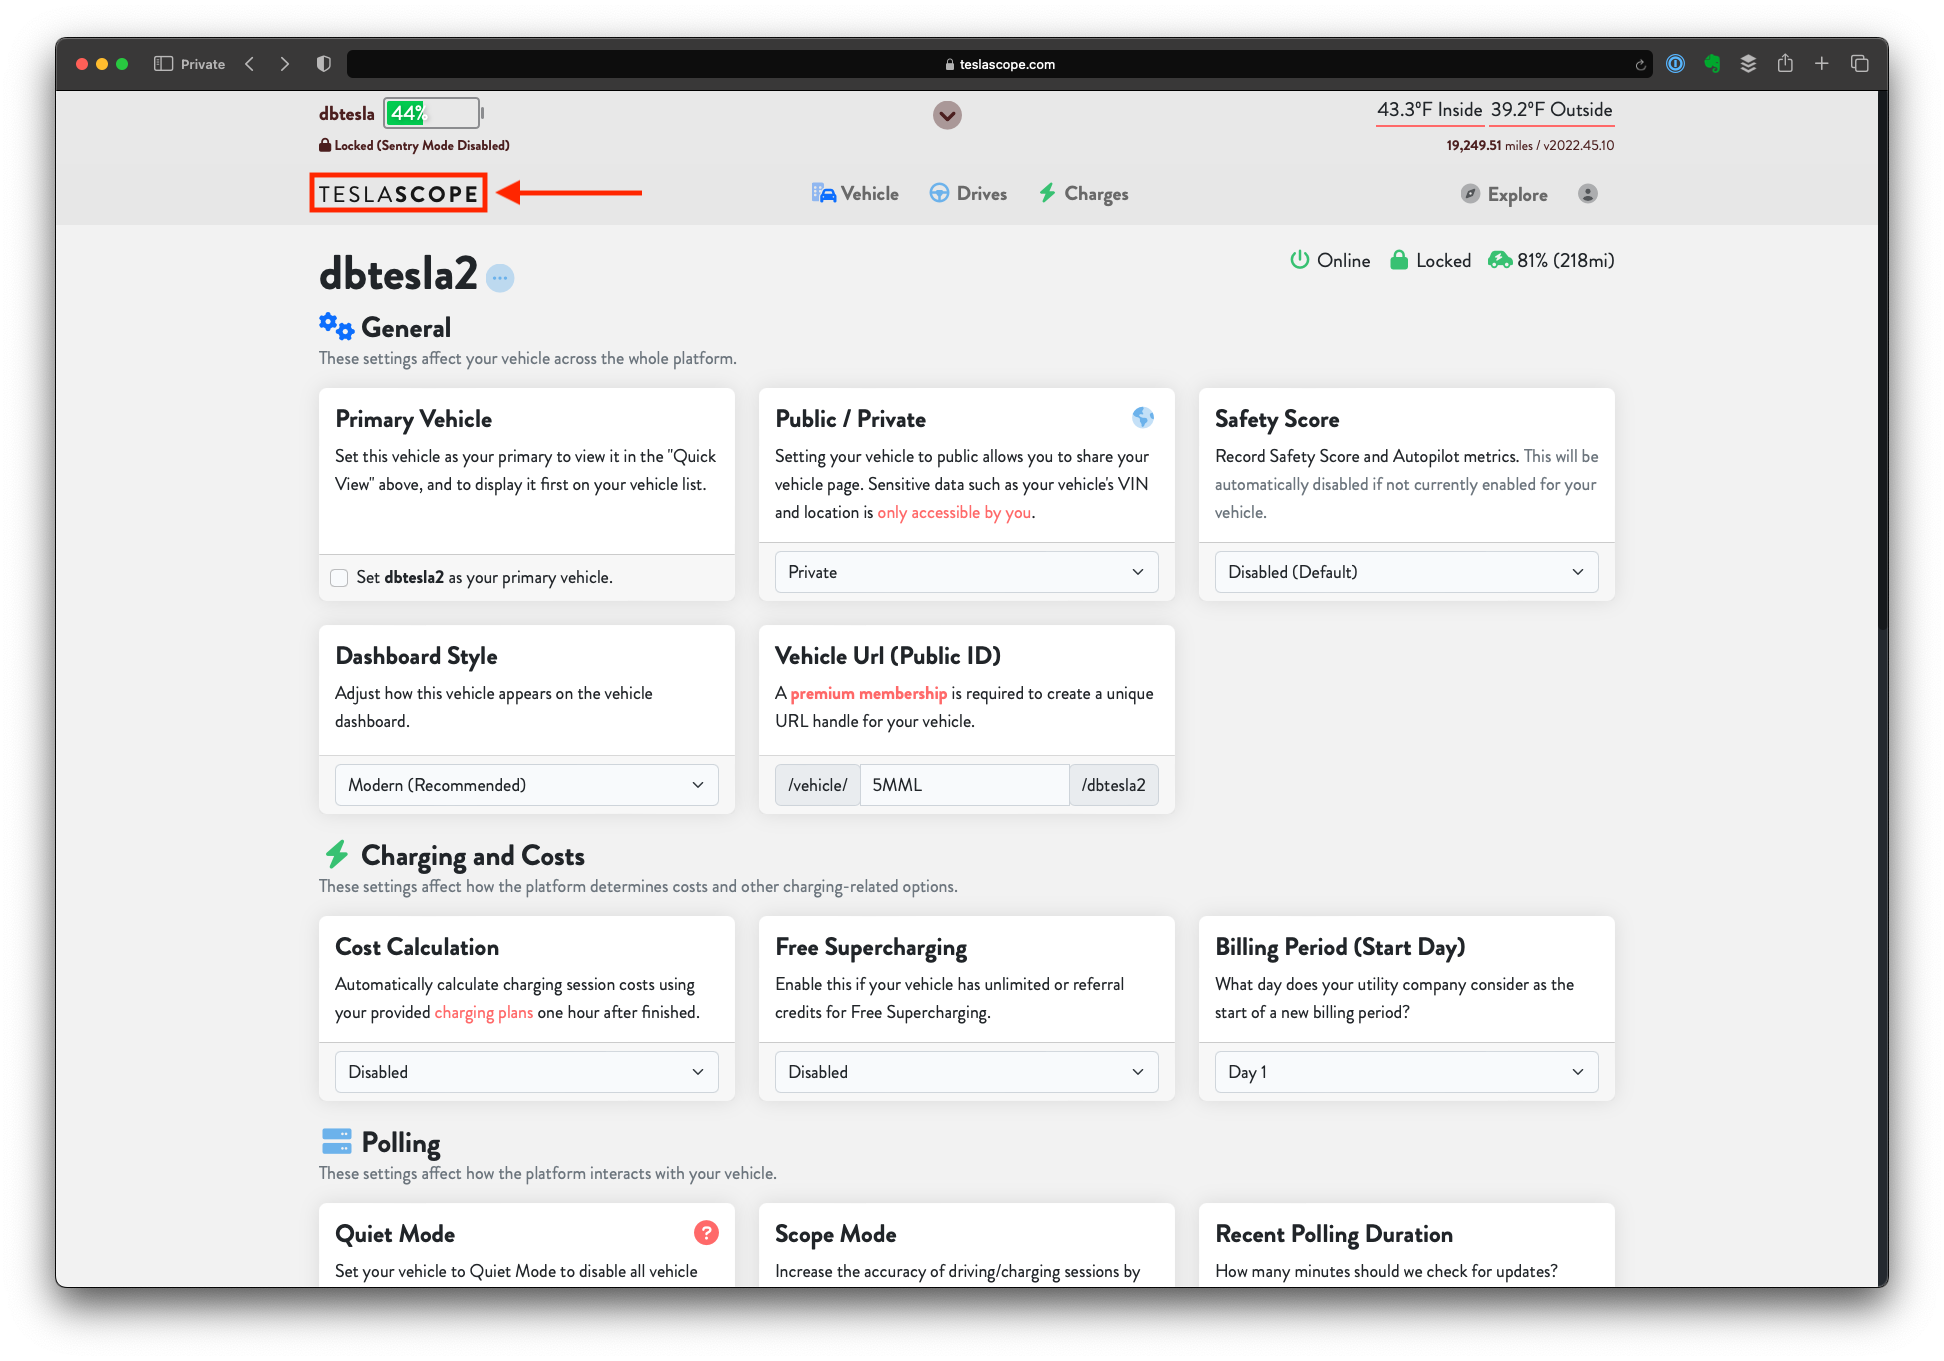
- You should now see a page like this:
- Primary Vehicle - If you have multiple vehicles and want to set this particular vehicle as your default in Teslascope, click on the checkbox next to “Set <vehicle_name> as your primary vehicle.”
- Public / Private - If you want to participate in Teslascope’s public statistics & leaderboards pages, you can set your vehicle to public by clicking on the dropdown in the “Public / Private” box that says “Private” and by selecting “Public” from the list
- NOTE: Sensitive data such as your vehicle’s VIN and location is only accessible by you.
- Safety Score - If you want Teslascope to record your Safety Score data you can enable this functionality by clicking on the drop down that says “Disabled” in the “Safety Score” box and by selecting “Enabled” from the list
- Once you are happy with these settings click the “Update Settings” button
- Scroll down and click the light blue circle with 3 dots next to the vehicle’s name
Charging and Costs
- Click the “Charging” button next to “General”
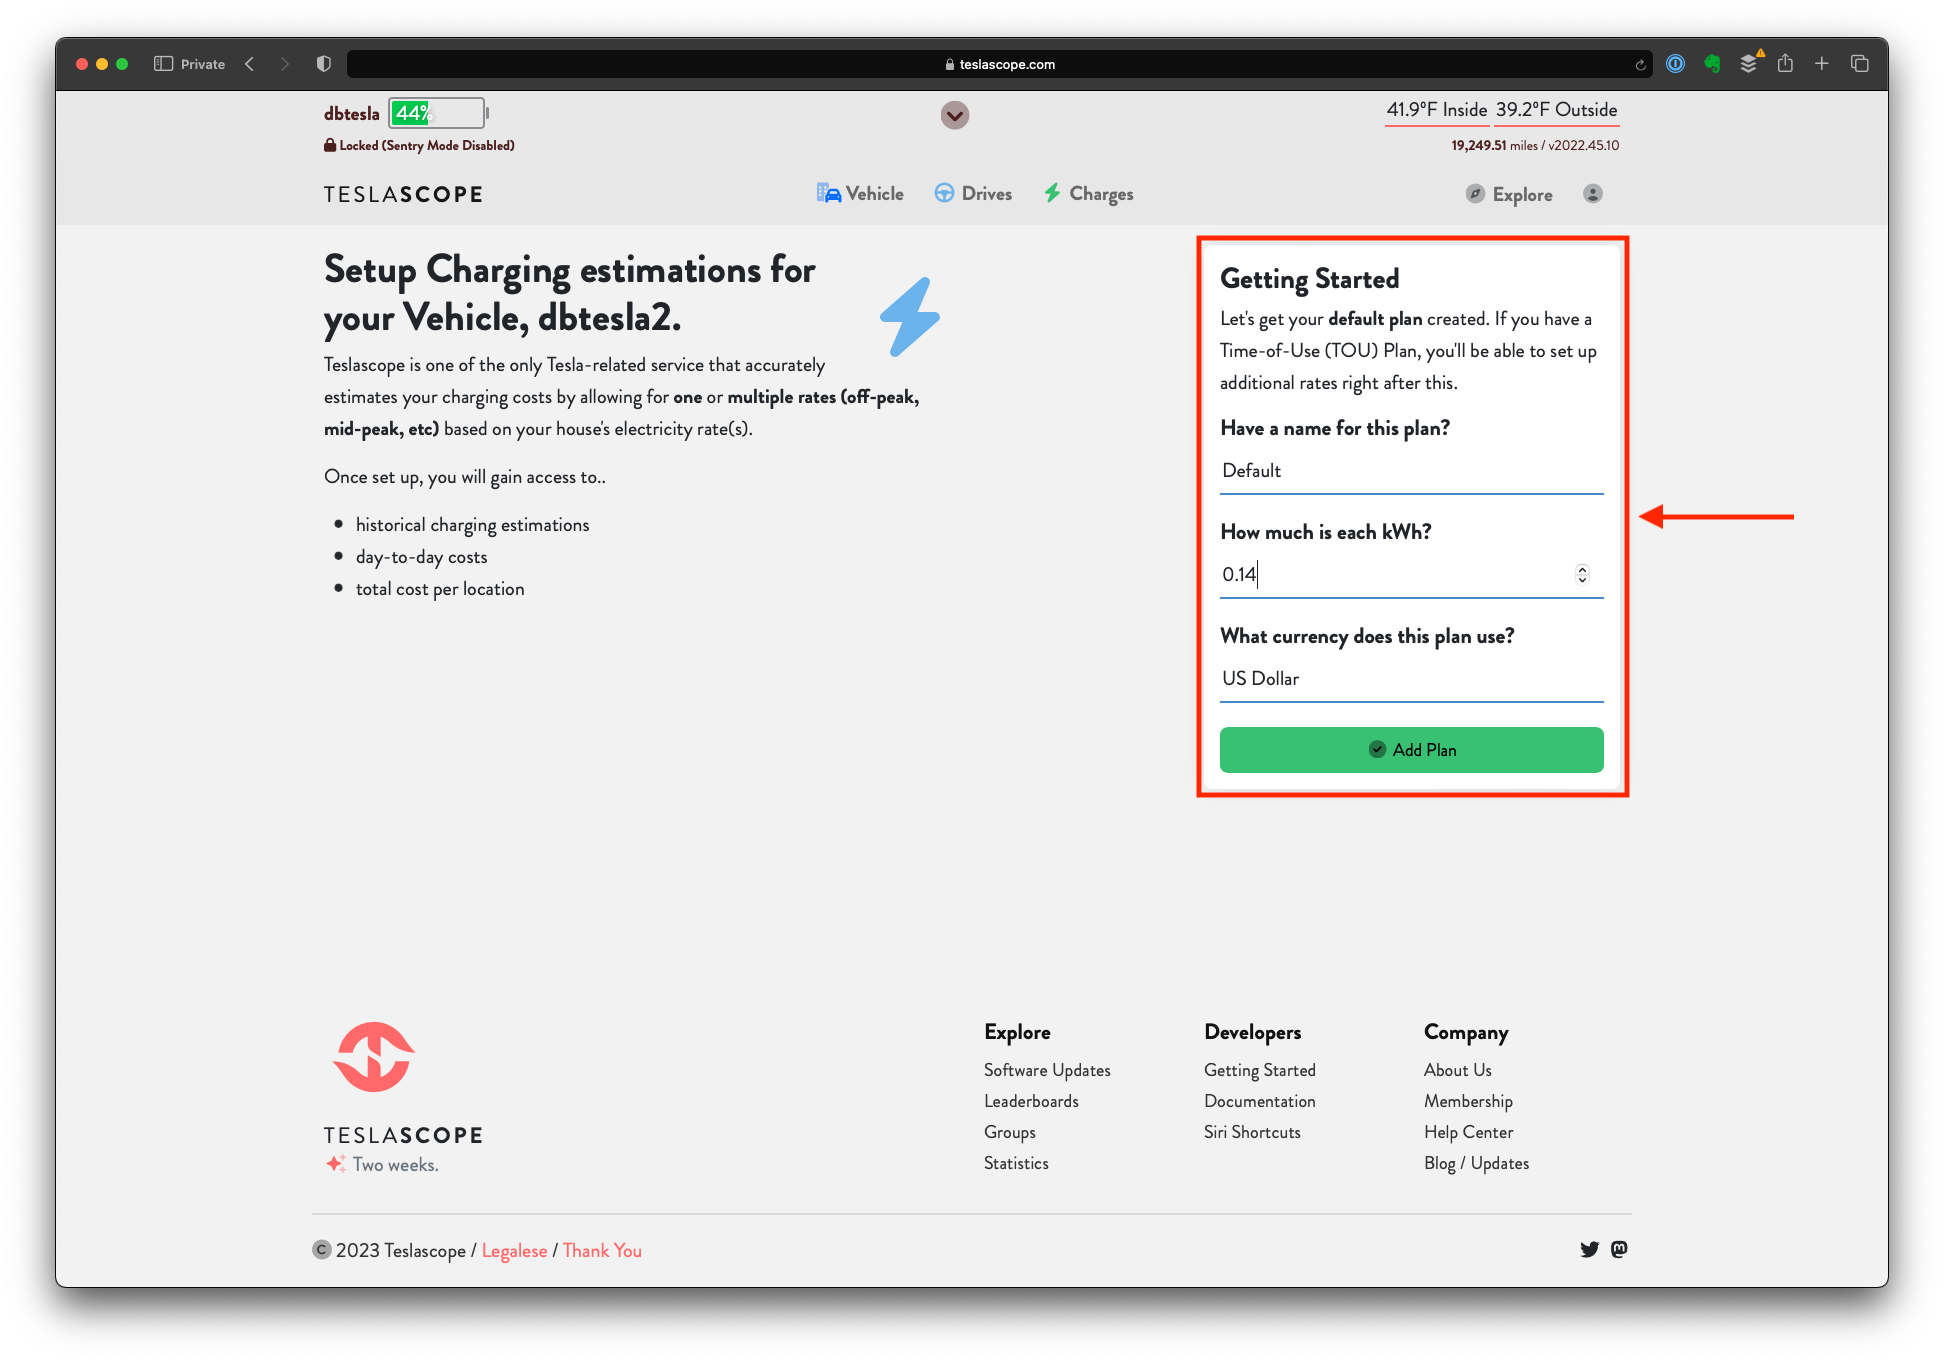
- Cost Calculation - If you would Teslascope to automatically calculate charging session costs you will need to create a charging plan that includes things like your home utility rate (ex. $0.14 / kWh).
- To create a default charging plan, click the “charging plans” link
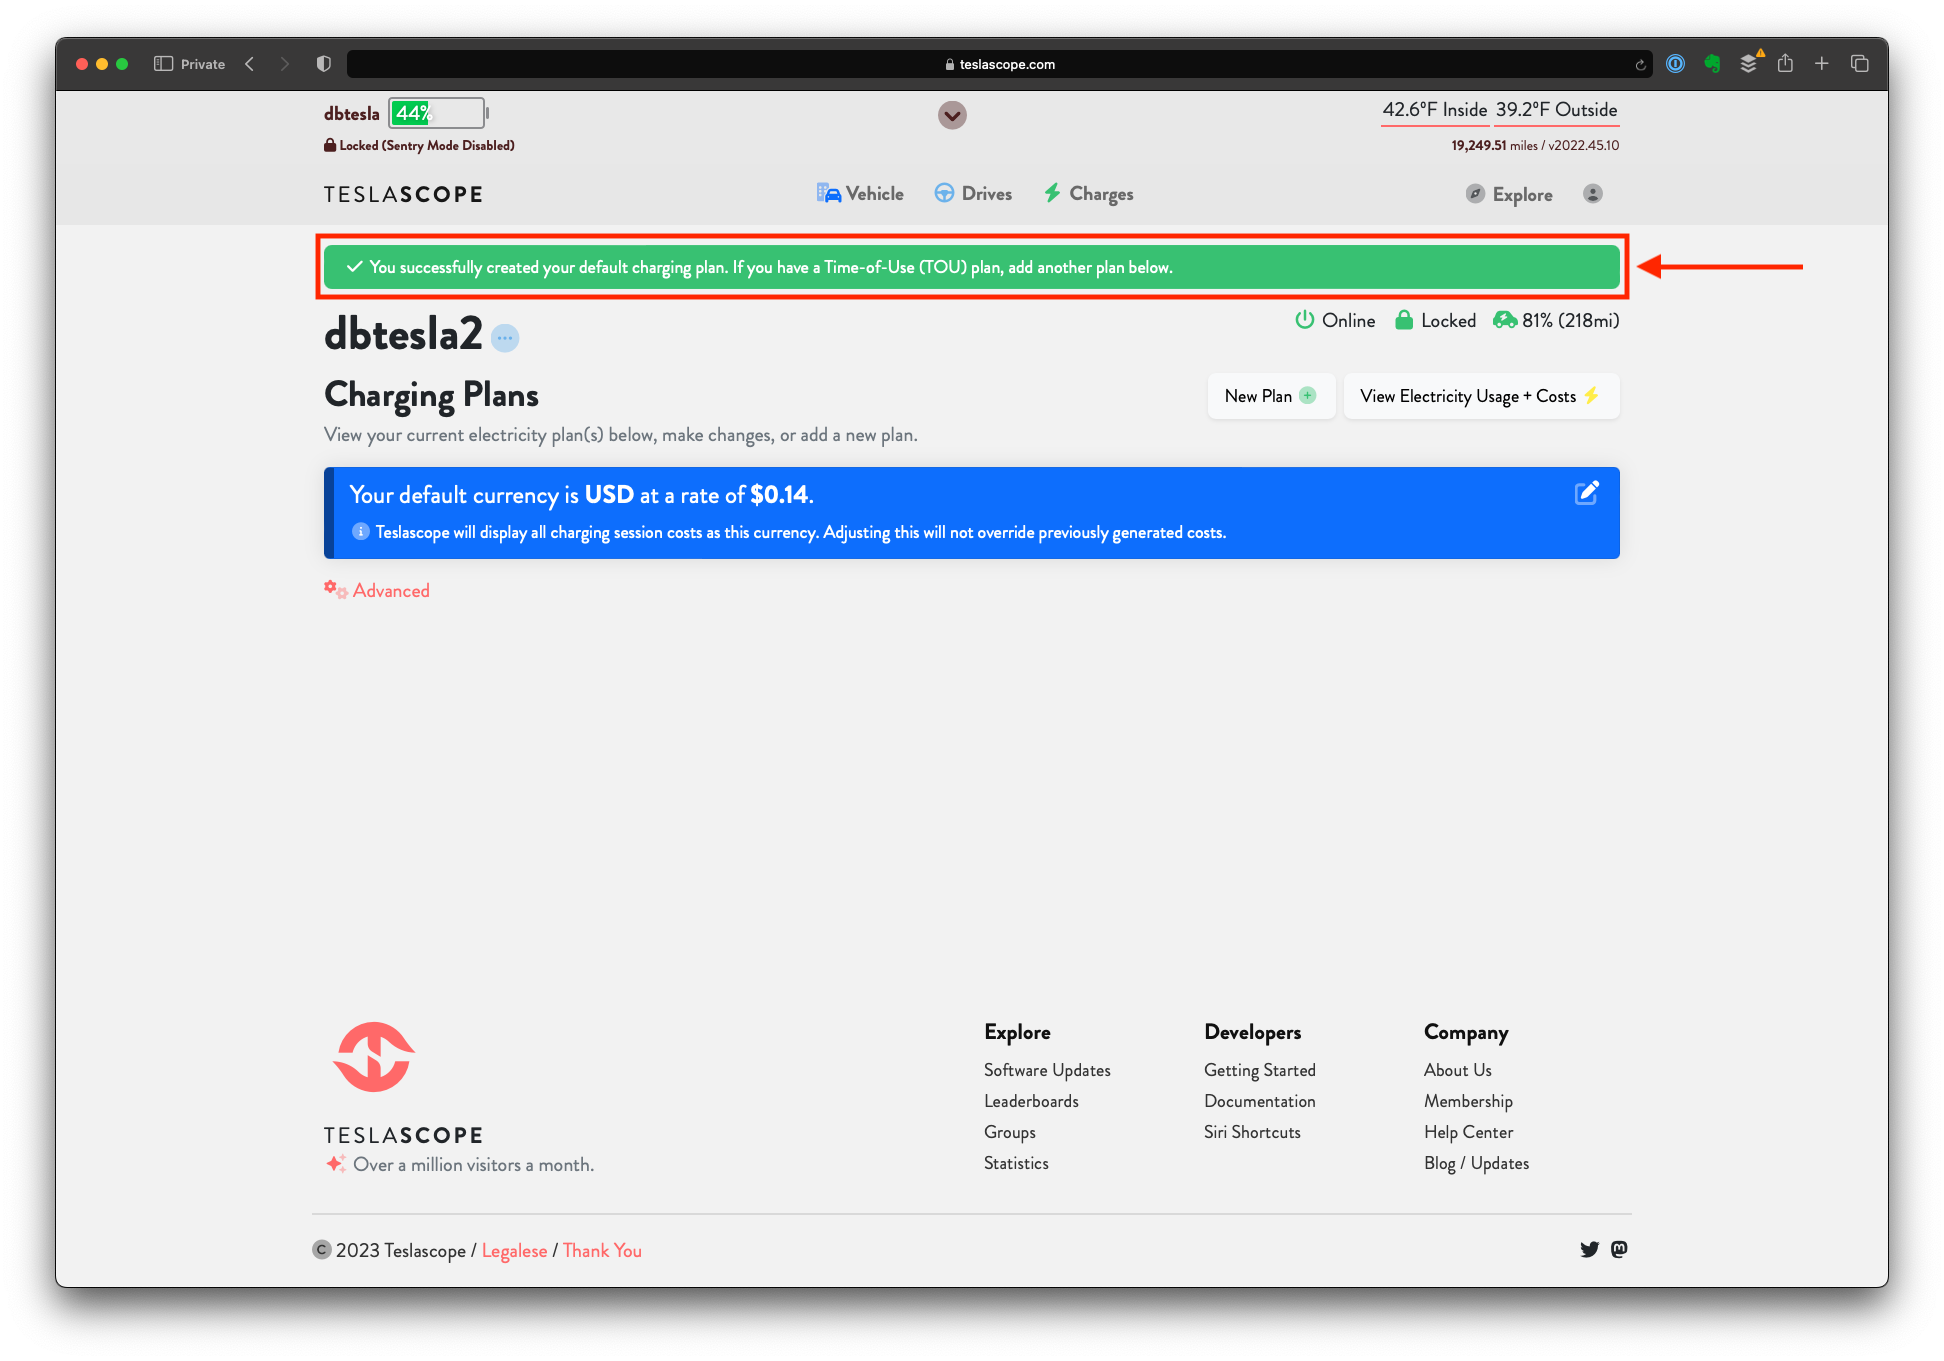
- Complete all 3 fields and click the “Add Plan” button to create the default charging plan
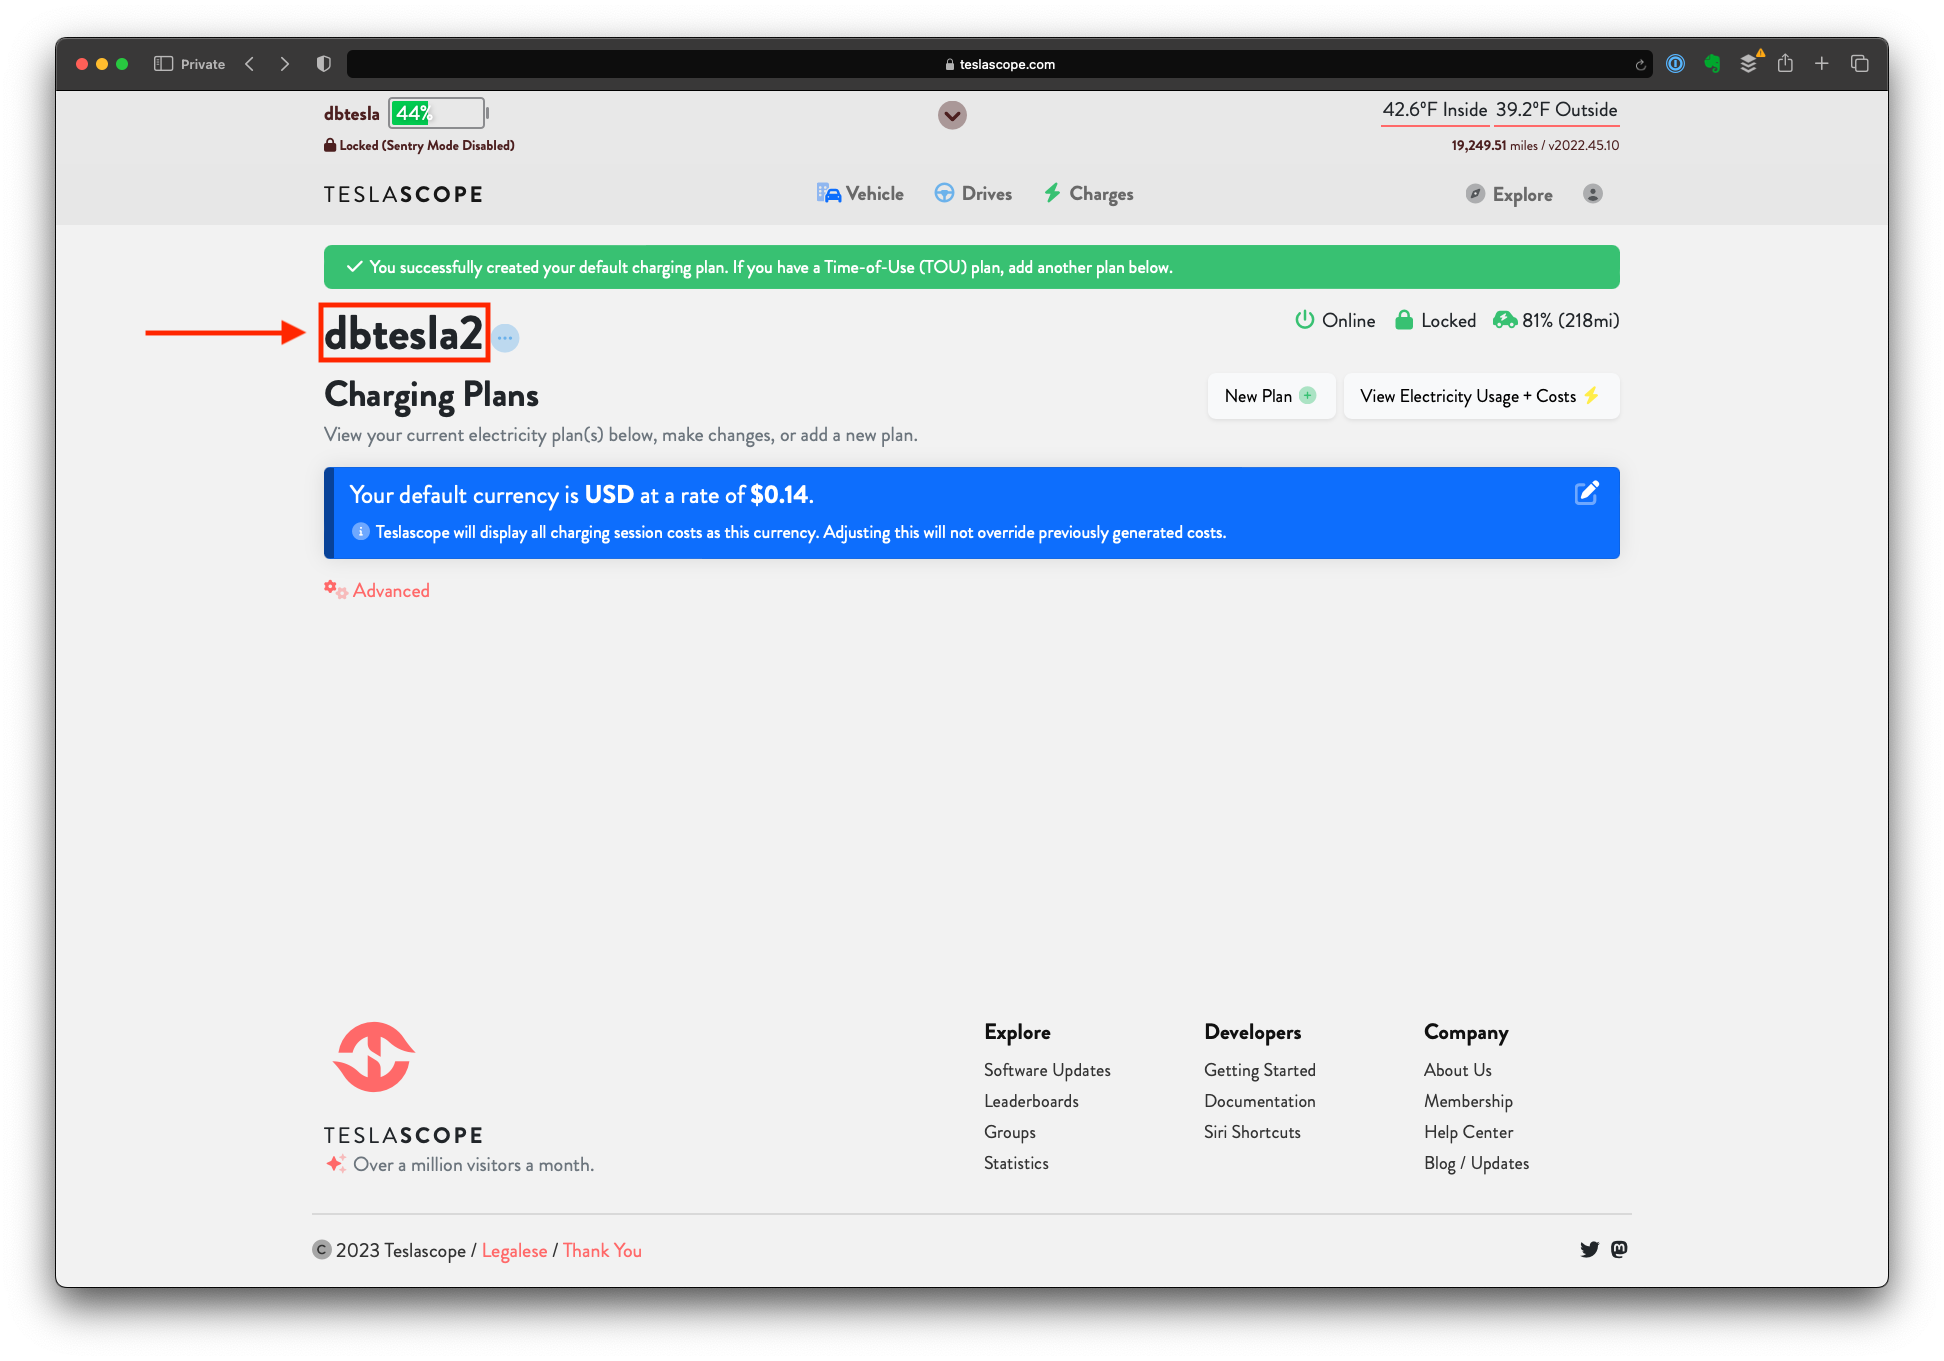
- Click on the vehicle’s name
- Scroll down and click on the “Settings” button
- Scroll down to the “Charging and Costs” section
- Click the dropdown that says “Disabled” in the “Cost Calculation” box and select “Enabled” from the list
- Billing Period (Start Day) - Specify the start day of your utility bill by clicking the dropdown that says “Day x” and by selecting the correct date that aligns with your utility bill
- Free Supercharging - If you have Free Supercharging on your vehicle click the dropdown that says “Disabled” in the “Free Supercharging” box and select “Enabled” from the list
- NOTE: The aforementioned settings are saved as soon as you make them (new in v4)
Polling
- Unless you have a good reason to change the settings under the “Polling” settings section, I would advise you to accept the default values.
Advanced
- Unless you have a good reason to change the settings under the “Advanced” settings section, I would advise you to accept the default values.
Locations
- To ease reporting accuracy especially when it comes to charging at home, you will want to define your home location
- To do so, first click on “TESLASCOPE” to return to the main dashboard
- To do so, click on the “vehicle name”
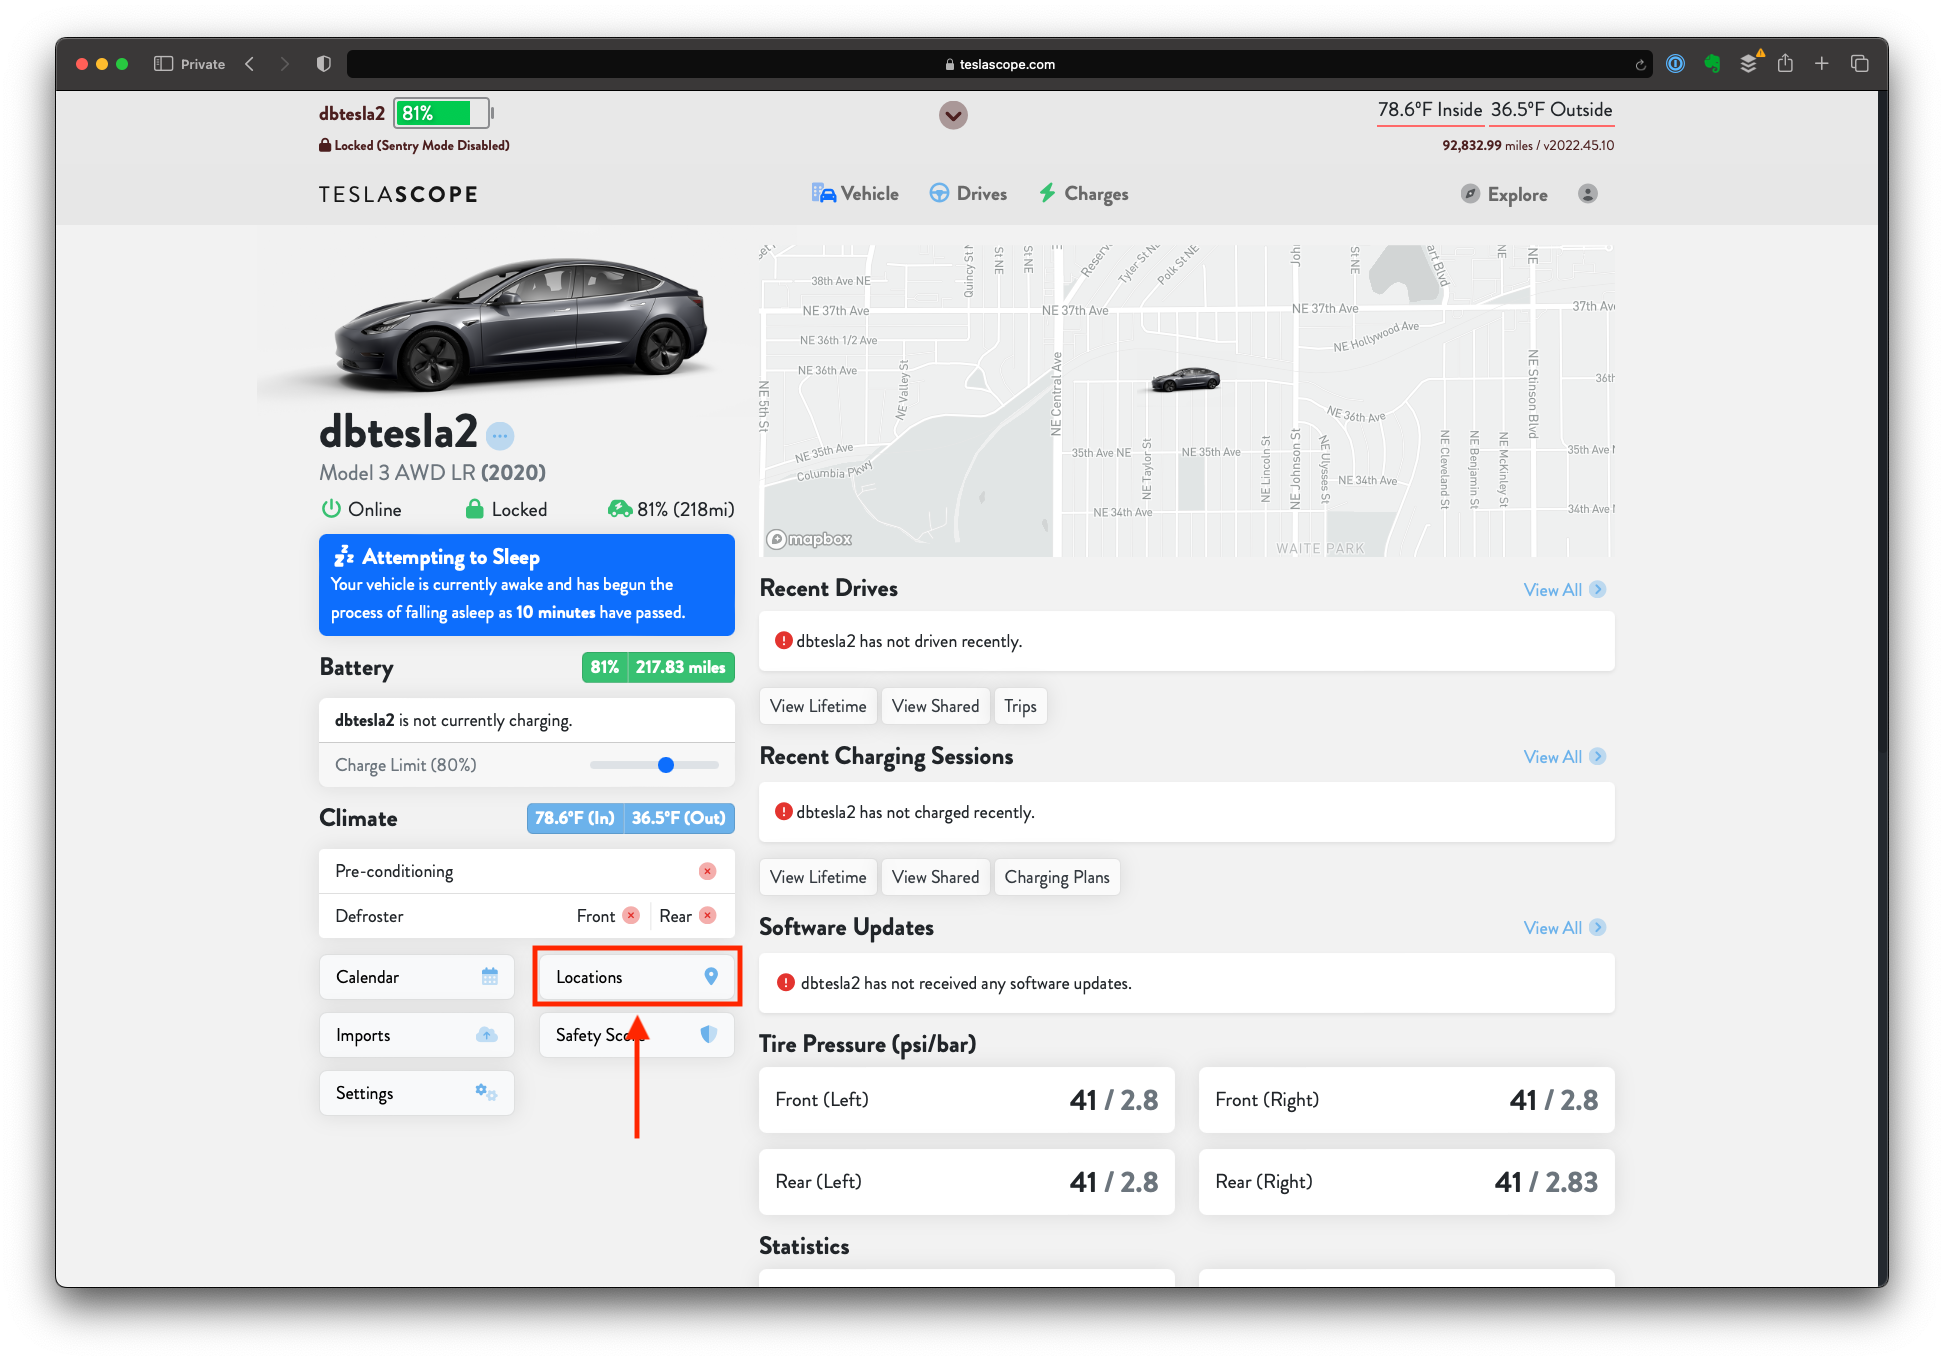
- Scroll down and click on the “Locations” button
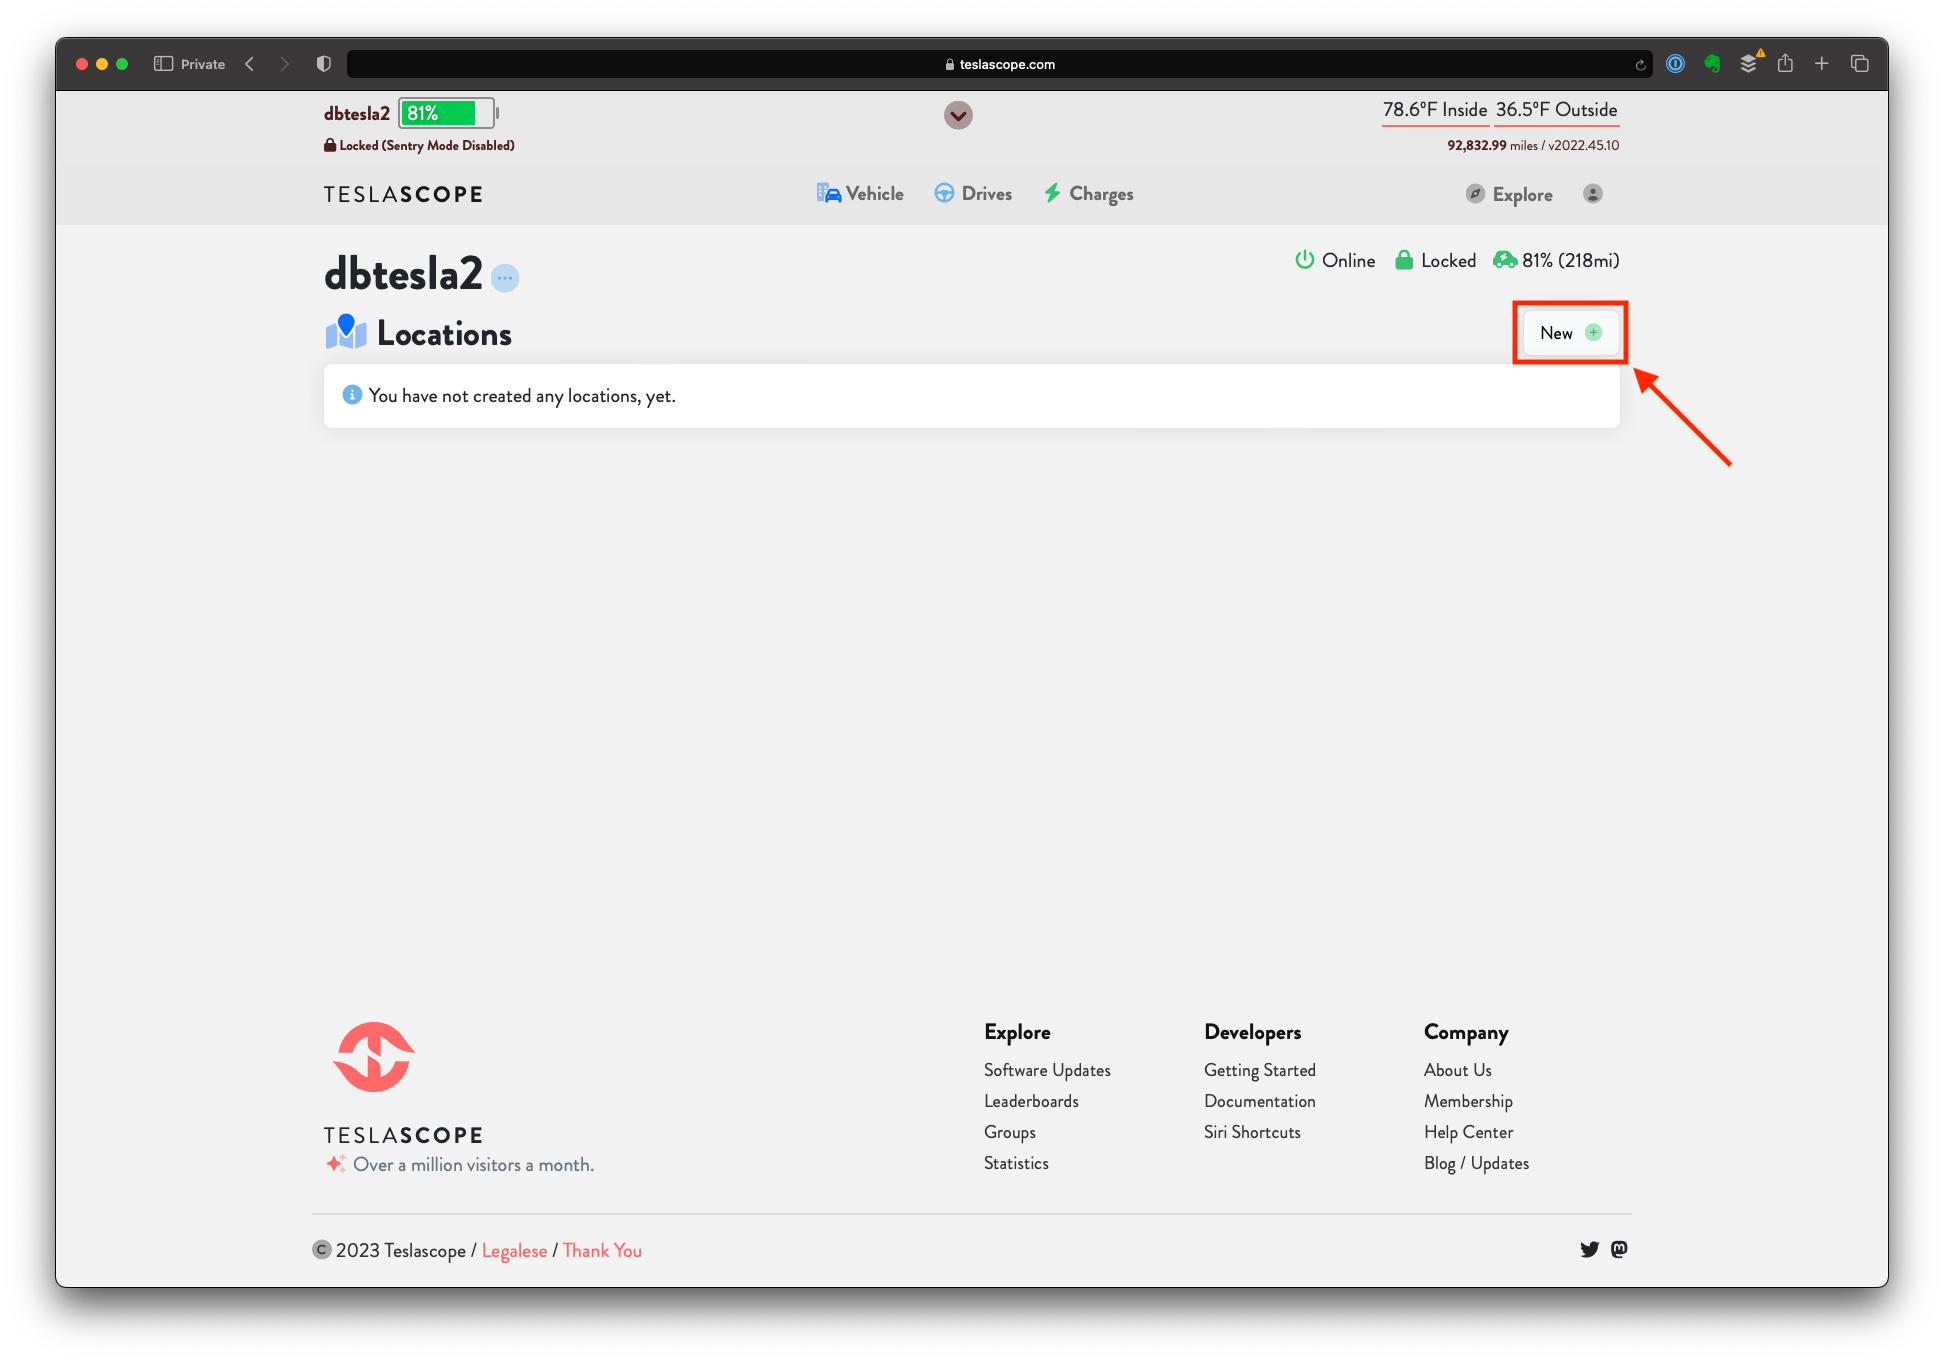
- Click the “New” button
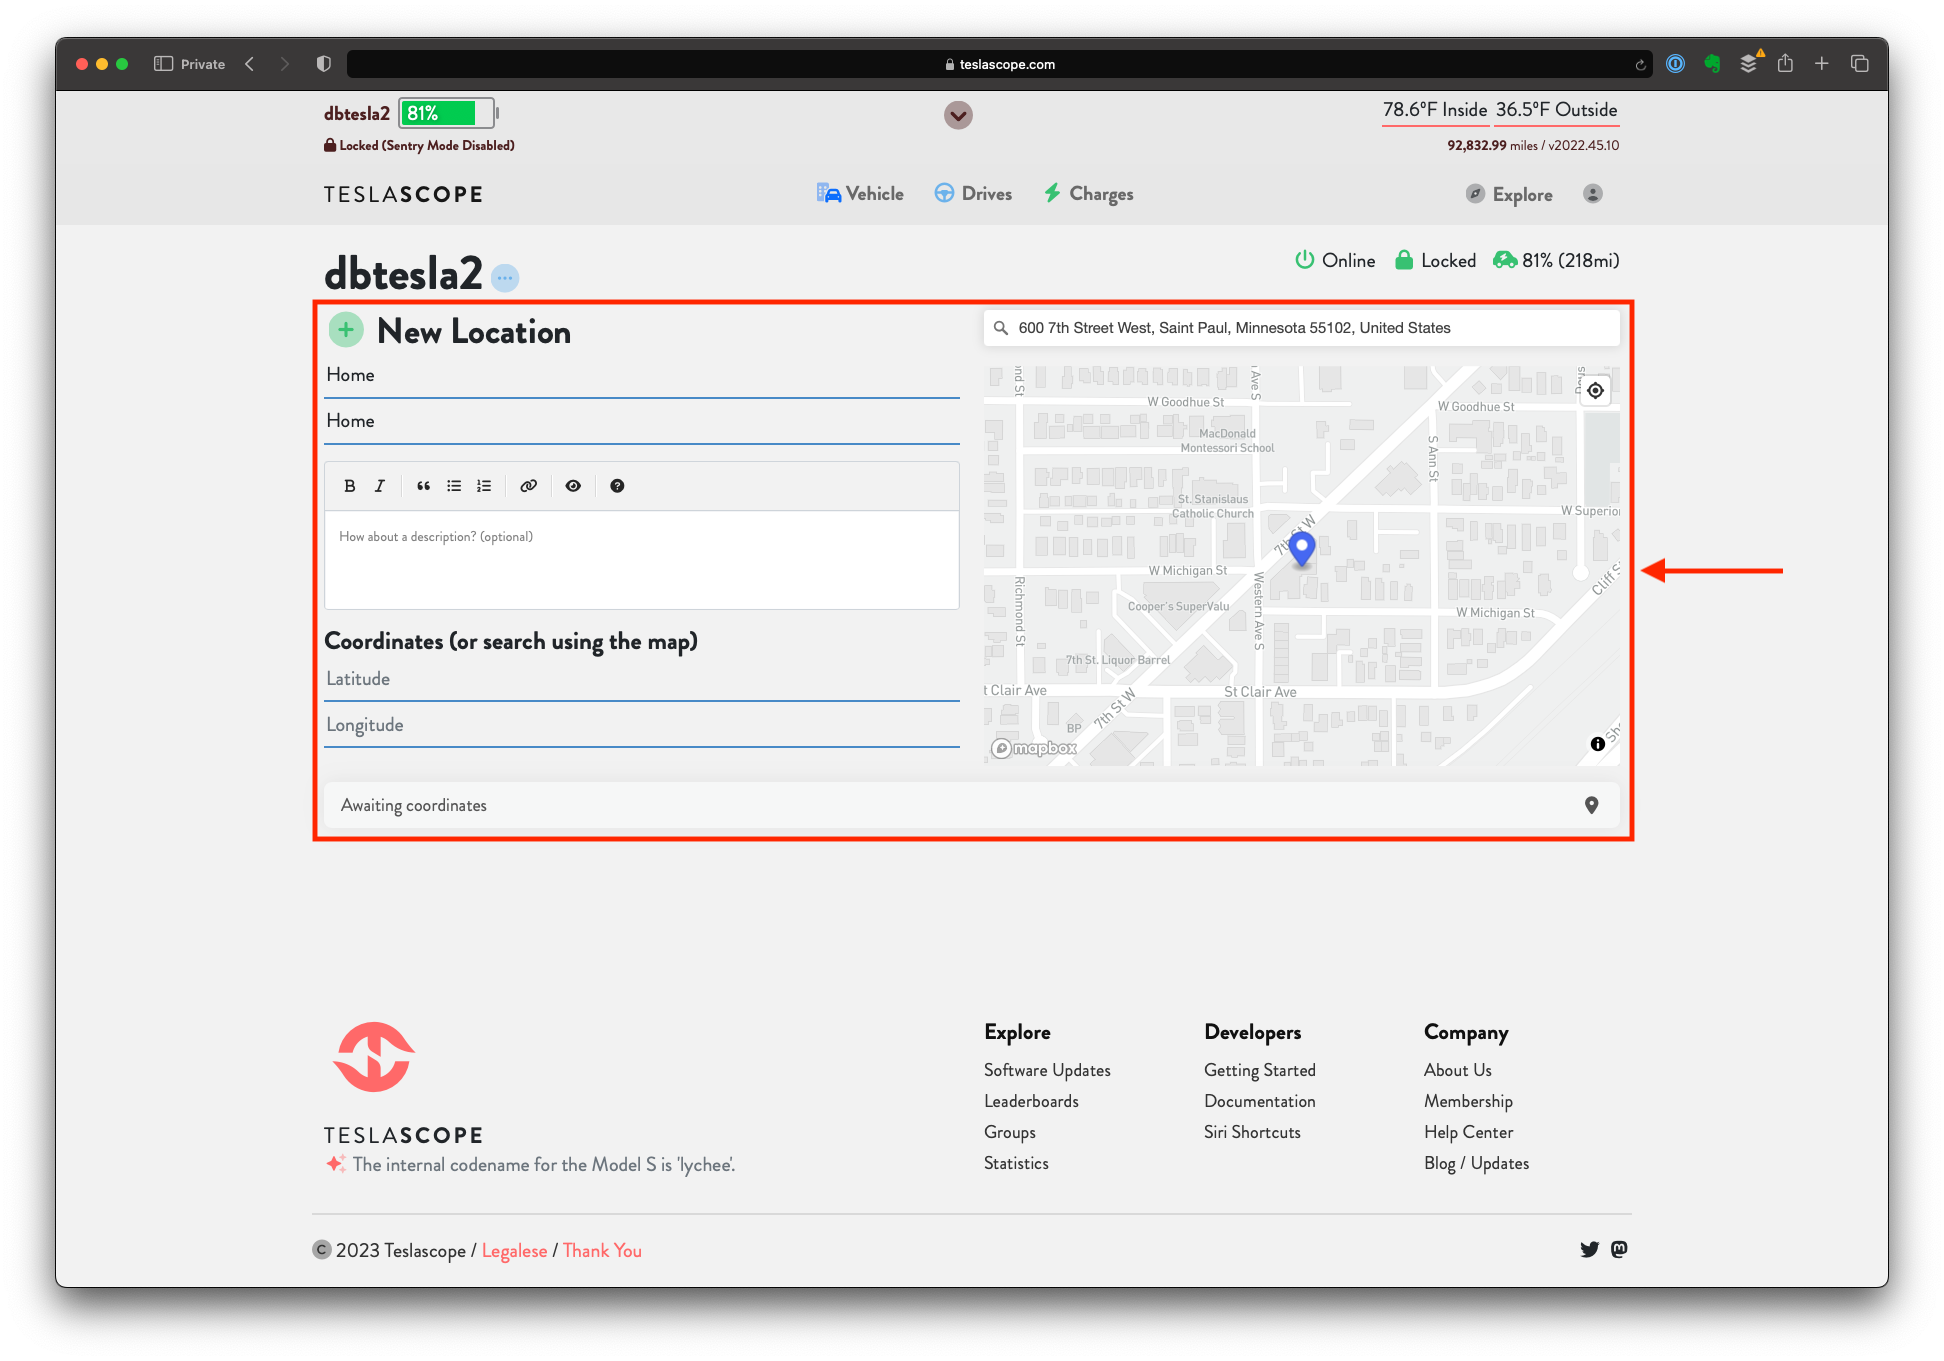
- Populate the appropriate fields that match your home location and click the “Create” button at the bottom when you are ready to proceed

Power User Functionality
- Data Import From TeslaFi.com (For existing TeslaFi users)
- Export (from TeslaFi)
- Using a web browser, navigate to TeslaFI.com and login to your account
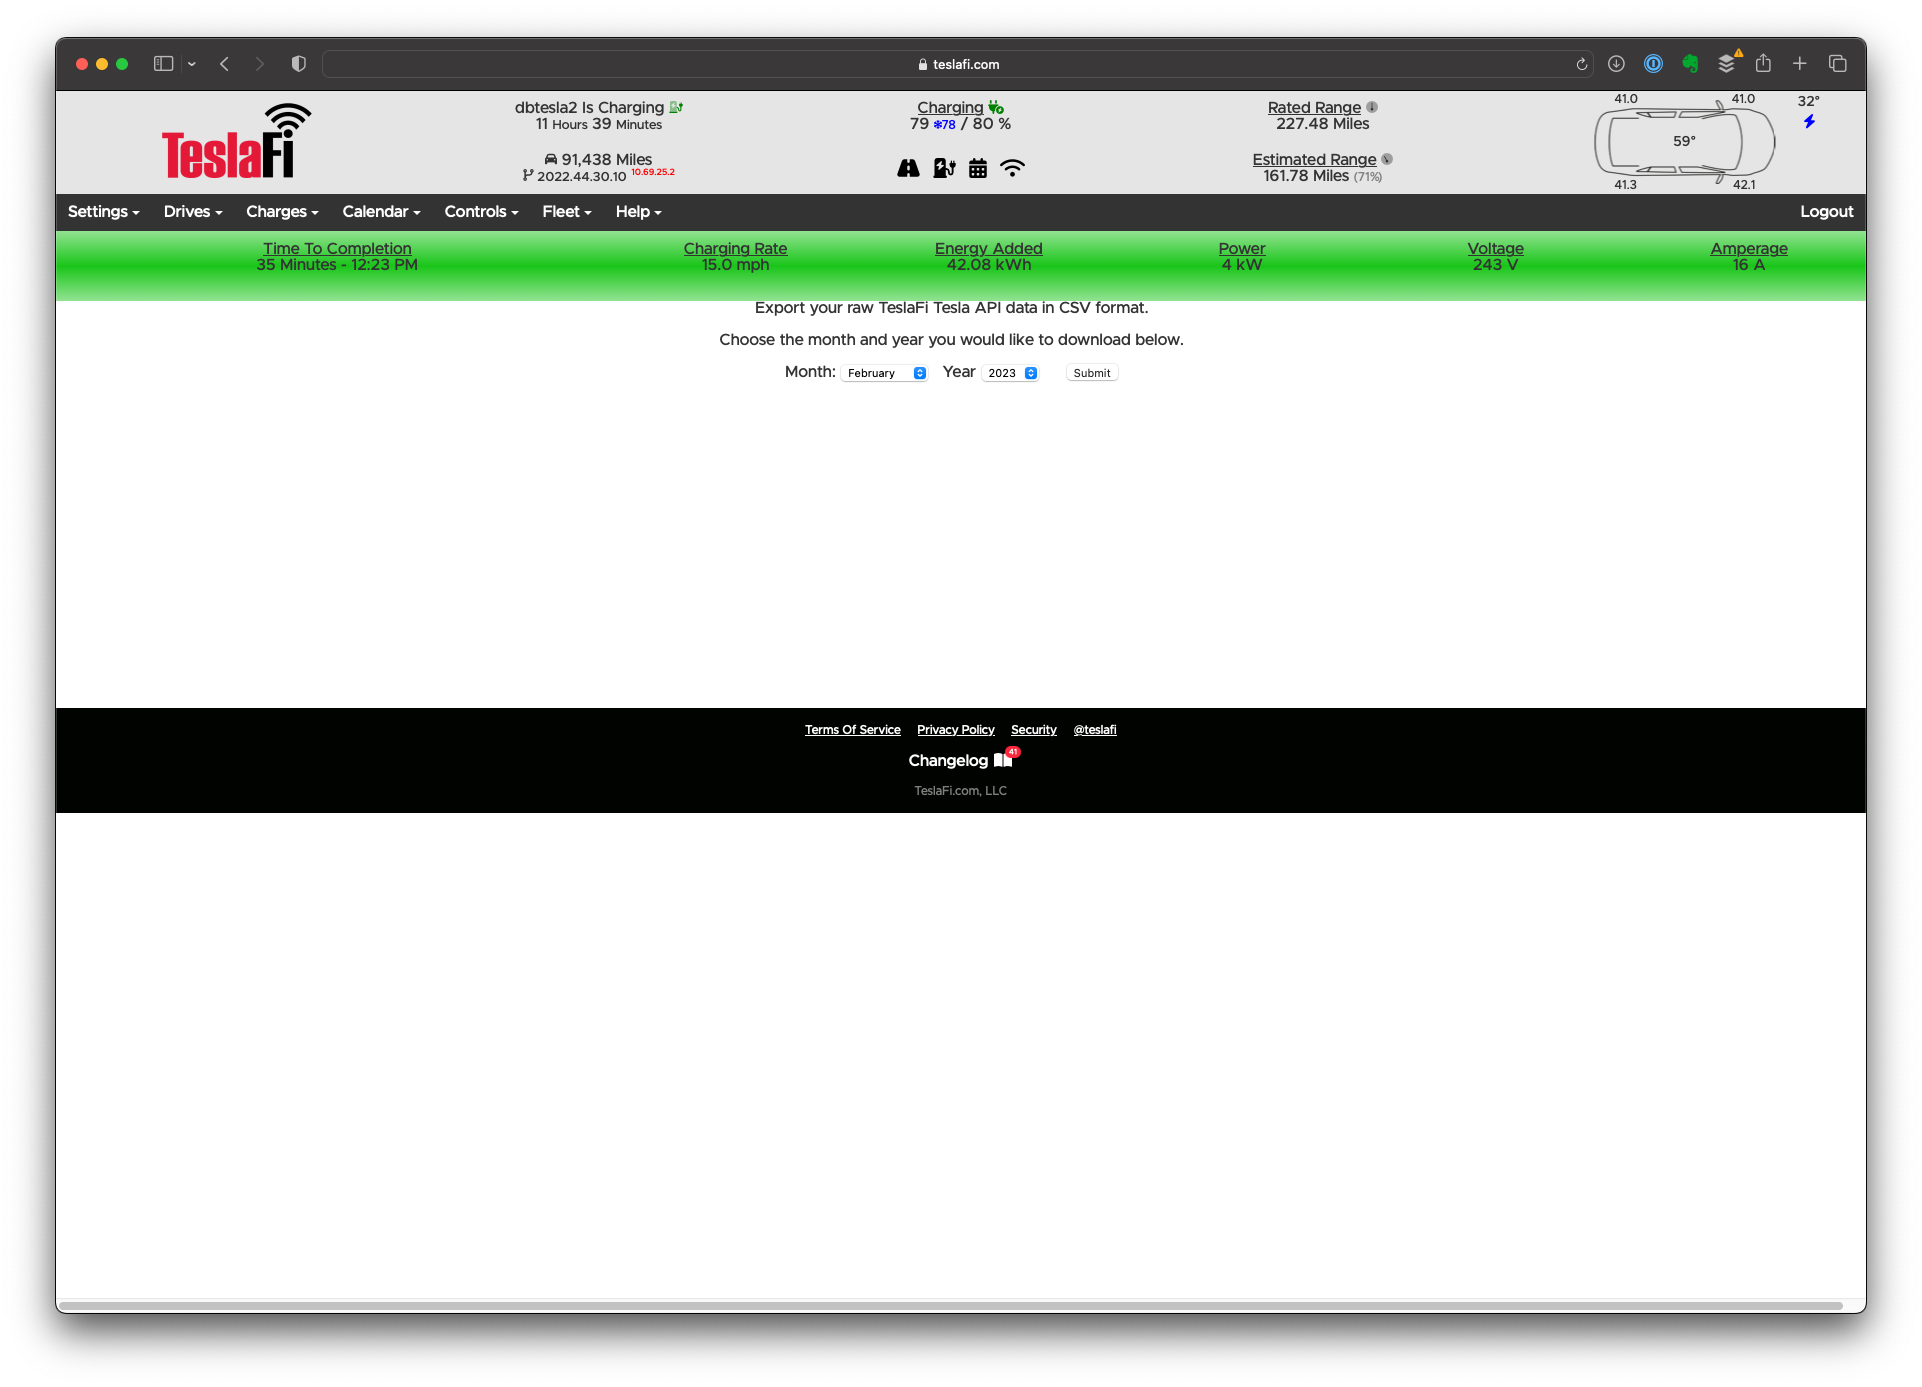
- Once you are logged into TeslaFi, navigate to “Settings” > “Account” > “Advanced” and click on “Download TeslaFi Data”
- NOTE: Unfortunately, TeslaFi only allows you to download 1 month of data at a time so you’ll have to rinse & repeat the following process for every month that you had TeslaFi connected to your Tesla vehicle(s).
- Select the appropriate Month & Year and click the “Submit” button
- NOTE: Make sure to save this file in a place where you can easily get to it
- Import (into Teslascope)
- Using a web browser, navigate to Teslascope.com and login to your account
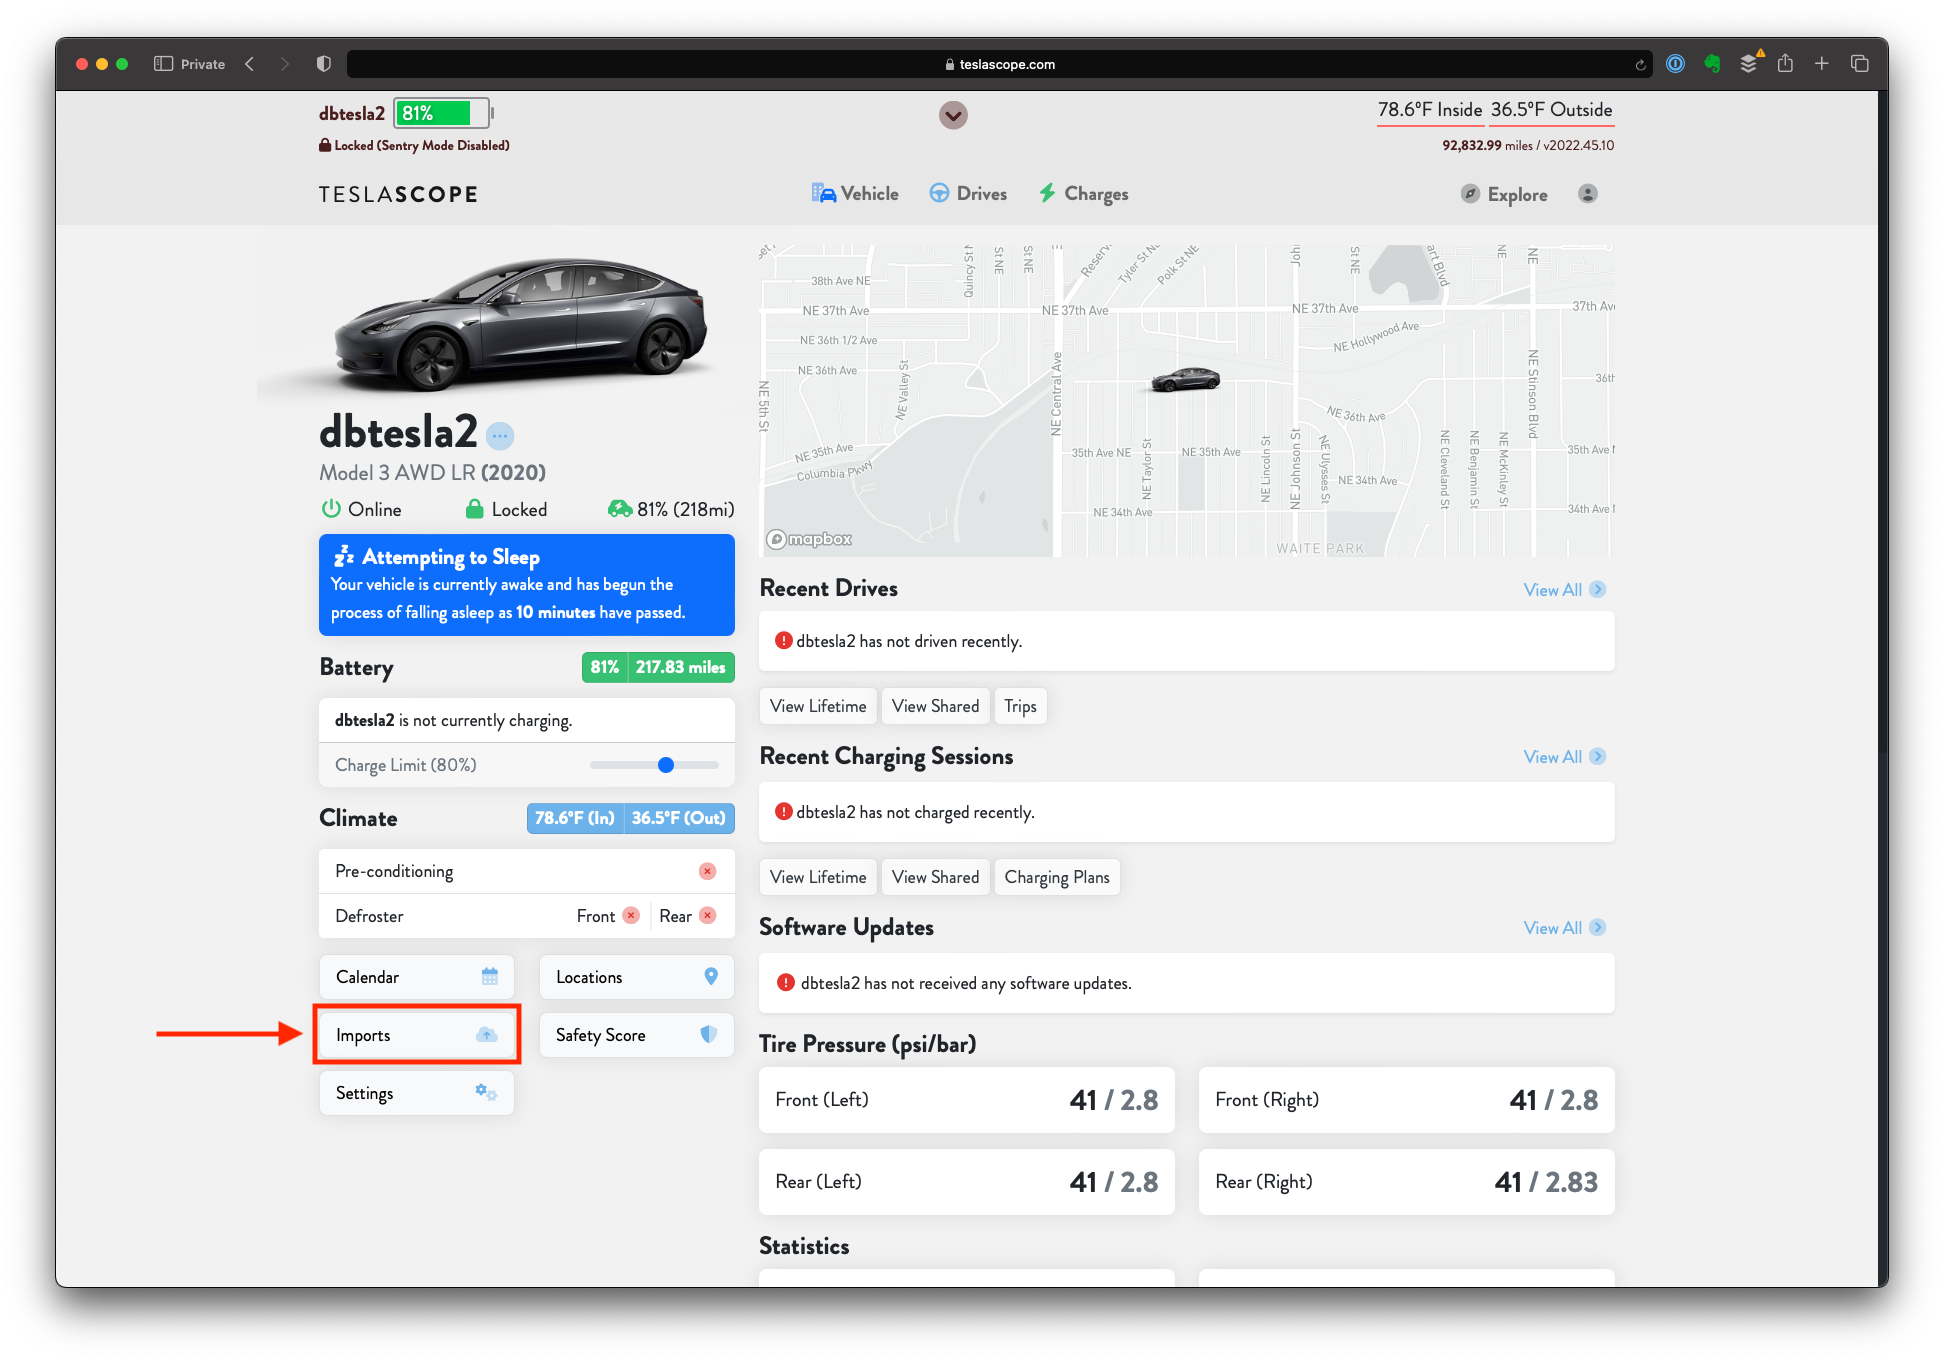
- Scroll down and click the light blue circle with 3 dots circle next to the vehicle’s name
- Scroll down and click the “Imports” button
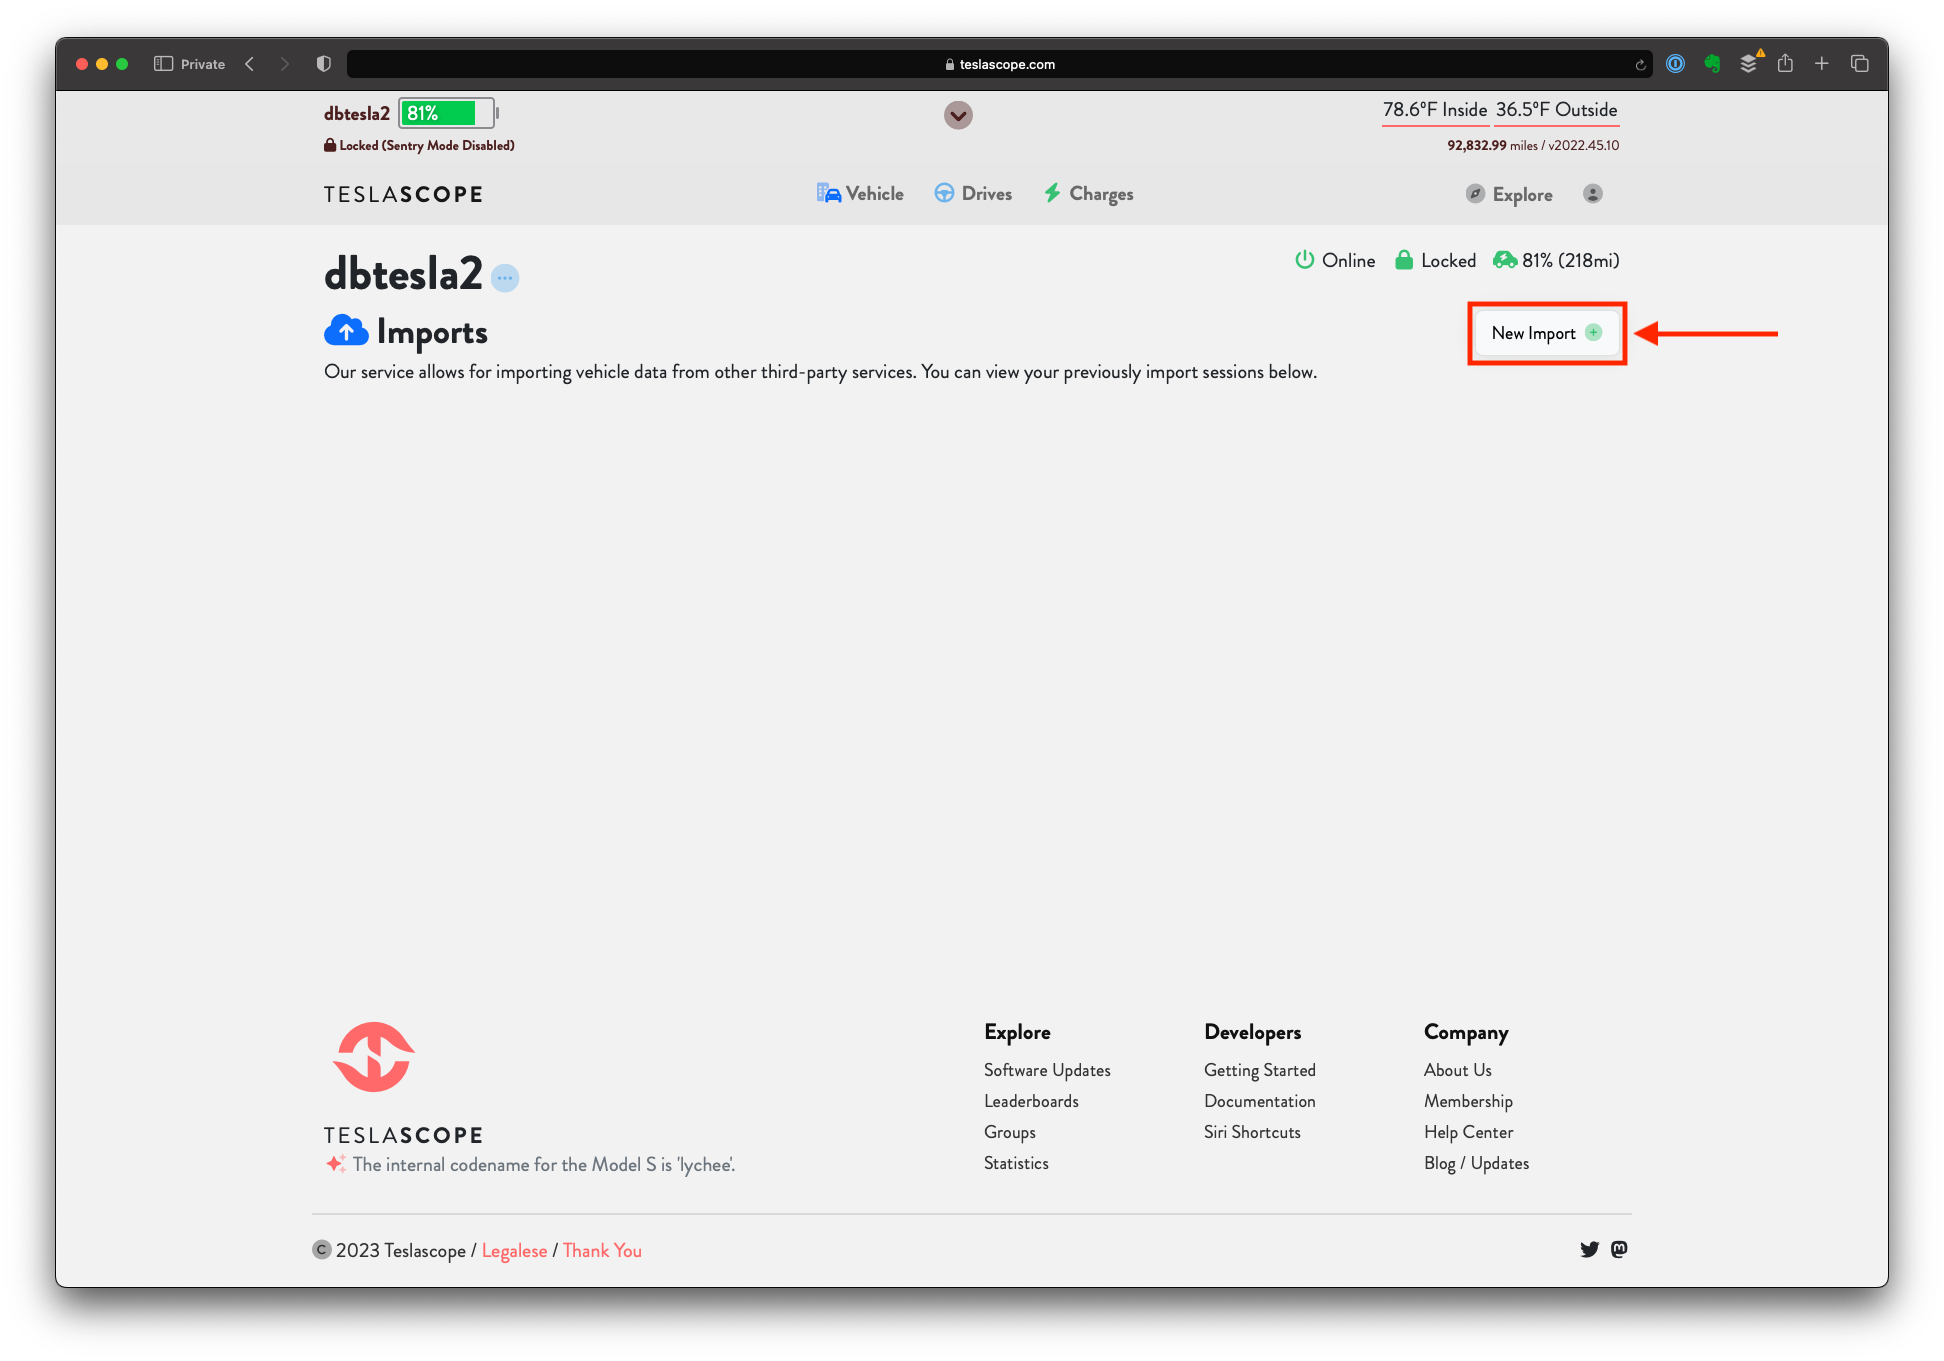
- Click the “New Import” button
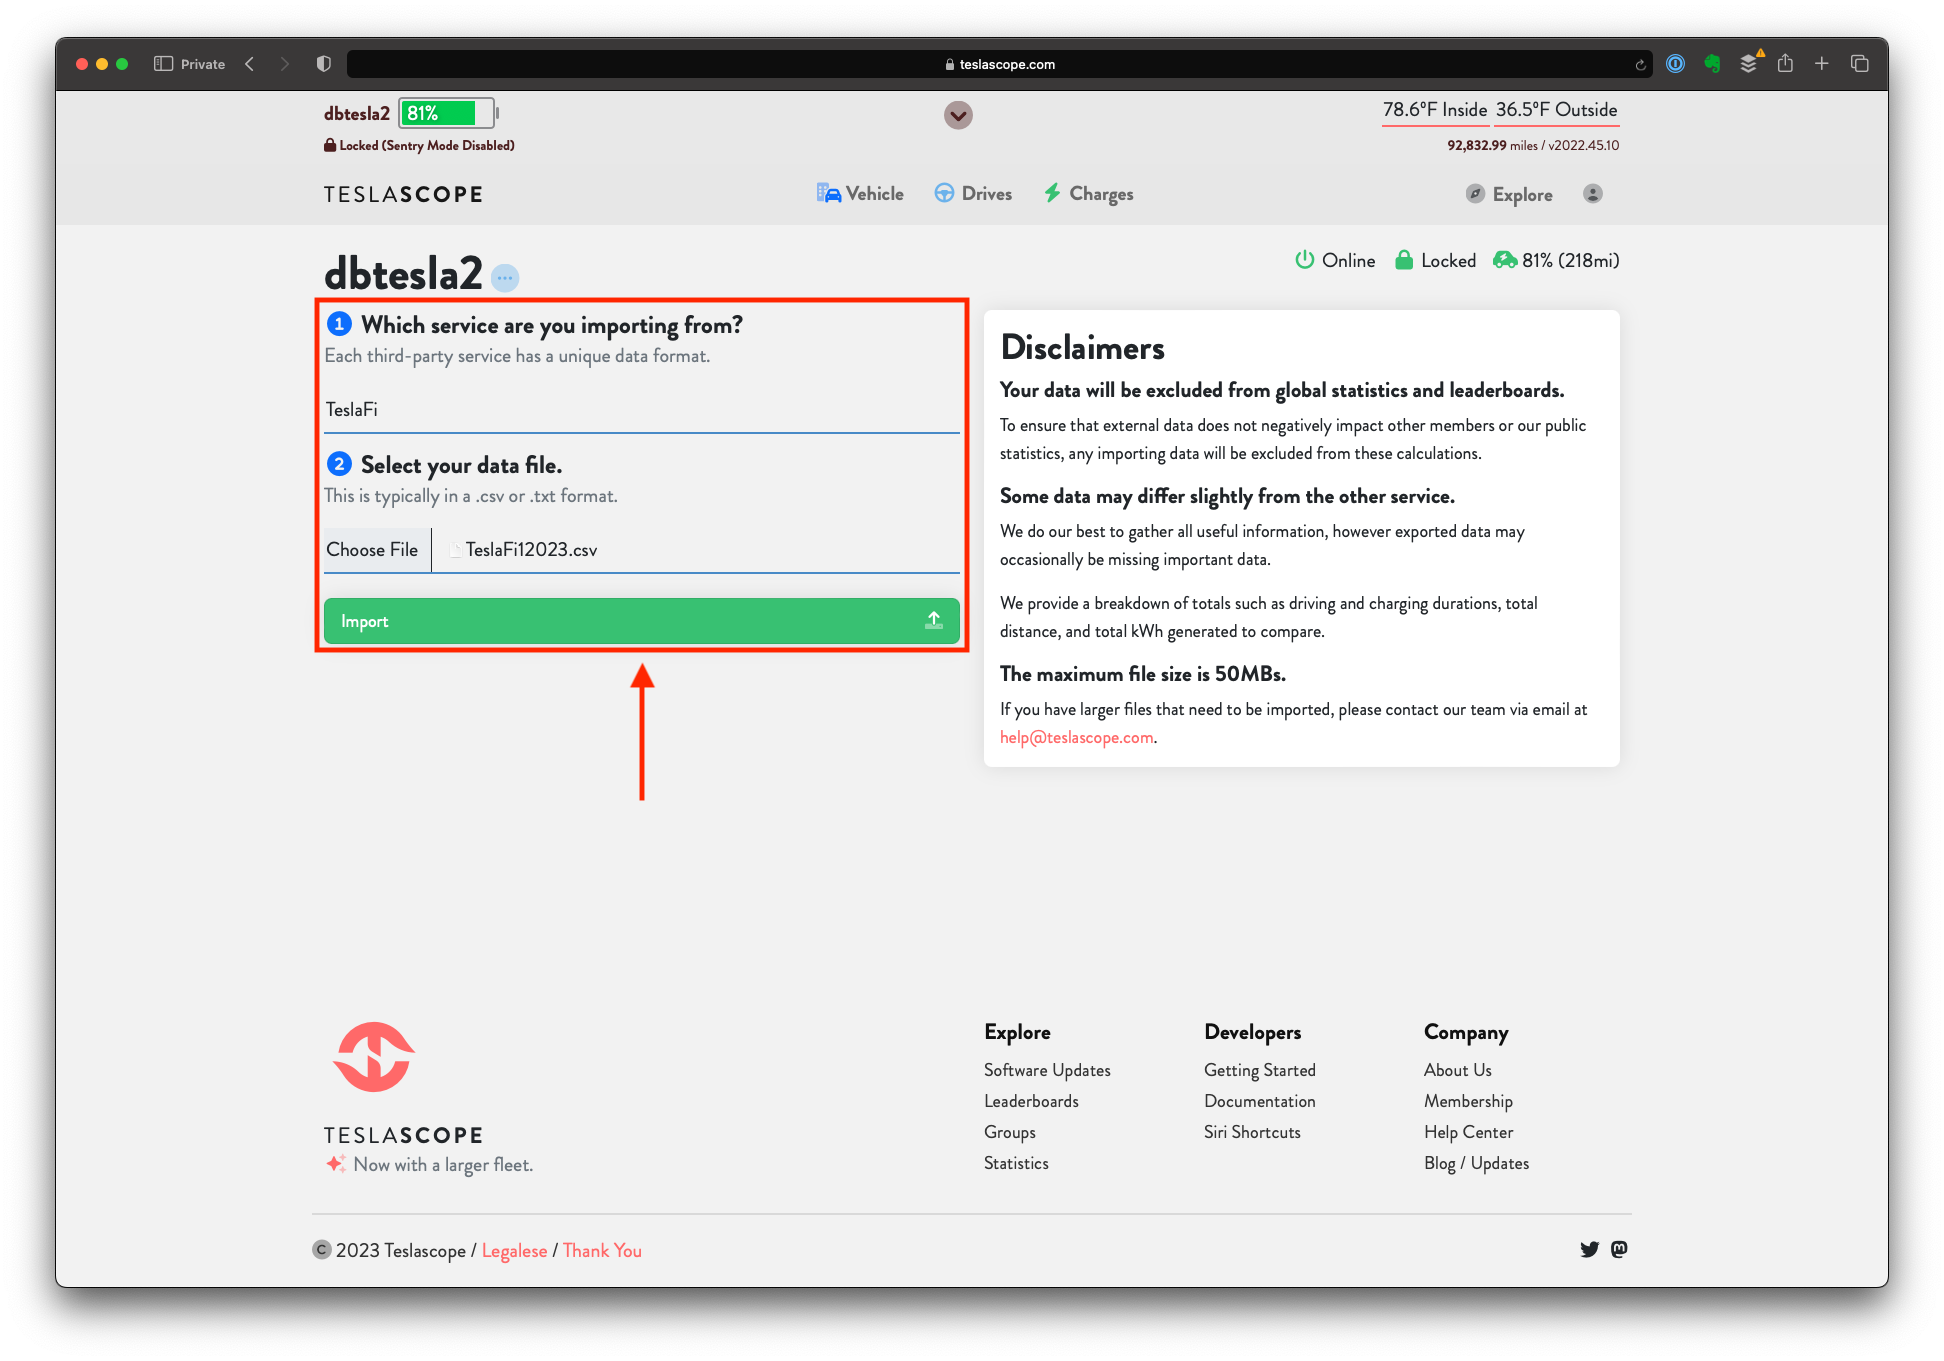
- Click the “Choose File” button and select the TeslaFi export file that we created in the previous export steps
- Click the “Import” button to begin the import process
- If the import succeeds, you will see a page that shows stats regarding your import such as Total Lines, Lines Processed, etc.
- NOTE: You will need to repeat this process for each vehicle that you have TeslaFi export files for.
- Export (from TeslaFi)
- More to come soon!
Closing Thoughts
If you found this post useful or have any further questions / concerns feel free to leave a comment below or connect with me on twitter @dburkland.