*2018-03-18: Updated for version 1.4.1 of my container image which includes bug fixes, Grafana 4.5.2 and NetApp Harvest 1.4
This post is based on the original “How To Setup NetApp Harvest Using Docker” blog post however it has been tweaked to reflect the use of Kubernetes and the NetApp Trident plugin. It is assumed both Kubernetes and NetApp Trident are already deployed so if you have questions on deploying these technologies see here.
Image download and distribution
Create the appropriate directories which will house the docker container build files
# mkdir -pv /root/docker/harvestDownload the custom NetApp Harvest Docker image (dburkland/harvest)
Download the following files to your workstation and upload them to the “/root/docker/harvest/“ directory on the Kubernetes master node
- dburkland_harvest_v1.4.1aa
- dburkland_harvest_v1.4.1ab
- dburkland_harvest_v1.4.1ac
- dburkland_harvest_v1.4.1ad
- dburkland_harvest_v1.4.1ae
- dburkland_harvest_v1.4.1af
- dburkland_harvest_v1.4.1ag
- dburkland_harvest_v1.4.1ah
- dburkland_harvest_v1.4.1ai
- dburkland_harvest_v1.4.1aj
- dburkland_harvest_v1.4.1ak
- dburkland_harvest_v1.4.1al
Uncompress the multi-part zip file
cd /root/docker/harvest
cat dburkland_harvest_v1.4.1a* > dburkland_harvest_v1.4.1.zip
unzip dburkland_harvest_v1.4.1.zip
NOTE: At this point enter NTAPHarvestDocker2016 for the password in order to properly unzip the aforementioned zip file.
Import the Docker image file
docker load < dburkland_harvest_v1.4.1.tar
NOTE: You MUST perform this step on EVERY node in the Kubernetes cluster. It is recommended to deploy a local Docker image repository. For instructions on how to deploy one, see the "Sources" section below.
Verify you can now see the “dburkland/harvest” image in the Docker image inventory
docker images
Deploy NetApp Harvest in the Kubernetes Environment
Login to your kubernetes master node and create the harvest namespace
# kubectl create namespace harvestDefine the persistent volume claims (PVCs) on your kubernetes master node
# cd trident-installer
# vi setup/pvc-dburkland_harvest_carbon.yaml
kind: PersistentVolumeClaim
apiVersion: v1
metadata:
name: var-lib-carbon
namespace: harvest
annotations:
volume.beta.kubernetes.io/storage-class: default-dburkland
trident.netapp.io/exportPolicy: "prod_kubernetes_nodes"
trident.netapp.io/snapshotPolicy: "default-dburkland"
spec:
accessModes:
ReadWriteMany resources: requests: storage: 5Gi
vi setup/pvc-dburkland_harvest_conf.yaml
kind: PersistentVolumeClaim apiVersion: v1 metadata: name: opt-netapp-harvest-conf namespace: harvest annotations: volume.beta.kubernetes.io/storage-class: default-dburkland trident.netapp.io/exportPolicy: “prod_kubernetes_nodes” trident.netapp.io/snapshotPolicy: “default-dburkland” spec: accessModes:
- ReadWriteMany resources: requests: storage: 5Gi
  - Create the PVCs

    ```sh
    # kubectl create -f pvc-dburkland_harvest_carbon.yaml
    # kubectl create -f pvc-dburkland_harvest_conf.yaml
    ```

  - Define the deployment which relies on the aforementioned persistent volume claims

    ```sh
    # vi setup/deployment-dburkland_harvest.yaml
    apiVersion: extensions/v1beta1
    kind: Deployment
    metadata:
      name: harvest
      namespace: harvest
    spec:
      replicas: 1
      template:
        metadata:
          labels:
            app: harvest
        spec:
          volumes:
        - name: volume-var-lib-carbon
          persistentVolumeClaim:
            claimName: var-lib-carbon
        - name: volume-opt-netapp-harvest-conf
          persistentVolumeClaim:
            claimName: opt-netapp-harvest-conf
        - name: volume-tmpfs-run
          emptyDir:
            medium: "Memory"
        - name: volume-tmpfs-run-lock
          emptyDir:
            medium: "Memory"
        - name: volume-tmpfs-tmp
          emptyDir:
            medium: "Memory"
      containers:
        - name: harvest
          image: mn1s21000.dburkland.com:5000/dburkland/harvest:latest
          ports:
            - containerPort: 80
            - containerPort: 8080
          volumeMounts:
            - mountPath: "/opt/netapp-harvest-conf"
              name: volume-opt-netapp-harvest-conf
            - mountPath: "/var/lib/carbon"
              name: volume-var-lib-carbon
            - mountPath: "/run"
              name: volume-tmpfs-run
            - mountPath: "/run/lock"
              name: volume-tmpfs-run-lock
            - mountPath: "/tmp"
              name: volume-tmpfs-tmp
          readinessProbe:
            httpGet:
              path: /
              port: 80
            initialDelaySeconds: 120
            timeoutSeconds: 1
            periodSeconds: 15
          livenessProbe:
            httpGet:
              path: /
              port: 80
            initialDelaySeconds: 120
            timeoutSeconds: 1
            periodSeconds: 15
          securityContext:
            capabilities:
              add:
                - SYS_ADMIN
---
  kind: Service
  metadata:
    name: harvest
    namespace: harvest
    labels:
      app: harvest
  spec:
    type: NodePort
    ports:
      - name: grafana
        port: 80
        nodePort: 30080
      - name: graphite
        port: 8080
        nodePort: 30081
    selector:
      app: harvest
Create the deployment
# kubectl create -f setup/deployment-dburkland_harvest.yaml
# kubectl get deployment --all-namespaces --watch=true
<CTRL+C>
# kubectl get pod --all-namespaces --watch=true
NetApp Controller / OCUM Appliance Preparation Steps
- Create the Harvest role on each NetApp system you wish to monitor
7mode
useradmin role add role-harvest -c "Role for performance monitoring by NetApp Harvest" -a login-http-admin,api-system-get-version,api-system-get-info,api-perf-object-*,api-ems- autosupport-log
useradmin group add group-harvest -c "Group for performance monitoring by NetApp Harvest" -r role-harvest
cDOT
security login role create -role role-harvest -access readonly -cmddirname "version"
security login role create -role role-harvest -access readonly -cmddirname "cluster identity show"
security login role create -role role-harvest -access readonly -cmddirname "cluster show"
security login role create -role role-harvest -access readonly -cmddirname "system node show"
security login role create -role role-harvest -access readonly -cmddirname "statistics"
security login role create -role role-harvest -access readonly -cmddirname "lun show"
security login role create -role role-harvest -access readonly -cmddirname "network interface show"
security login role create -role role-harvest -access readonly -cmddirname "network interface show"
security login role create -role role-harvest -access readonly -cmddirname "qos workload show"
- Create the Harvest user on each NetApp system you wish to monitor
7mode
useradmin user add netapp-harvest -c "User account for performance monitoring by NetApp Harvest" -n "NetApp Harvest" -g group-harvestcDOT 8.2 or earlier
security login create -username harvest -application ontapi -role role-harvest -authmethod passwordcDOT 8.3 or greater
security login create -user-or-group-name harvest -application ontapi -role role-harvest -authmethod passwordOCUM 6.x/7.x (Required for capacity data)
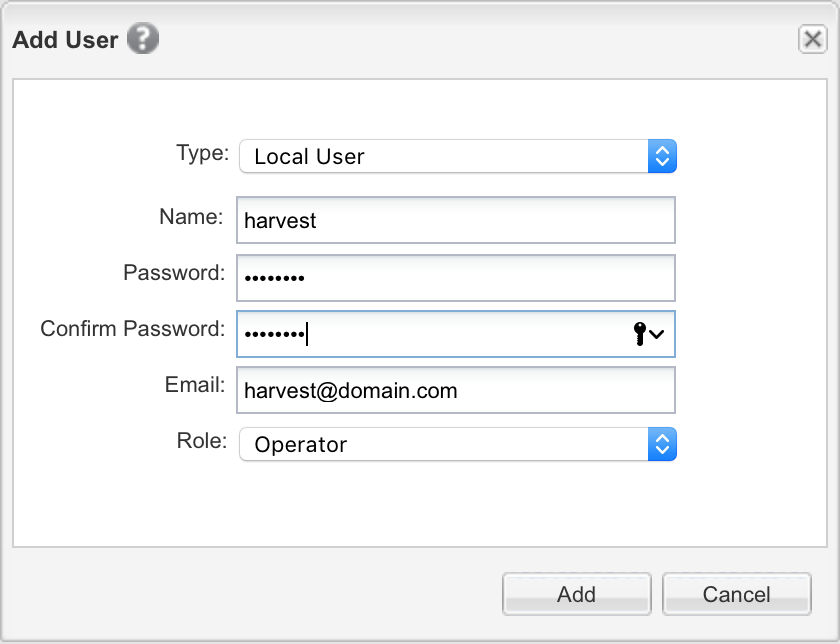
- Login to the OCUM web interface as the “admin” user
- Navigate to “Administration” -> “Manage Users”
- Click “Add” to bring up the “Add User” window and create the “harvest” user as seen in the screenshot
For certificate authentication see the “NetApp Harvest Installation and Administration Guide” located here for more information
- Create the Harvest role on each NetApp system you wish to monitor
Final NetApp Harvest Container Configuration & Validation Steps
Login to the container and add all applicable NetApp 7mode or cDOT systems to the bottom of “/opt/netapp-harvest-conf/netapp-harvest.conf” and then restart the Harvest service to apply the changes
# kubectl get pod --all-namespaces (Grab the harvest pod name)
# kubectl exec -n harvest -ti harvest-1257702773-j1qzg -- /bin/bash
# vi /opt/netapp-harvest-conf/netapp-harvest.conf
[mn1d41000]
host_type = FILER
hostname = mn1d41000
site = mn1
[mn1s41007]
host_type               = OCUM
hostname                = mn1s41007.dburkland.com
site = mn1
data_update_freq        = 900
# /etc/init.d/netapp-harvest restart
# exit
You should now be able to login to Grafana by pointing your web browser at http:// Kubernetes_Master_Node_IP:30080
- Default Username: admin
- Default Password: admin
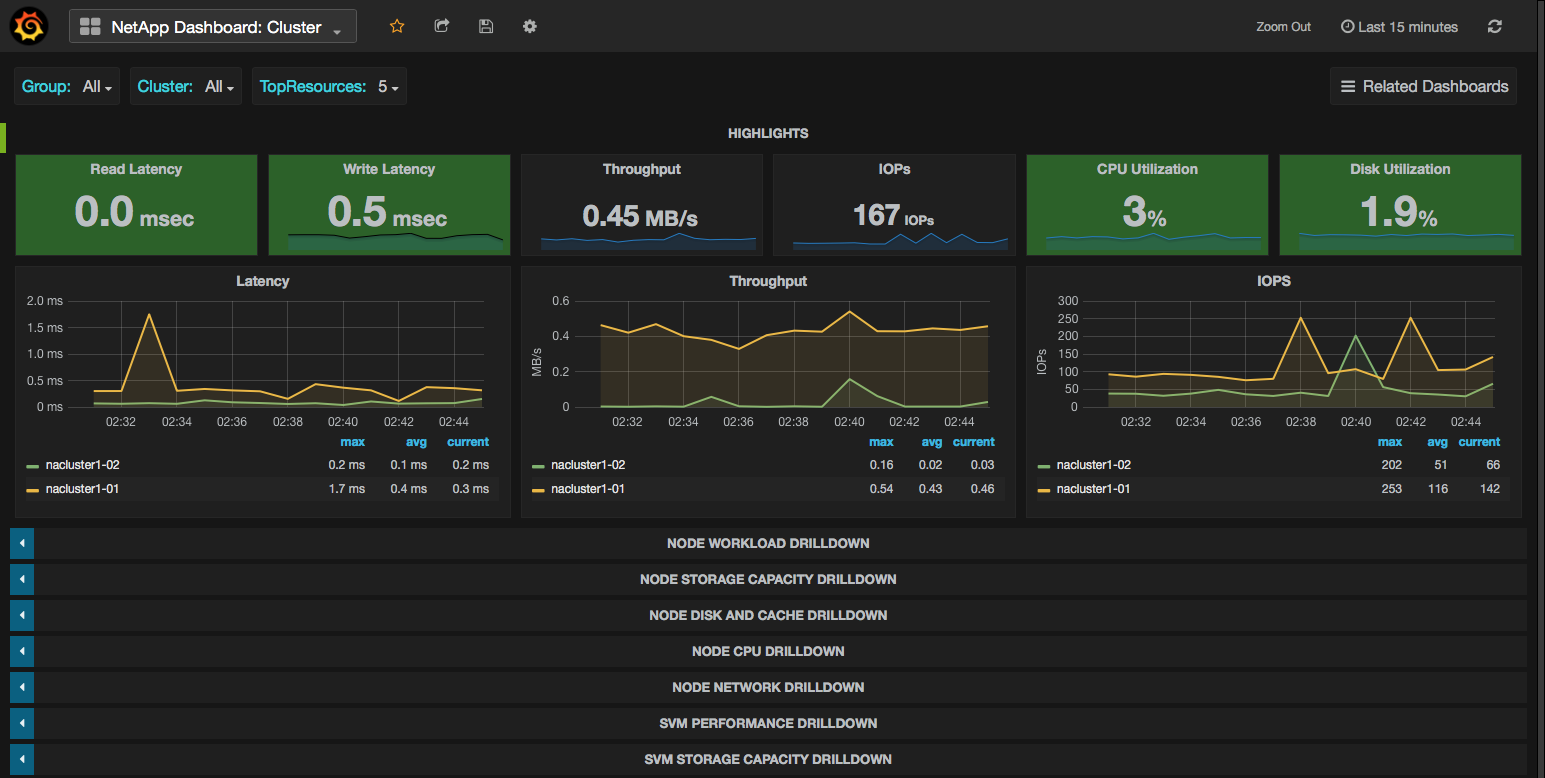
Within a half hour the dashboards should be correctly displaying realtime statistics as seen in the following example screenshot:
Sources
[GitHub] Tech ONTAP Live: NetApp Performance Tools Update Slide Deck
[DBurkland.com] How To Setup Graphite To Visualize OnCommand Performance Manager Data
[DBurkland.com] How To Setup Grafana with Graphite And Create Basic Dashboards